- Published on
'Hacking' the Wifi captive portal (Part 1)
- Authors

- Name
- Muhammad Fareez Iqmal
- @iqfareez
When building IoT projects, the quickest way to connect to the internet is by using our mobile hotspot. But, what if we want the project to be deployed somewhere else? For sure, it is not very convenient to put our phones together with the project. In my case, when we want to deploy the Parcel Safety Box project, the only public Wi-Fi available is the campus Wi-Fi.
Note that
This article is not about actually hacking the portal, i.e., bypassing the security etc. You'll still need to have your username & password or any other valid credentials.
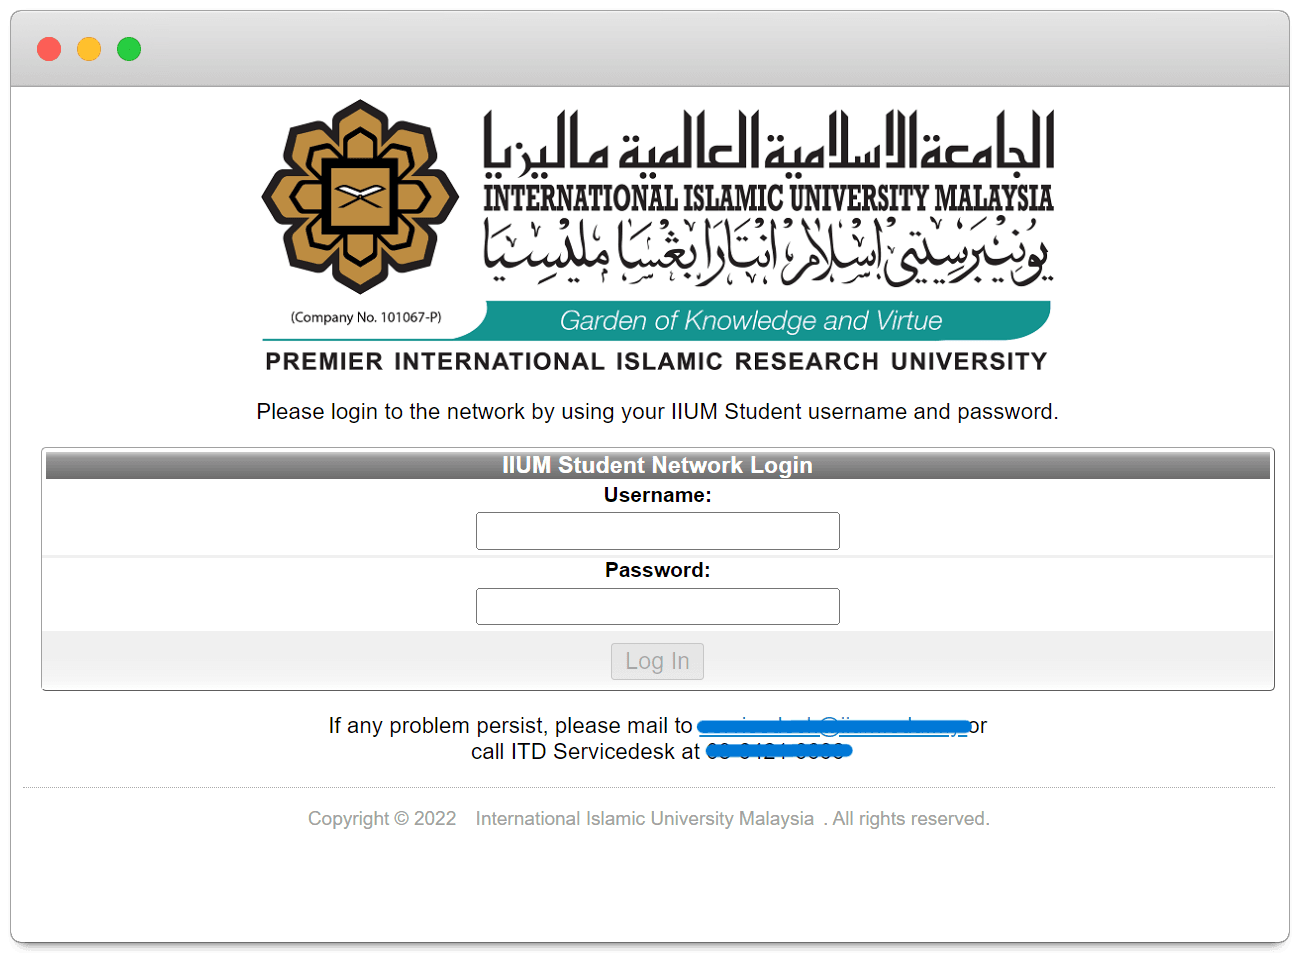
It is not as straightforward as plugging the SSID and password of the campus Wi-Fi network. They usually have another layer of authentication called a captive portal. According to techtarget.com, captive portal is a web page that the user of a public-access network is obliged to view and interact with before access is granted. The example below is the captive portal of my campus Wi-Fi: IIUM-Student.
While there is no hassle to log in when you have a laptop or phone, microcontrollers, on the other hand, are a different story. It doesn't have a GUI environment, let alone a web browser to access the portal. After some attempts with a different approach, I found a way to authenticate ourselves to the wifi without a web browser.
We are going to use the ESP32 microcontroller throughout this article
Spoofing the MAC address
The first approach I tried was making my ESP32 act as my laptop. Found this Reddit answers' and I think it is theoretically possible.
A MAC address, or Media Access Control address is a unique 12-digit hexadecimal number used to identify a physical device within a network. For example, the MAC address will look something like this: 31-15-EA-C8-56-FA. A laptop, a phone, and someone else's phone should have a different MAC address.
The Wi-Fi access point (AP) will interact with devices using this MAC address (in addition to IP addresses etc.). So, if I try to set the ESP32's MAC address to be the same as my logged-in device, the ESP32 can access the network, right? But, for some reason, that's not the case. Nothing works. I'm not sure if I'm missing something.
Making an HTTP request to the captive portal server
Moving on to the second approach (spoiler alert: It works!), is to capture what the captive portal does behind the scenes and try to replicate those in the microcontroller.
note
I'm going to record my methodology in the steps below. If you're a bit impatient 🤭, you can skip to the solution here.
Connect to Wi-Fi
Connect to your campus/hotel/community Wi-Fi using a laptop or PC. The captive portal will open automatically. If it doesn't, the system usually prompts you to sign in first to use the network. If the system didn't give you a prompt, launch your browser and open http://neverssl.com. Then, the Wi-Fi's captive portal should appear.
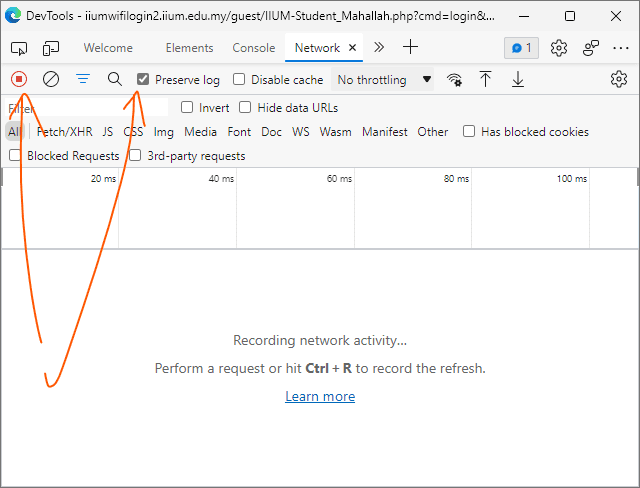
Prepare browser
Open the Developer Tools (or press F12) and go to the Network tab. Click the Record network log if it doesn't record yet. Then, check the option Preserve log, so the network log doesn't disappear even when the traffic redirects.
Here I use Microsoft Edge. Any other Chromium-based browser should work very similarly.
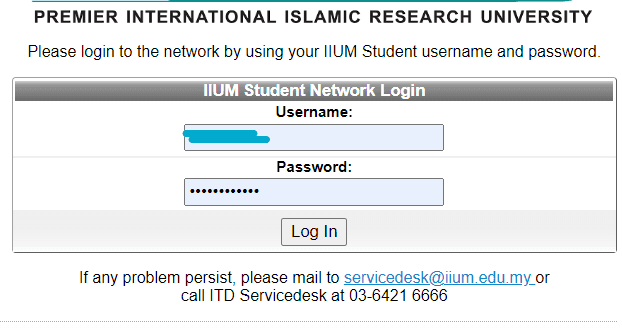
Login
Next, enter your username and password. Then, click the login button.
Note that some Wi-Fi requires you to register as a guest, and usually, the session will be timed
After that, on some Wi-Fi, you'll be redirected to some website, indicating that your login was successful, and you can now access the Internet.
Playing detective
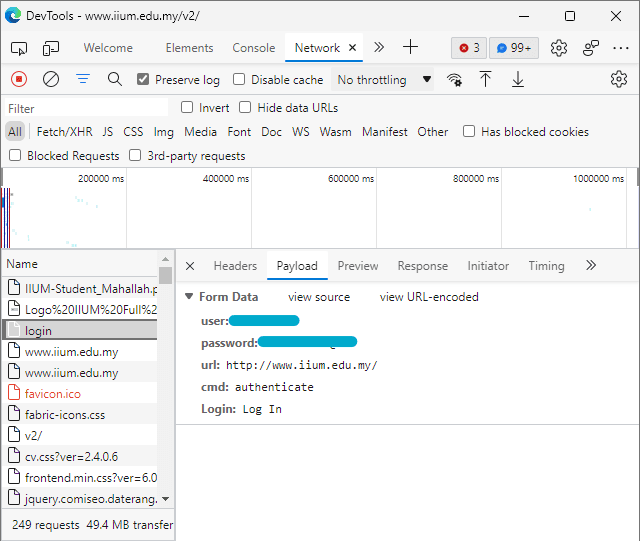
Now, check the Network tab we opened earlier. As you've noticed, there is a lot of network traffic being recorded. We need to inspect which request authenticates us when we click the login button earlier.
These requests will be likely to occur earlier in the timeline, so scroll up. In the Name column, look for something called login or something similar.
tip
Look for a POST method. But it is not always the case (I think)
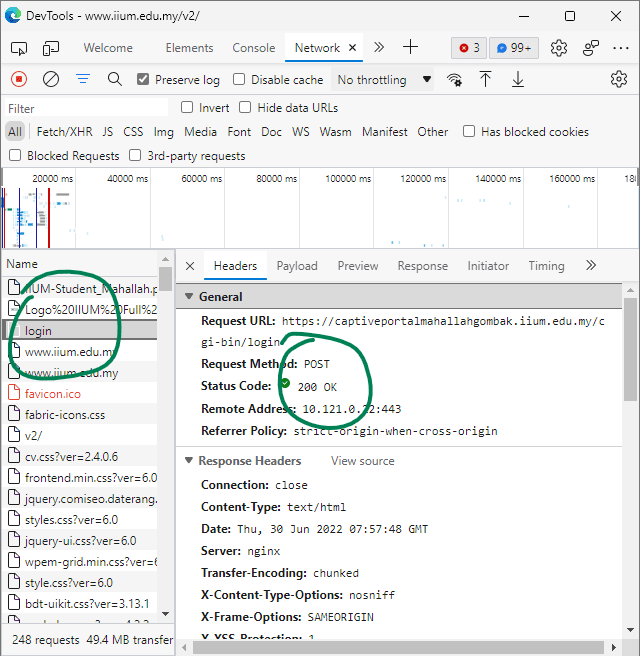
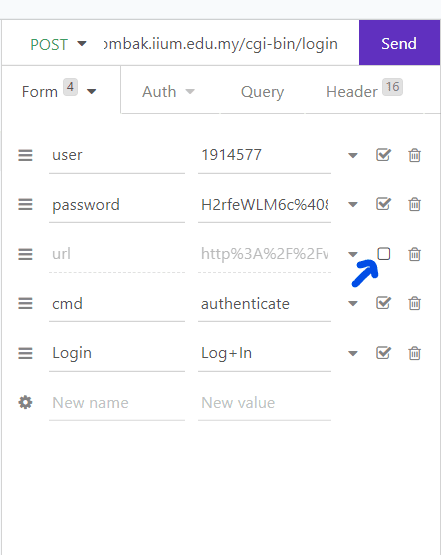
Now, we found the best request candidate. We can further confirm it by looking at what this request sent to the server. If it contains your username and password you've entered earlier, then good news, your search is over (hopefully). If it doesn't, look for another request.
Switch to the Payload tab.
Don't close this tab yet, we're going to need it in the next step.
Testing and verifying
I'll use Insomnia for this purpose. You can use other API testing software that works offline. Starts by creating a new Request Collection, give it any suitable name.
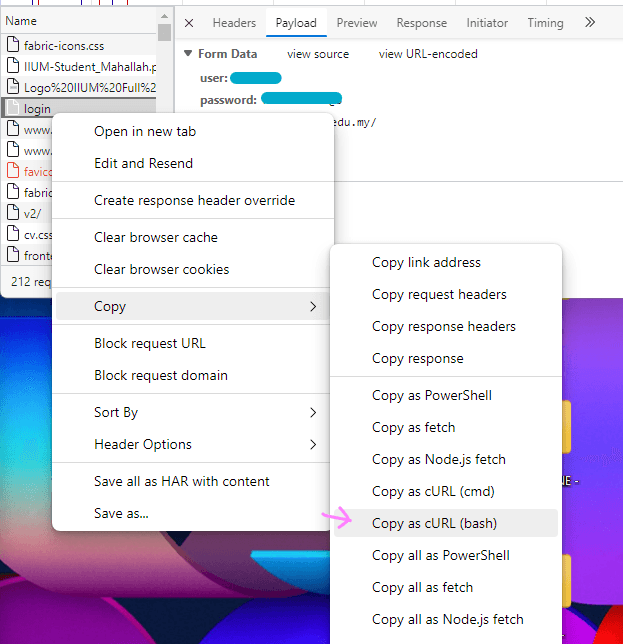
Go back to the Developer Tools window earlier. Right-click the best candidate we've chosen earlier, click on Copy and choose Copy as cURL (Bash).
In Insomnia, create a New Request, then paste in the empty text box to import the cURL command we've copied earlier. The request body should be automatically parsed. For other software, look for option import from cURL or similar

important
Some characters are automatically url-encoded after pasting. Be sure to change it to normal text. Example: Your password is s@ample, but in insomnia, it becomes s%40mple. Be sure to edit it to become the original text.
To test it, logout from the network, perhaps by clicking the logout button (if available), or by disconnecting and connecting back to the wifi (not sure if this can work). You might need to change the site's permission to allow Pop-ups
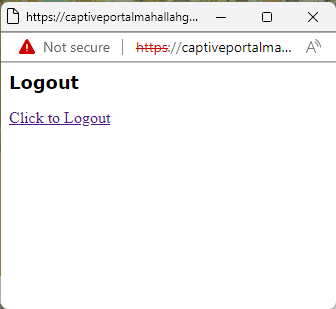
For IIUM-Student wifi, go to this link from the Insomnia or the browser: https://captiveportalgombak1.iium.edu.my/cgi-bin/login?cmd=logout
Now, back in Insomnia, click the Send button. After a few seconds, the server will send a response. It is 200 or OK for successful requests. You can now check if the Internet can be accessed.
Tuning
Remember that our main purpose is to implement this login method to the microcontrollers. So, we need to cut down the unnecessary data to reduce the memory footprint for the mcu's cpu.
Start by using the trial and error method to turn one parameter off and test the POST request. If the request is successful, that indicates that the parameter is safe to be turned off. Then repeat with other parameters.
INFO
"Turning off" here means the parameter is not sent to the server.
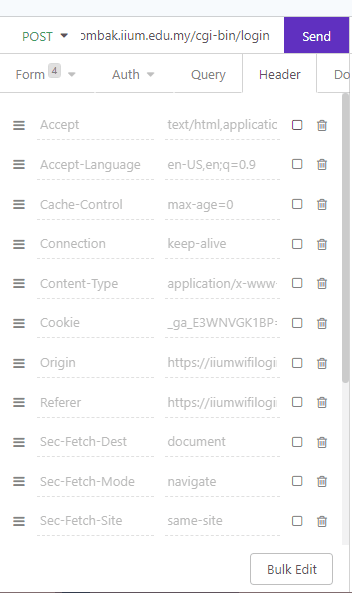
I discovered that the url parameter can be safely turned off. All the headers also are not necessary.
By doing so, you have simplified the request payload needed to complete the request.
Now to the ESP32
note
You can also use ESP8266 etc. Modification with the code may be required.
I hope you're already familiar with program the esp. If this is your first time, please do the necessary setup first.
Open your favourite IDE of your choice. I'm going to use Arduino IDE for this. Create a new .ino file.
Begin by including this include directive at the top of the file:
#include <WiFi.h>
#include <Wire.h>
#include <HTTPClient.h>
After that, define your AP's SSID and password and your credentials to log in to the wifi (username & password)
#define AP_SSID "IIUM-Student"
#define AP_PASSWORD "" // leaves empty if open wifi

const String username = "<username>";
const String password = "<your pass>";
Then, in the setup() function, add the following code:
Serial.begin(115200);

// Connecting to the WIFI AP
WiFi.begin(ssid, password);
lcd.setCursor(0, 0);
lcd.print("Wifi setup...");

while (WiFi.status() != WL_CONNECTED) {
  delay(500);
  Serial.println("Connecting to WiFi..");
}

Serial.println("Connected to the WiFi network");

// Login to Captive Portal
HTTPClient login;
login.begin("http://captiveportalmahallahgombak.iium.edu.my/cgi-bin/login");
String body = "user=" + String(username) + "&password=" + String(password) + "&cmd=authenticate&Login=Log%2BIn";
int res = login.POST(body);

Serial.println(res); // print the http status code

if (res == 200) {
  Serial.println("Authentication IIUM successful");
}
login.end(); // free resources
The code above will first connect to Wi-Fi. After a successful connection, it will make a POST request to the captive portal with your username & password to authenticate itself.
To verify if the ESP32 is connected to the internet, you can make a request to any API, and see if it returns something. You could use this https://iqfareez.com/api/hello simple API for testing.
Put this code in the loop() function:
HTTPClient http;
http.begin("https://iqfareez.com/api/hello");
int res = http.GET();

Serial.println(res); // status code
Serial.println(http.getString()); // api response

delay(2000);
Full code here (GitHub)
Now, it's time to upload the sketch to your ESP32. Make sure to select the correct COM port etc. and hit that upload button.
tip
For convenience, use the built-in LED at pin 2 to indicate the connection status of the ESP32.
Open the Serial Monitor to see the result (be sure to select the correct baud rate).
Result
note
If you're already authenticated, but you still sending the authentication request, you might get a different status code (like 302)
🎉 Tadaaaa. The ESP32 now can talk to the Internet, so you could do anything you want like IoT stuff, sending messages via Telegram bot, and many more.
Just in case you want to log out, you can use this code.
In the Part 2 of this article, we will authenticate wifi quickly using laptop or smartphone. Thank you.