- Published on
- Published on
- (Last revised
'Hacking' the Wifi captive portal (Part 2)
- Authors

- Name
- Muhammad Fareez Iqmal
- @iqfareez
In this article, I'm going to share how you can log in to the captive portal with just one click. No web browser is needed, so we can save our time without typing down the username and password every time we need to use the internet.
If you have no idea about what a captive portal is, etc., do read the first part of this article.

Basic principles
We understand that by making a POST request with the correct credentials, we will authenticate ourselves to Wi-Fi. So, the idea is to make a shortcut that can make the request.
The platform I'm going to cover is for Windows and Android. But no worries, as this method can be adopted on other platforms.
Microsoft Windows
We are going to use a Powershell script since it has a method Invoke-Request to make the HTTP requests.
Preparing a Powershell script using Powershell ISE
First, open Windows Powershell ISE.
A new empty file will appear (if not, go to File > New).
Open Insomnia, right-click on your request, and click on Generate code.
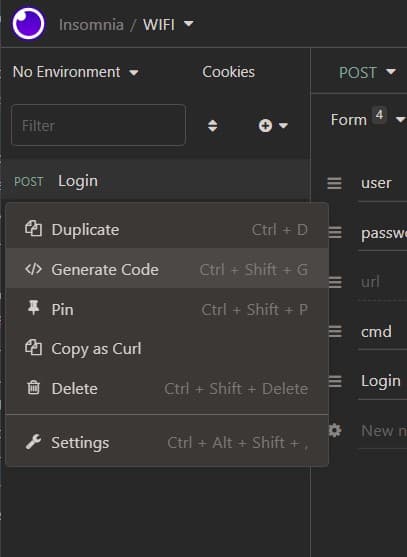
From the language dropdown, choose Powershell and select Invoke-WebRequest
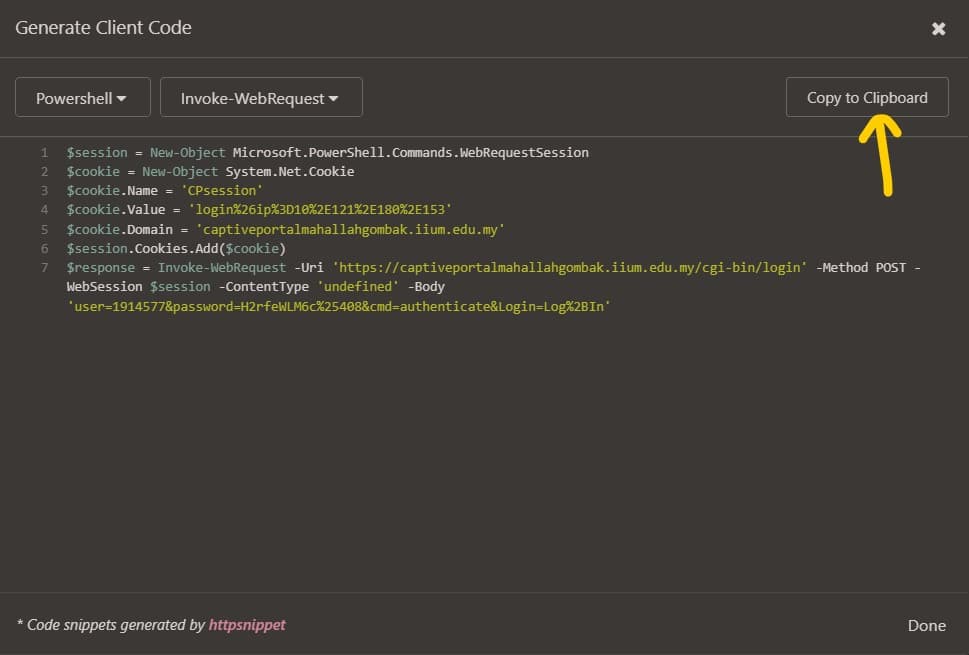
Here is an example of mine:
$session = New-Object Microsoft.PowerShell.Commands.WebRequestSession
$cookie = New-Object System.Net.Cookie
$cookie.Name = 'CPsession'
$cookie.Value = 'login%26ip%3D10%2E121%2E180%2E153'
$cookie.Domain = 'captiveportalmahallahgombak.iium.edu.my'
$session.Cookies.Add($cookie)
$response = Invoke-WebRequest -Uri 'https://captiveportalmahallahgombak.iium.edu.my/cgi-bin/login' -Method POST -WebSession $session -ContentType 'undefined' -Body 'user=191XXX&password=MYPASSWORD&cmd=authenticate&Login=Log%2BIn'
important
Some characters are automatically URL-encoded. Be sure to change it to normal encoding. Example: Your password is s@ample, but in insomnia, it becomes s%40mple. Be sure to edit it to become the original text.
Test the script by clicking on the Run script button on the ribbon bar. The output will be shown on the console below it.
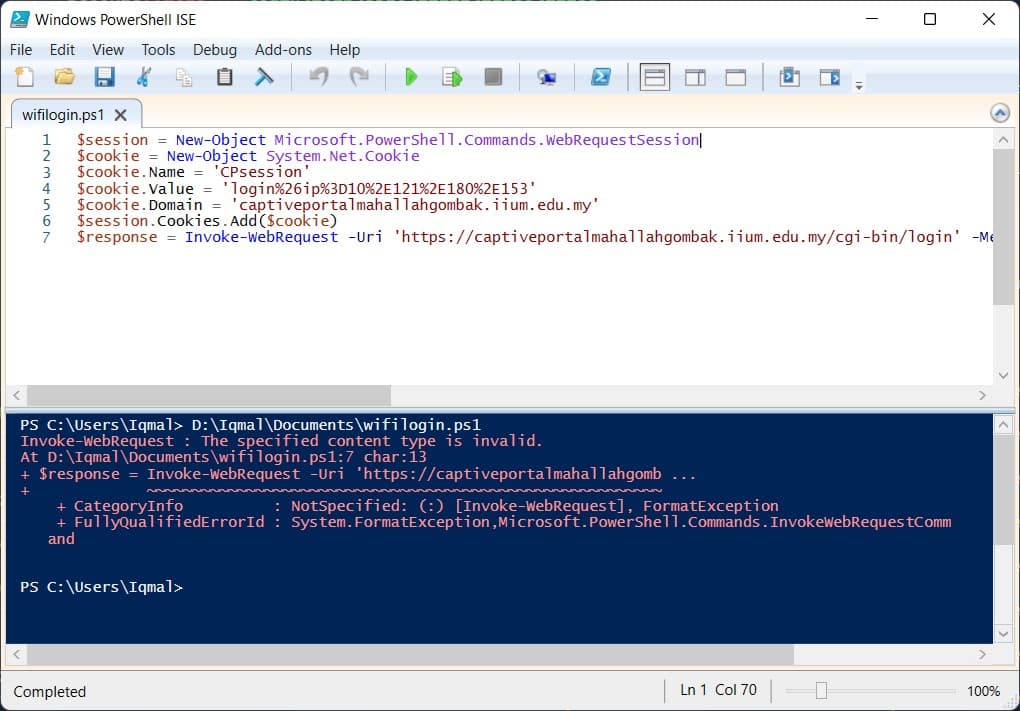
As you might notice, our first attempt didn't go well. From the error message, it doesn't like the -ContentType 'undefined' being undefined. So, remove that. Then, re-run the script again.
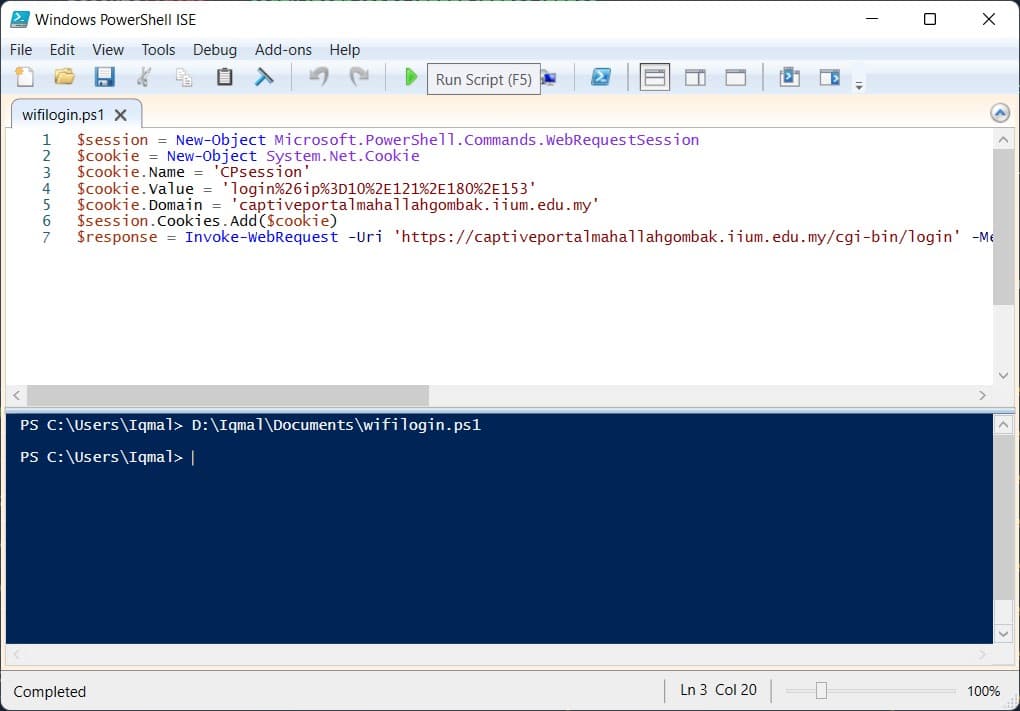
The console shows no error anymore, which is good. But it's not showing any message to indicate it is successful or negative.
I figured it by leaving the Invoke-WebRequest command alone, the script works. Remove all the code before the Invoke-WebRequest as shown below. Also, delete the -WebSession $session in the Invoke-WebRequest line.
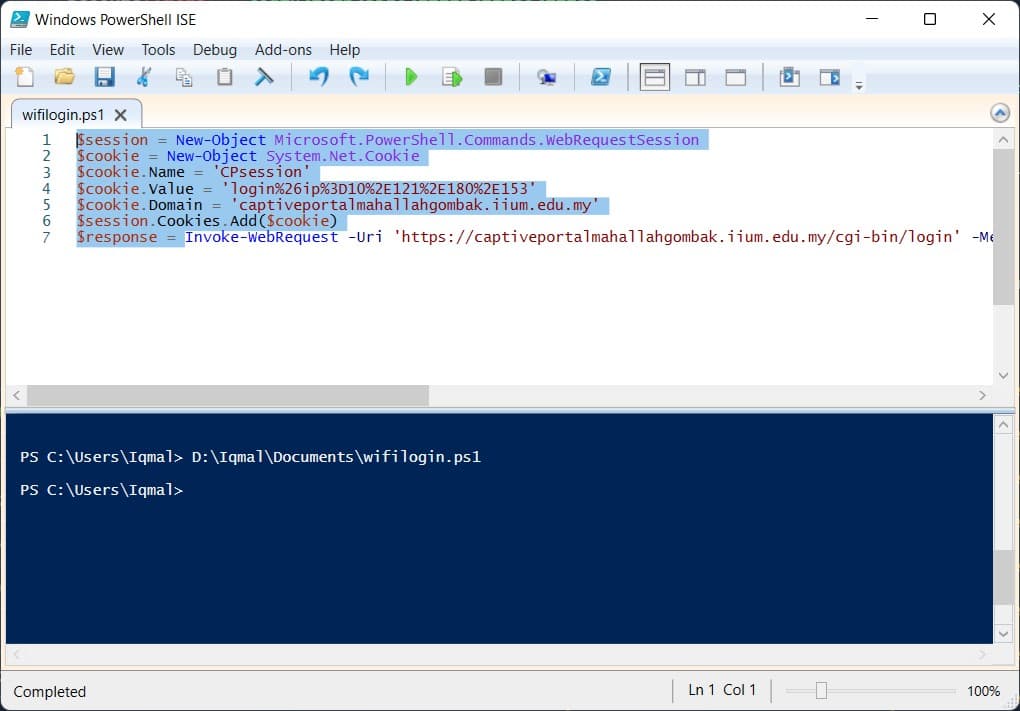
The script above ended up looking like this pattern:
Invoke-WebRequest -Uri '<REQUESTURL>' -Method <METHOD> -Body '<BODY>'
Where,
- REQUESTURL: The server URL.
- BODY: Request body. It contains your username, password, etc.
- METHOD: POST, GET, etc.
Re-run the script.
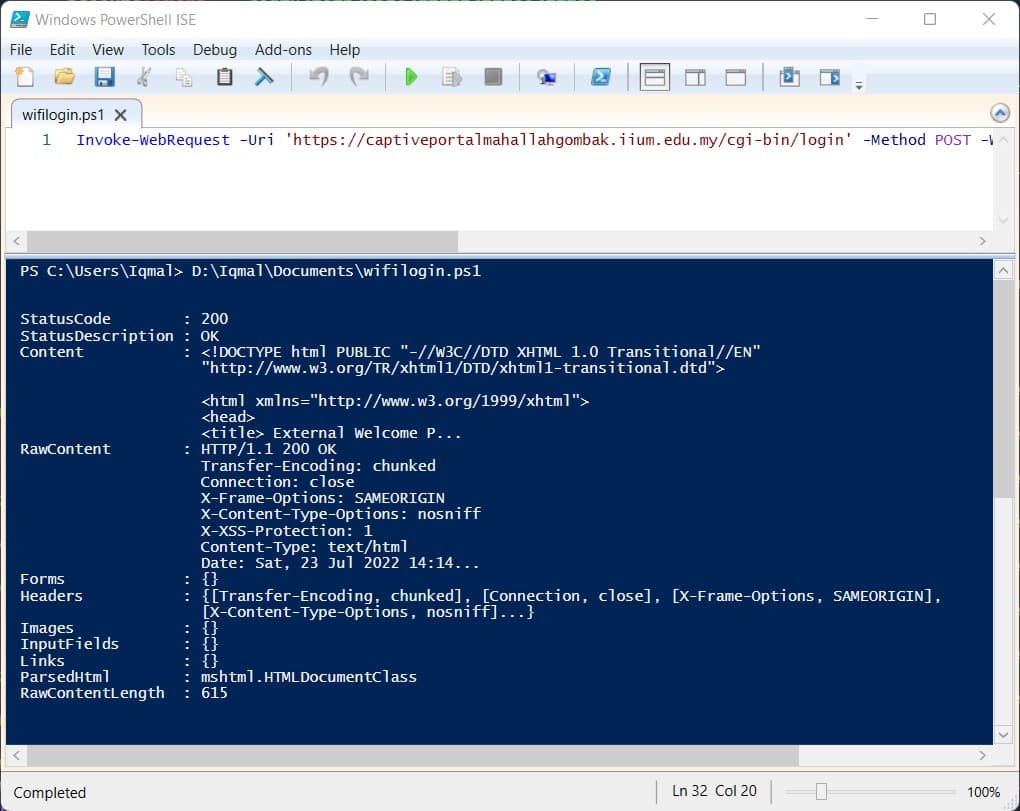
Successful request! As shown from the response above, it shows a status code of 200 (which is good). Now, test the internet connection using the browser.
Save the file, and take note of the folder and filename you save into. I save it in the Documents folder as wifilogin.ps1.
Create Powershell .ps1 shortcut
Next, we need to create a shortcut to run the Powershell script directly. Start by copying the full path to your .ps1 script we saved earlier.
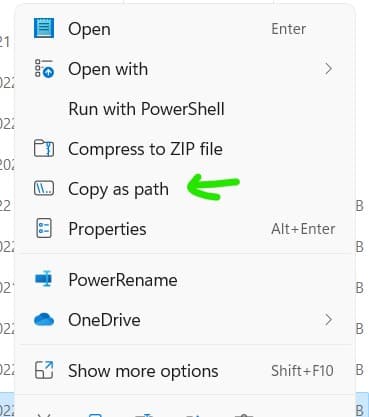
Go to the Desktop to create a new shortcut. Right-click, and select New > Shortcut. A new Create Shortcut window will appear. Enter the following:
powershell.exe -noexit -ExecutionPolicy Bypass -File <SCRIPT_PATH>
Where SCRIPT_PATH is the path you've copied earlier.
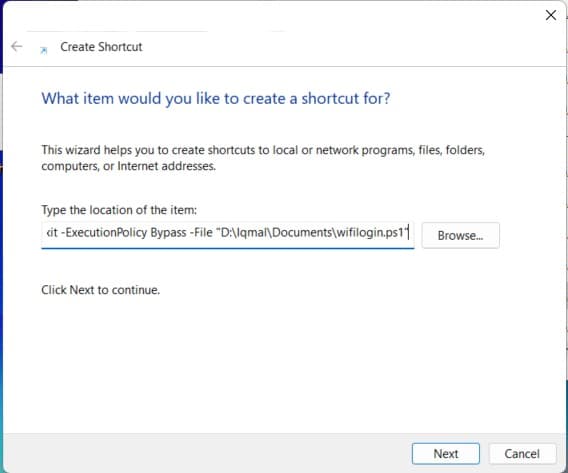
Click Next, feel free to name the shortcut whatever you want. Then, click Finish. A new shortcut will appear.
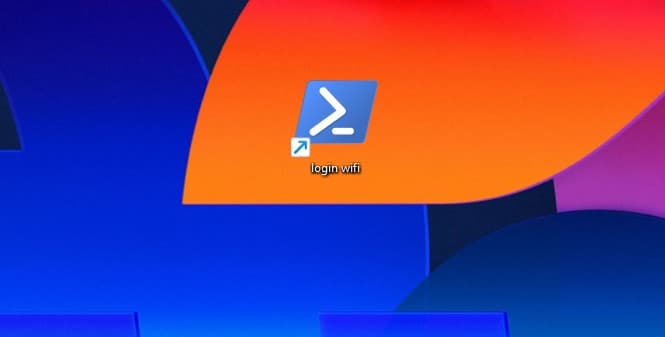
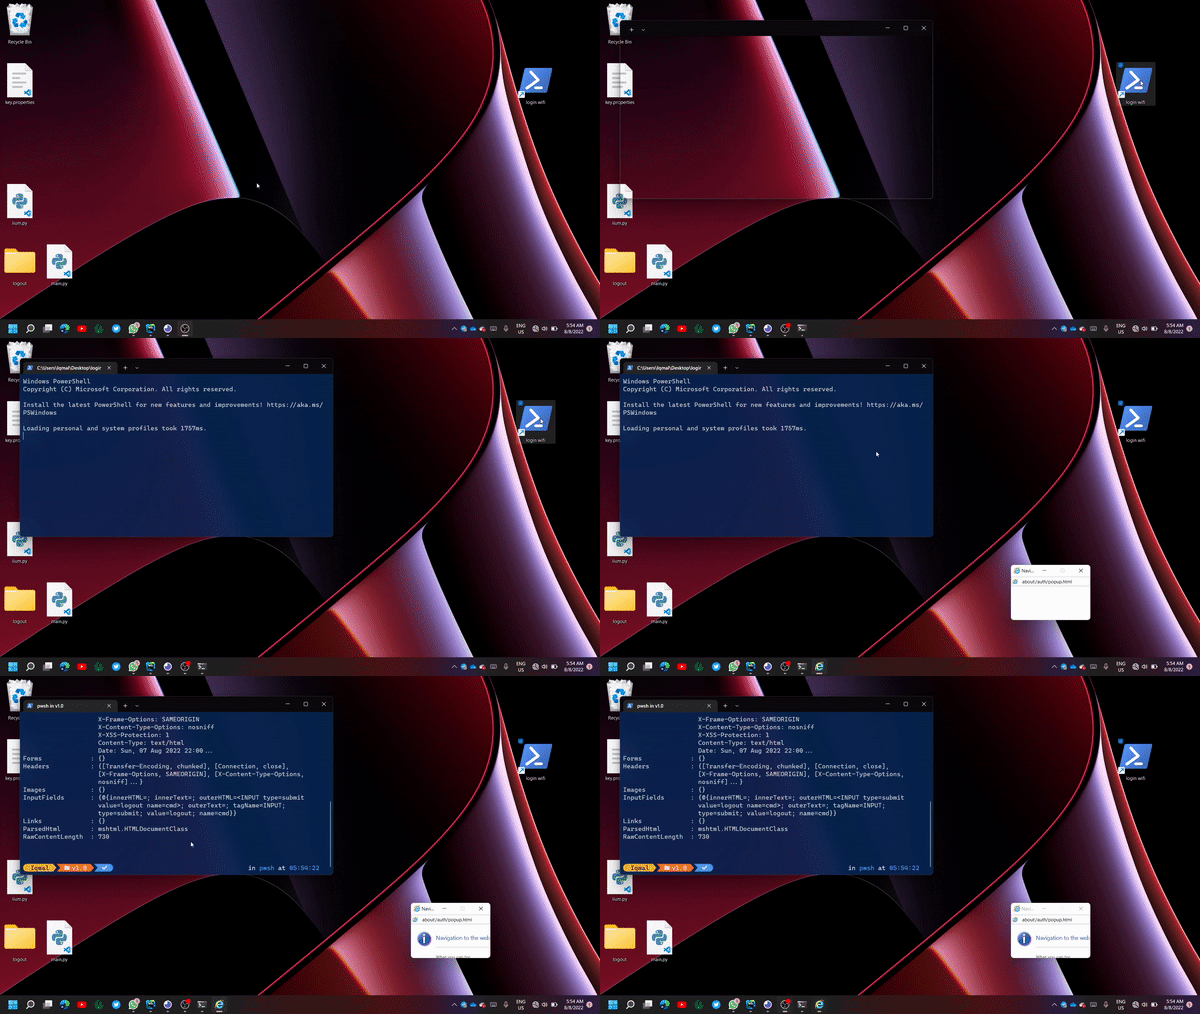
Run the shortcut
Next time, you can log in to Wi-Fi quickly by just clicking the shortcut.
Android
Download HTTP Request Shortcut app from Google Play Store.
tip
The app also offers a desktop (web-based) editing feature. It allows you to modify the data in the browser and sync it to your phone. Detail: https://http-shortcuts.rmy.ch/editor/#/
From Insomnia, right-click on the request entry and click Copy as Curl.
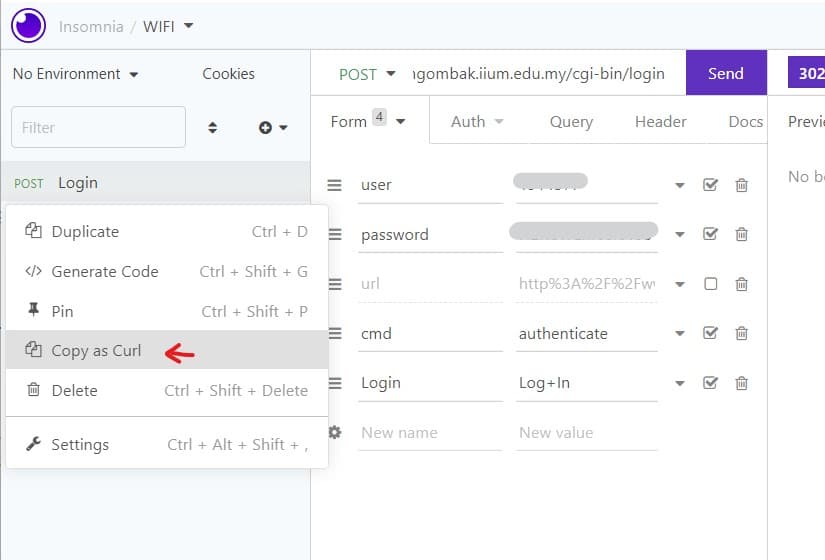
Transfer the copied item to your phone (using Telegram, etc.). Then, open the app and click on the Add shortcut button.
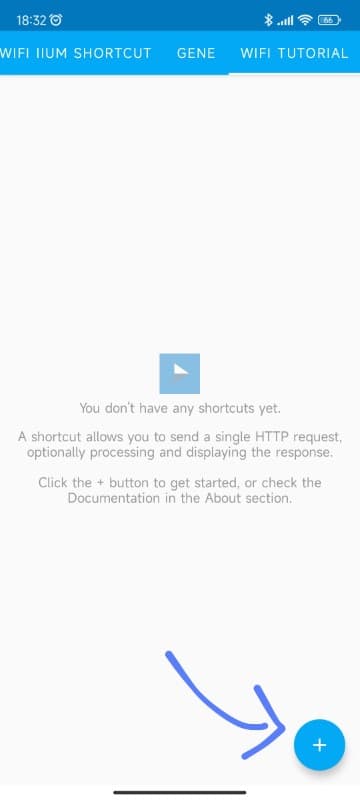
When the dialog opens, select the Import from cURL Command. Paste the item into the input box.
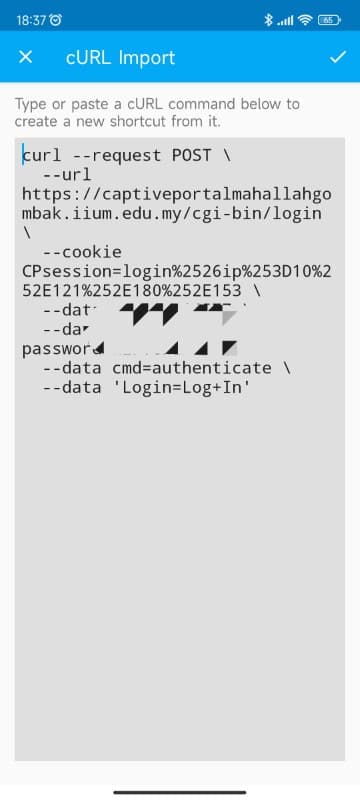
Then, click the Import button. A new Create Shortcut window will appear. Give it the name, icons, and description as you wish.
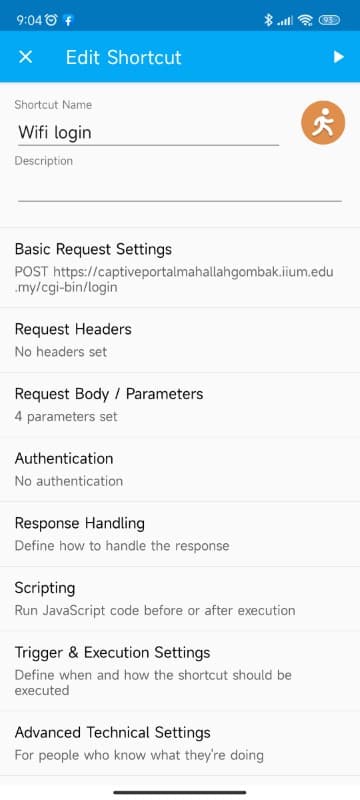
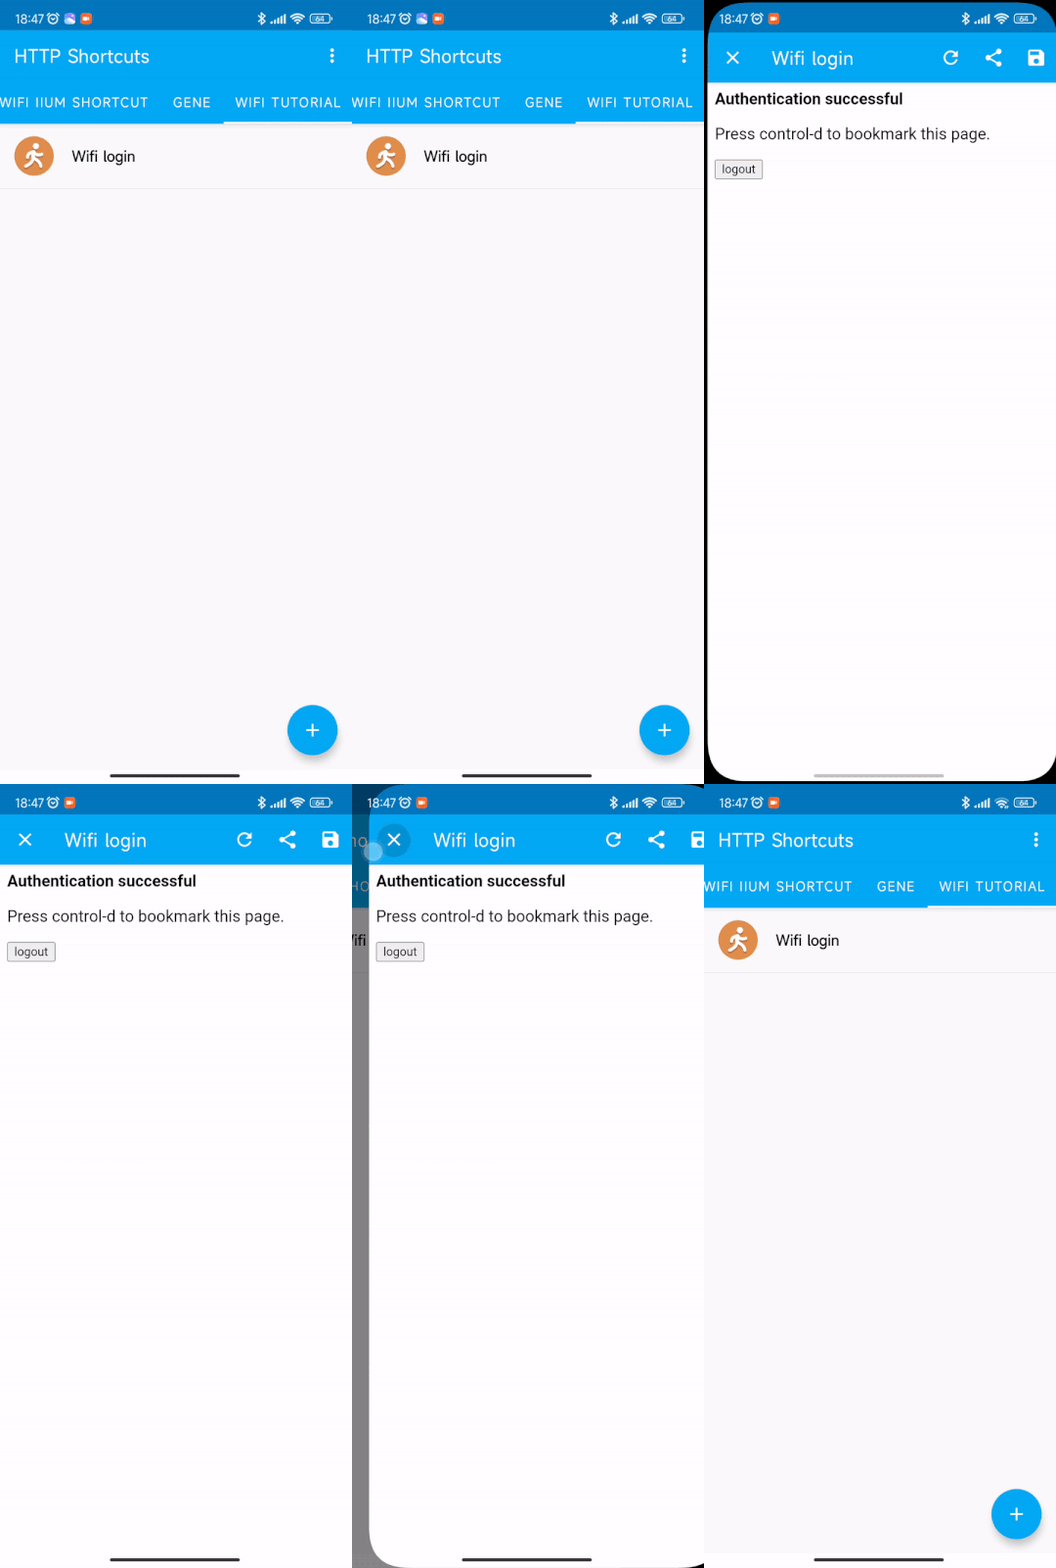
After that, click the Save button. The shortcut will now appear in the app. Tap once to test if it is working.
tip
In case where the wifi login failed, play around with the advanced settings in the app
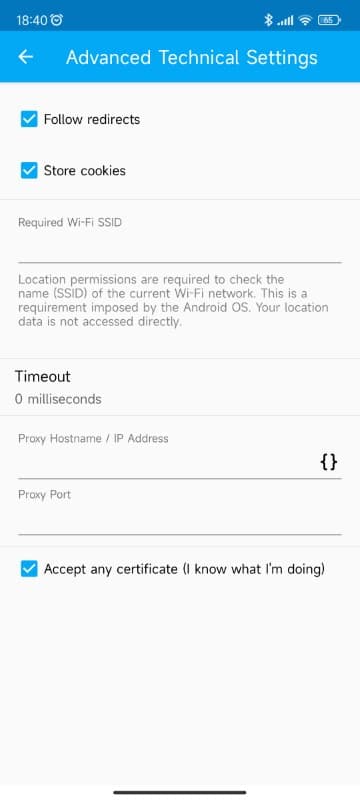
In my case, before enabling this setting, it cannot successfully authenticate with the server. Go to Advanced Technical Settings, then, check the box that says Accept any certificate.
Done 🎉. You can create a home-screen shortcut for easy access. Next time you want to log in to the Wi-Fi, just tap the shortcut.
Update 11/9/22: I recently updated my device to Android 12, and this method no longer works. 🥲
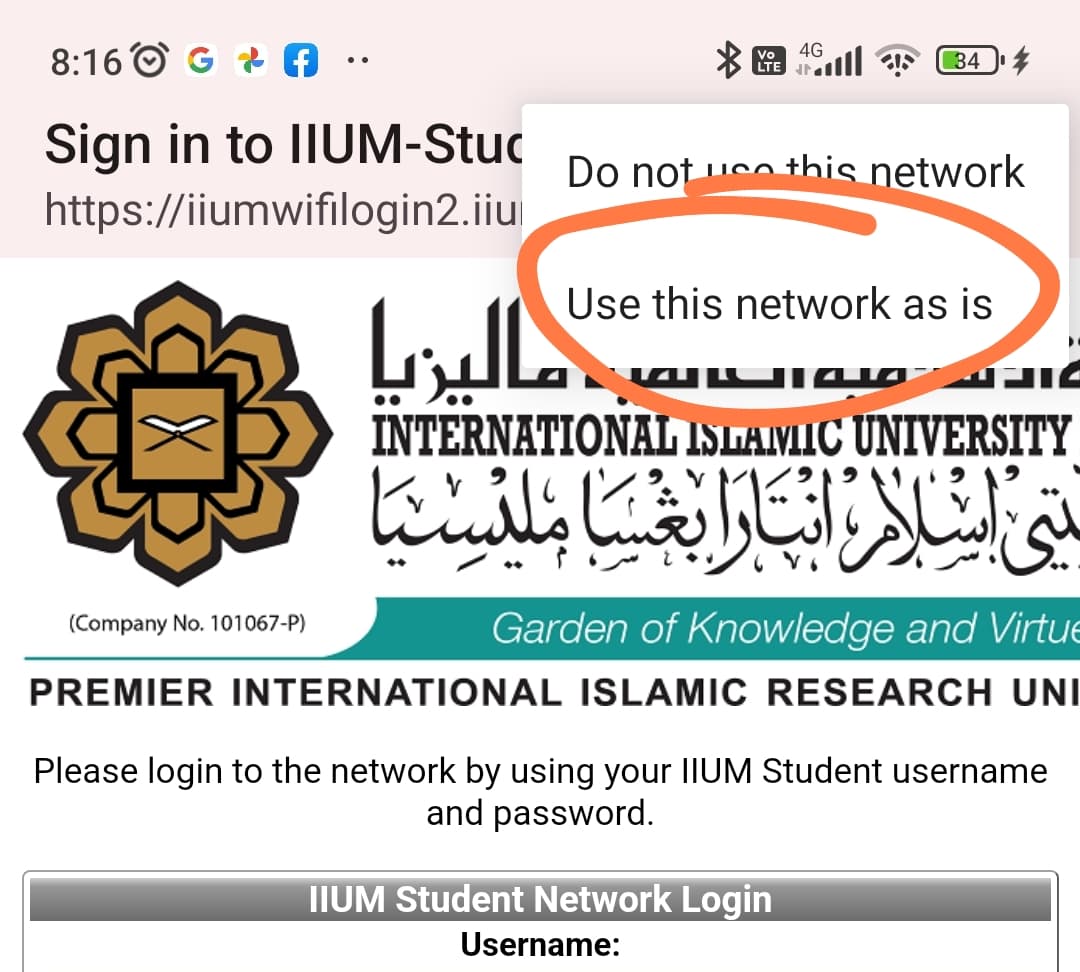
Well, it can still work but needs an additional step:
- Tap the Sign in to the network notification
- Tap the three-dot menu button
- Tap the Use this network as is option
- Then, use the HTTP shortcut that we set up earlier
Relevant xkcd explaining the situation:
Concluding remarks
That's it, now you know how to log in to the Wi-Fi captive portal without 'entering' the captive portal. You can further customize to improve your workflow. For example, set the script to run every time your computer boots, so that you'll have continuous access to the Wi-Fi network.
(Bonus) As you might notice, the speed of the Powershell script is quite slow. I made another script using Dart, and compiled it to the native binary. It runs significantly faster as in the GIF below ⚡. Create one for yourself now here.
