- Published on
- Last modified on
- Updated:
Giving a new life to my 2010 laptop
A little backstory
Back in 2010, when I was still in primary school, my dad bought us our first laptop. My brother and I loved it. The model is Acer Aspire 4738Z. It has 2GB of RAM, 320GB of HDD, and Intel Pentium P6100. It was a great laptop back then. We mainly used it for school work and some light gaming (We loved to play this KokoKrunch's game; Monster Trux).
The laptop also helped me survive in my foundation year in university. At this point, I realized that the laptop was getting worse in performance. The time taken between pressing the power button until I could interact with it was like 15 minutes! I could still do work on Word or PowerPoint, but it required a lot of patience. (I can't believe it myself that I could survive with that kind of frustration)
In 2019, I purchased a new laptop. Since then, this old laptop has been collecting dust in the cabinet.
Previous project
At one point previously, I tried to repurpose the laptop monitor to become an external monitor. The project was successful, and I was happy, but there are reasons I think it is not practical to use it; the viewing experience is bad, the display is too small, and the dangling electronics made it difficult to store. So I decided to scrap the project.
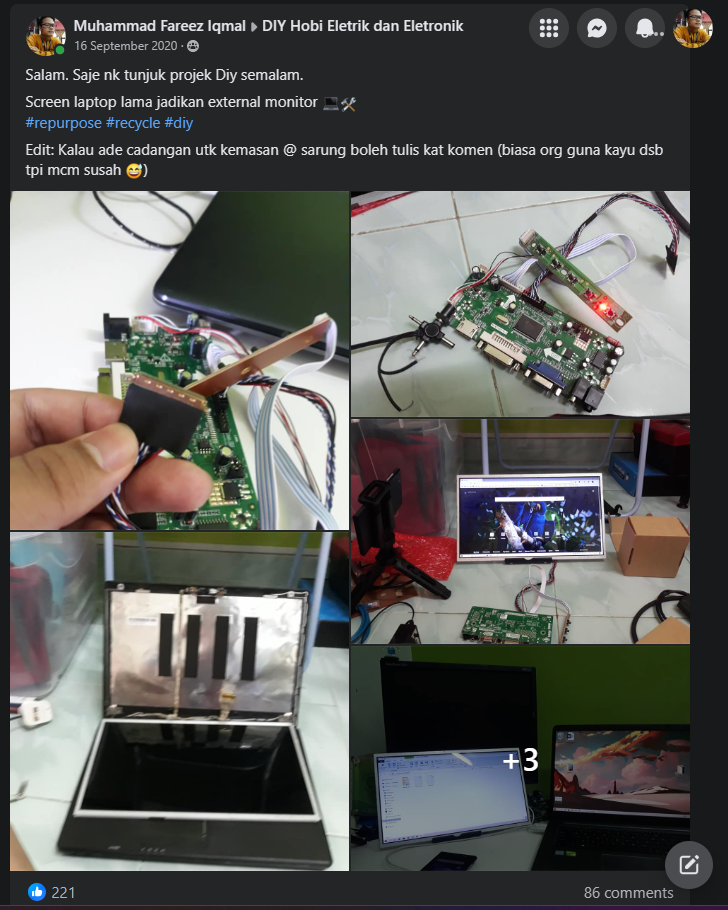
Link to post: https://www.facebook.com/groups/DIYHobiEletrik/permalink/897535880654623/
Choosing the OS
Before upgrading the hardware, I think it is better to choose the OS first, from there I can decide what hardware to buy. Currently, this laptop has both Windows 10 & Ubuntu 18 installed (Dual boot). So, telling from experience, Ubuntu requires much less resources than Windows does. I'm also not planning to do any work on this laptop that requires Windows.
So, I decided to go full Linux. Since I'm most comfortable with Ubuntu, I decided to install the latest Ubuntu interim release 23.10.
Upgrading the hardware
Now that we have chosen the OS, let's start hunting for suitable hardware. Remember that I'm not planning to do any demanding tasks with this machine.
Processor
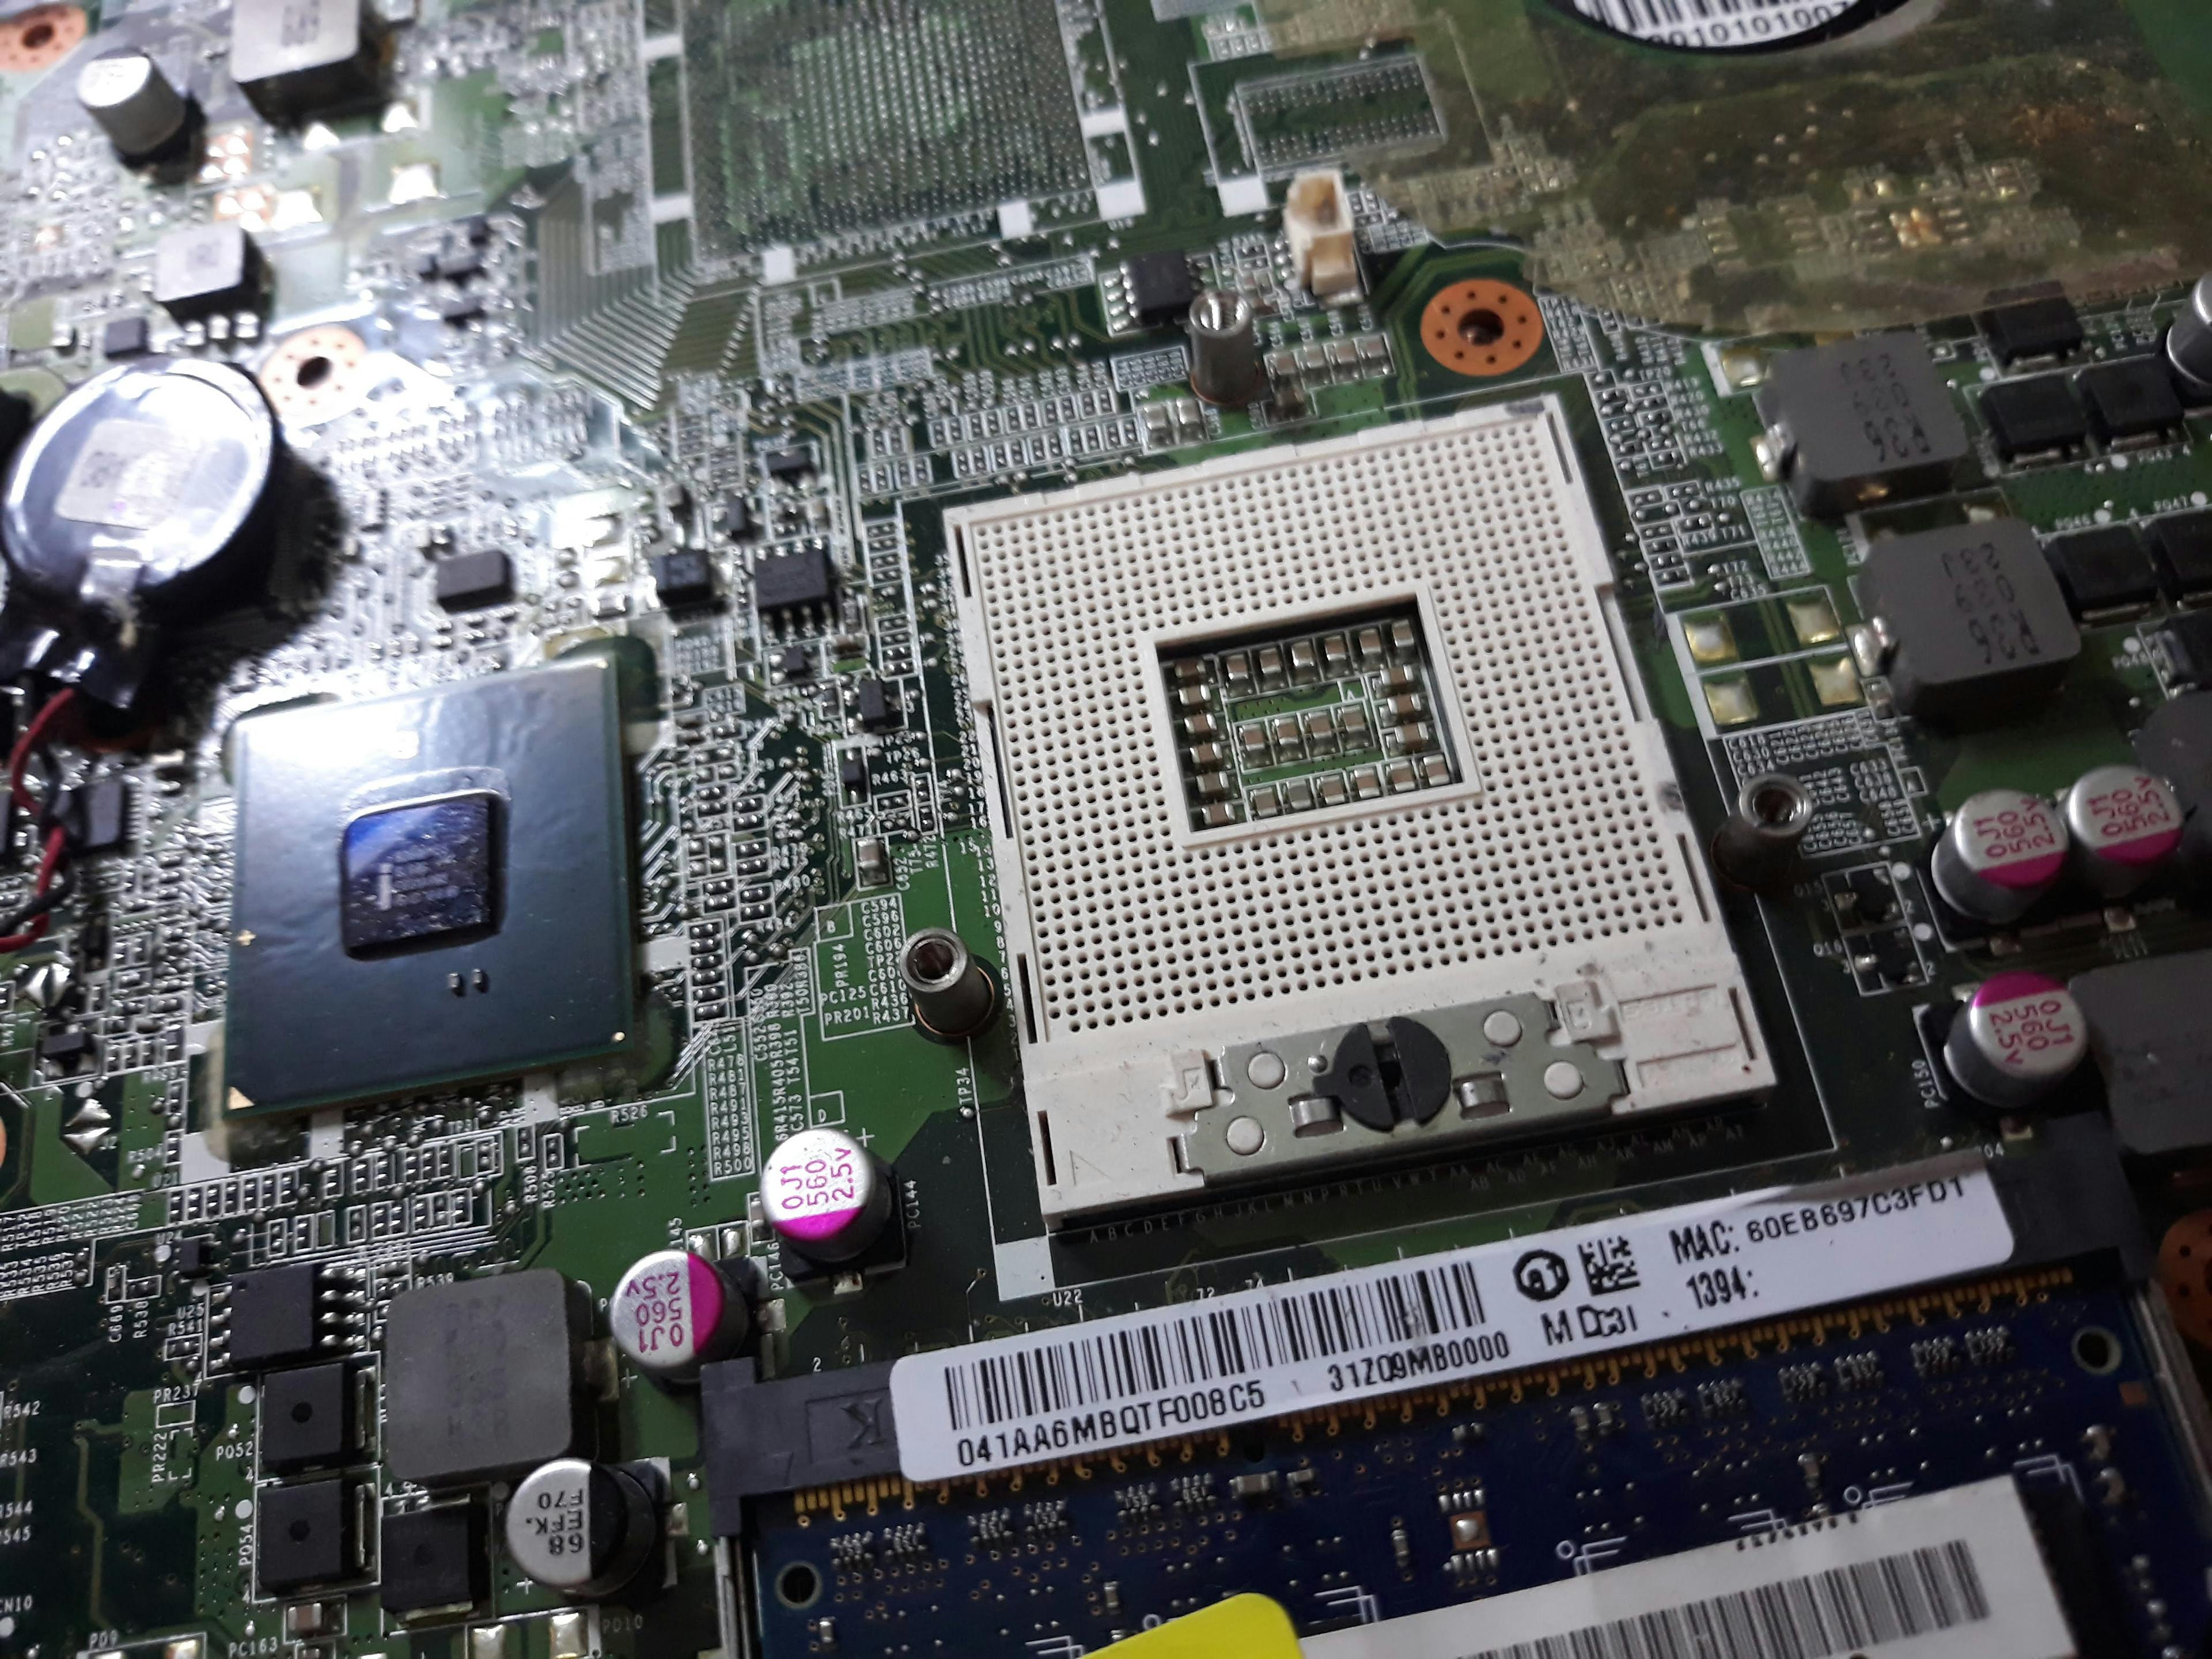
I don't want to mess with the Processor. So, let's just skip this part. But, I just wanted to show here the processor that I took out from its socket in 2019.
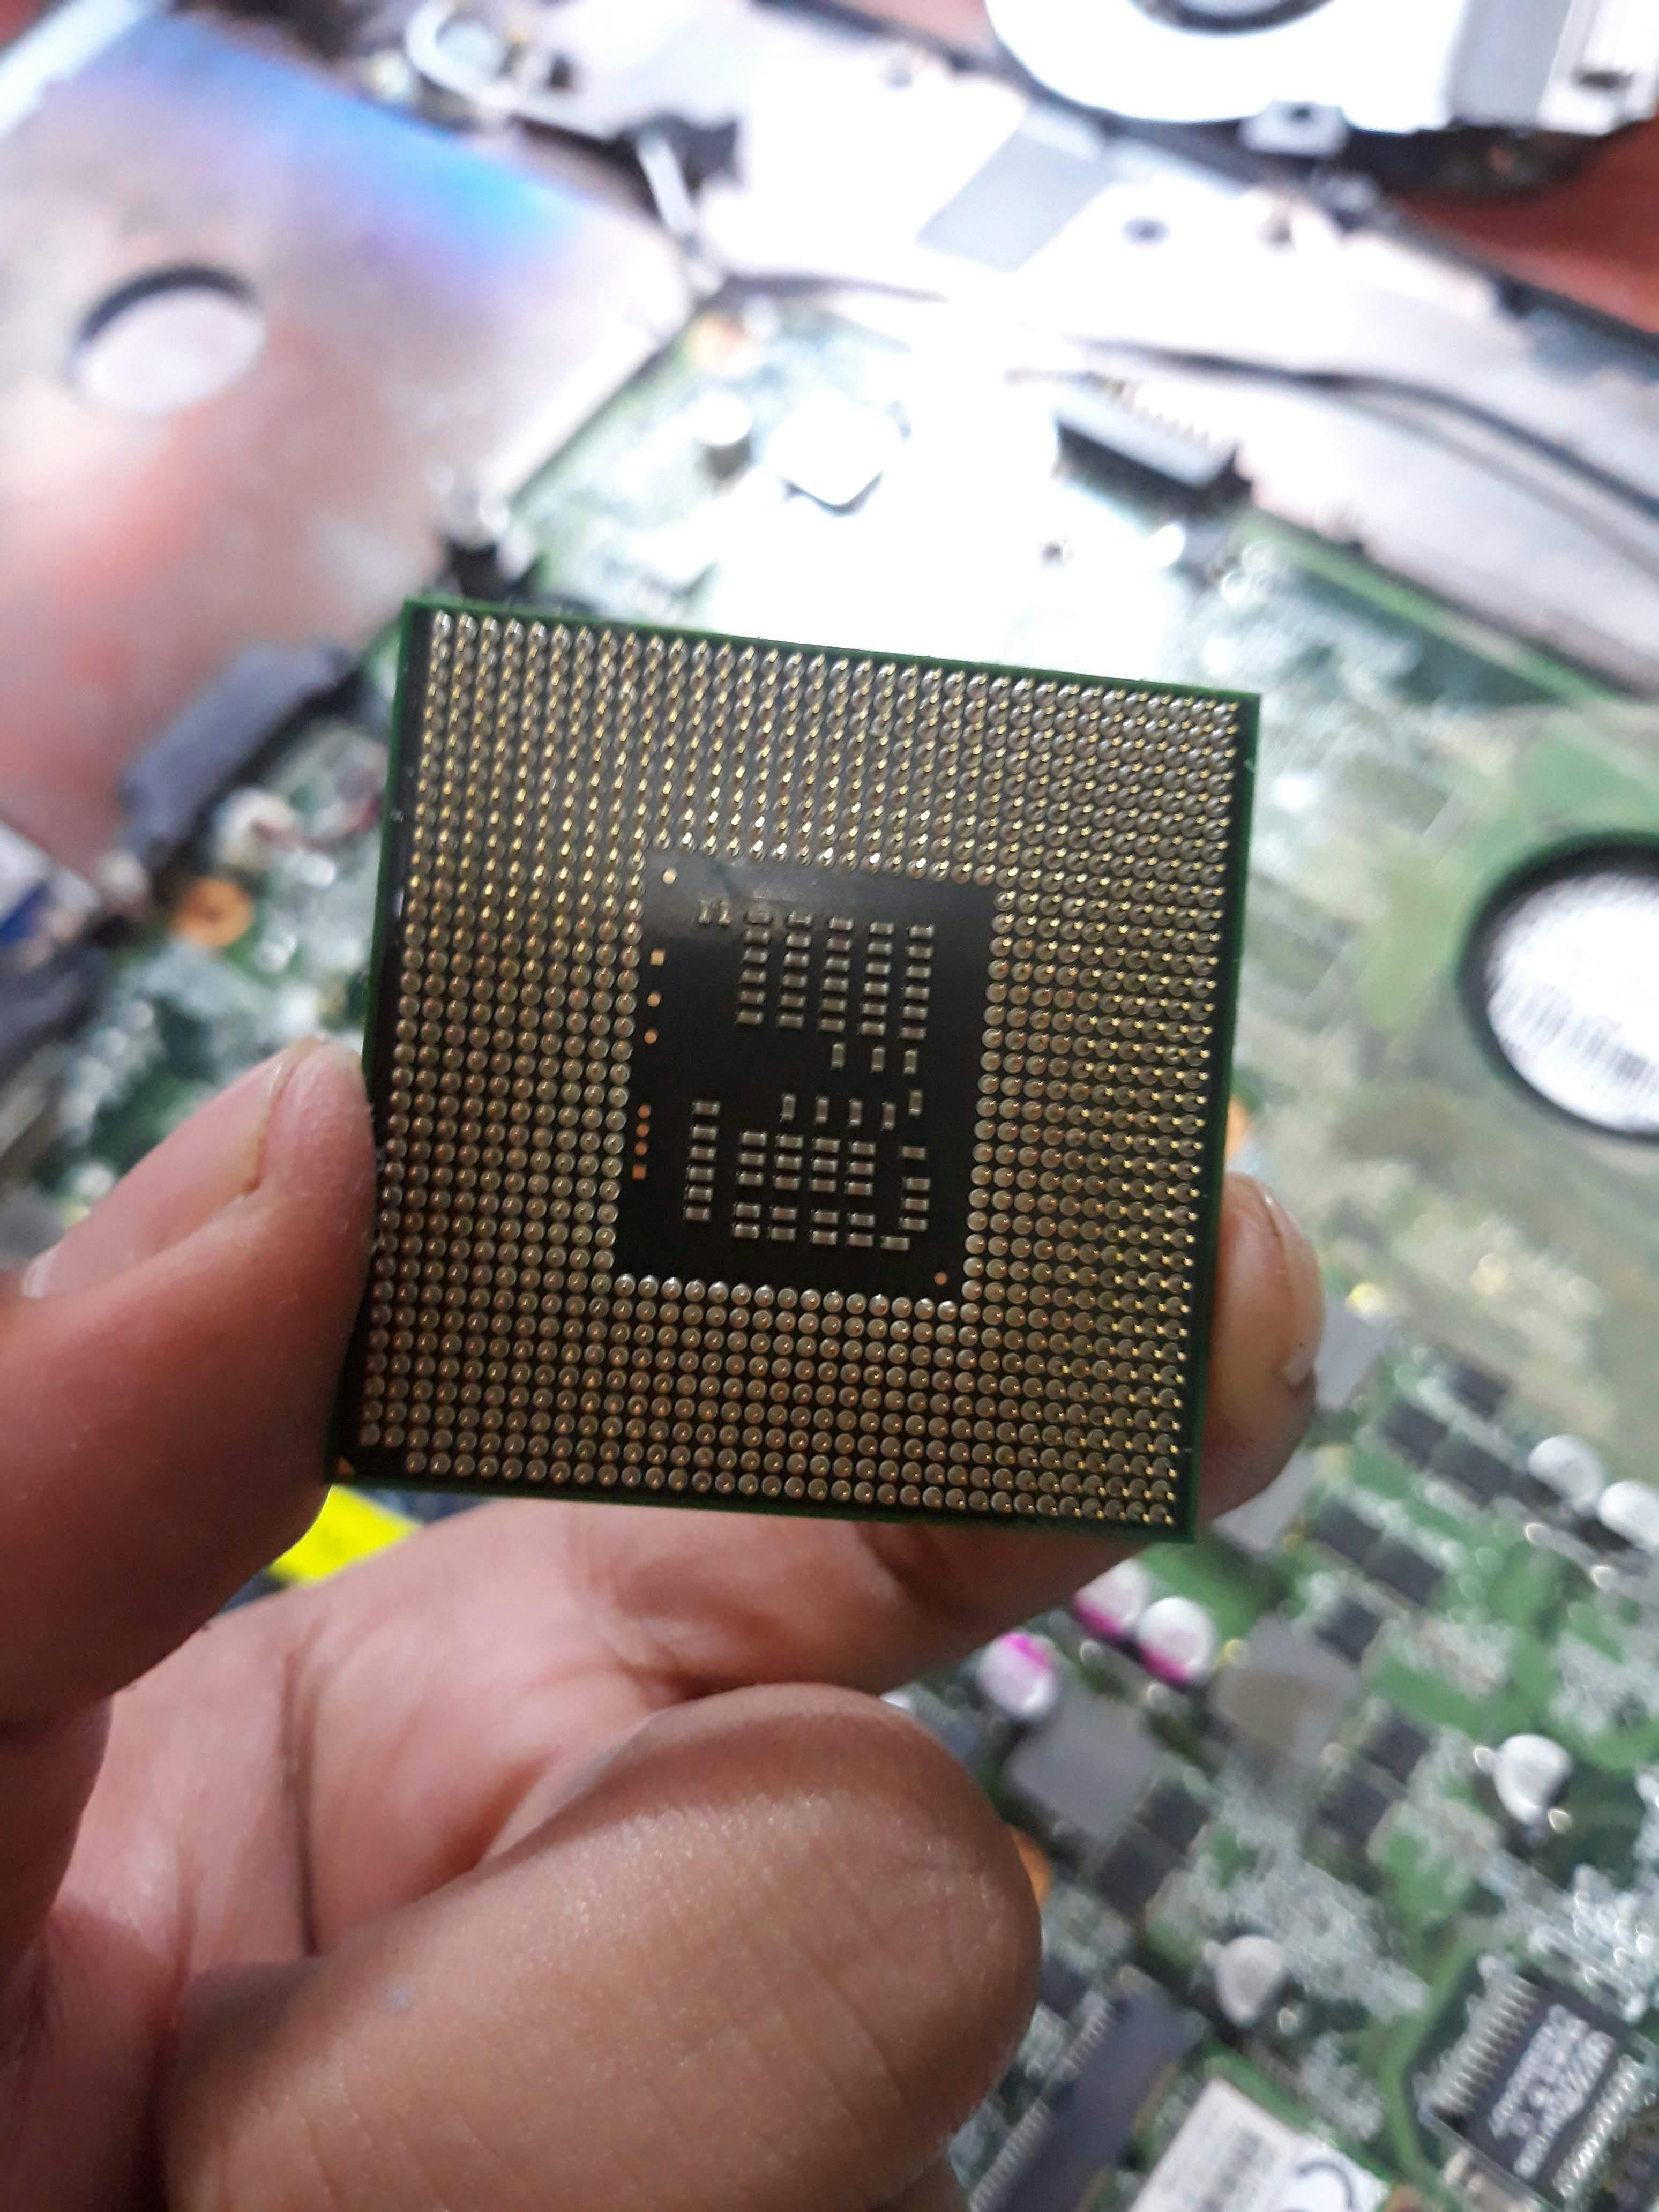
I did check the official specification page of the processor to see if there is any useful information we could use.
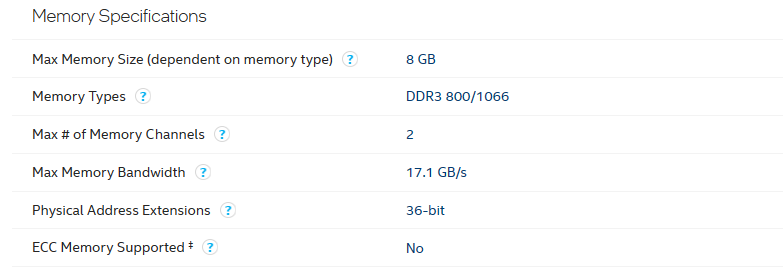
Ah, max 8 GB RAM. Noted that.
RAM
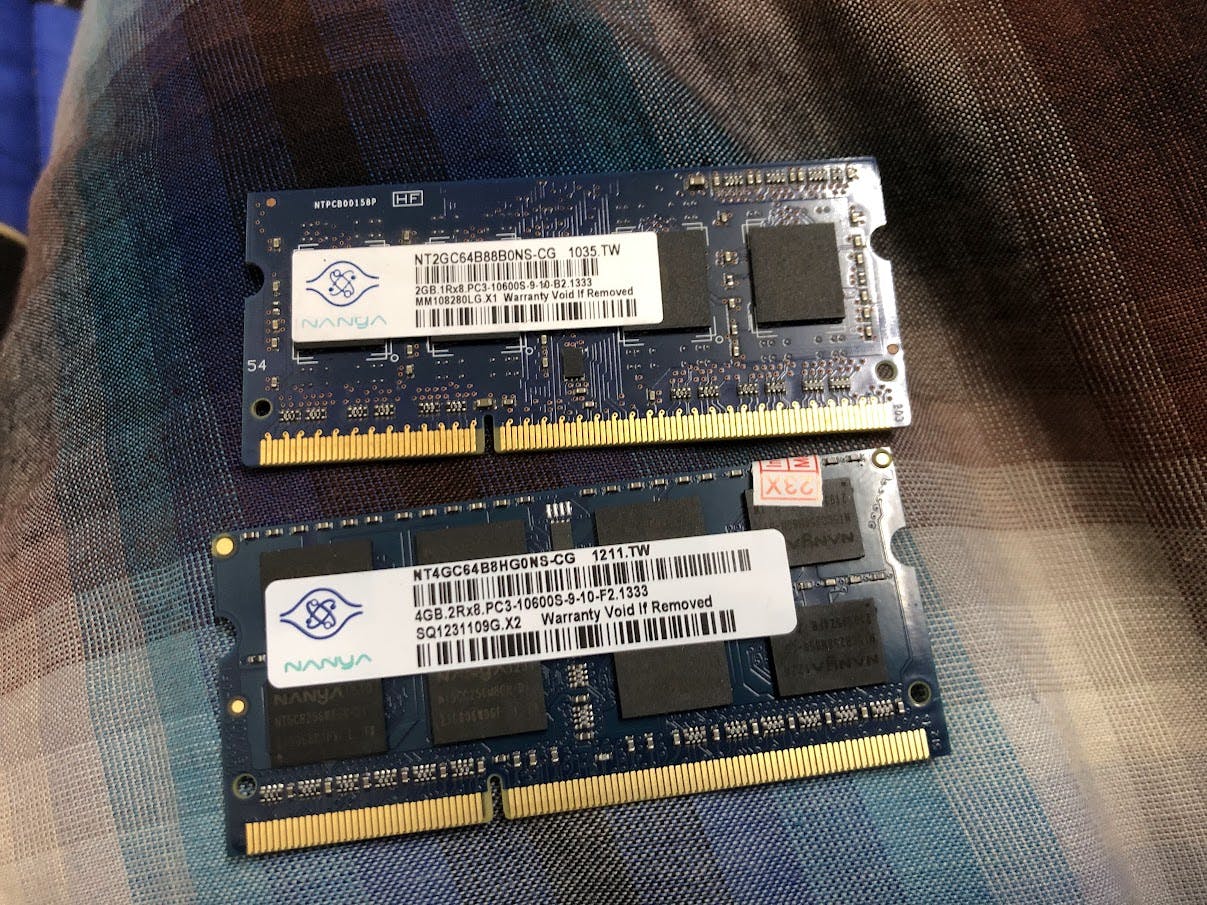
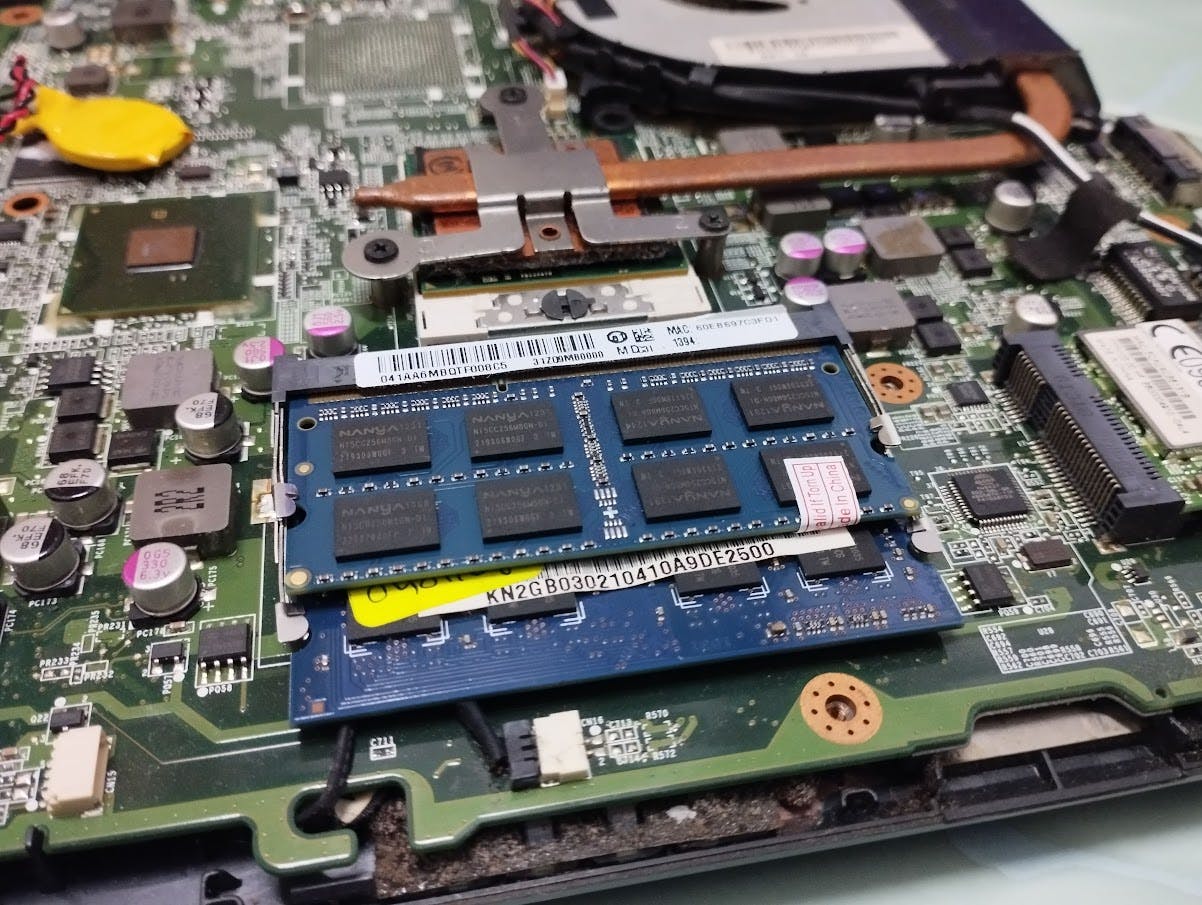
Hmm, how much RAM do I need? The system is equipped with 2 GB RAM. I think, by adding 4 GB more (total 6 GB) should be sufficient enough. I tried to match the current RAM model and specification to maximize compatibility.
Disk
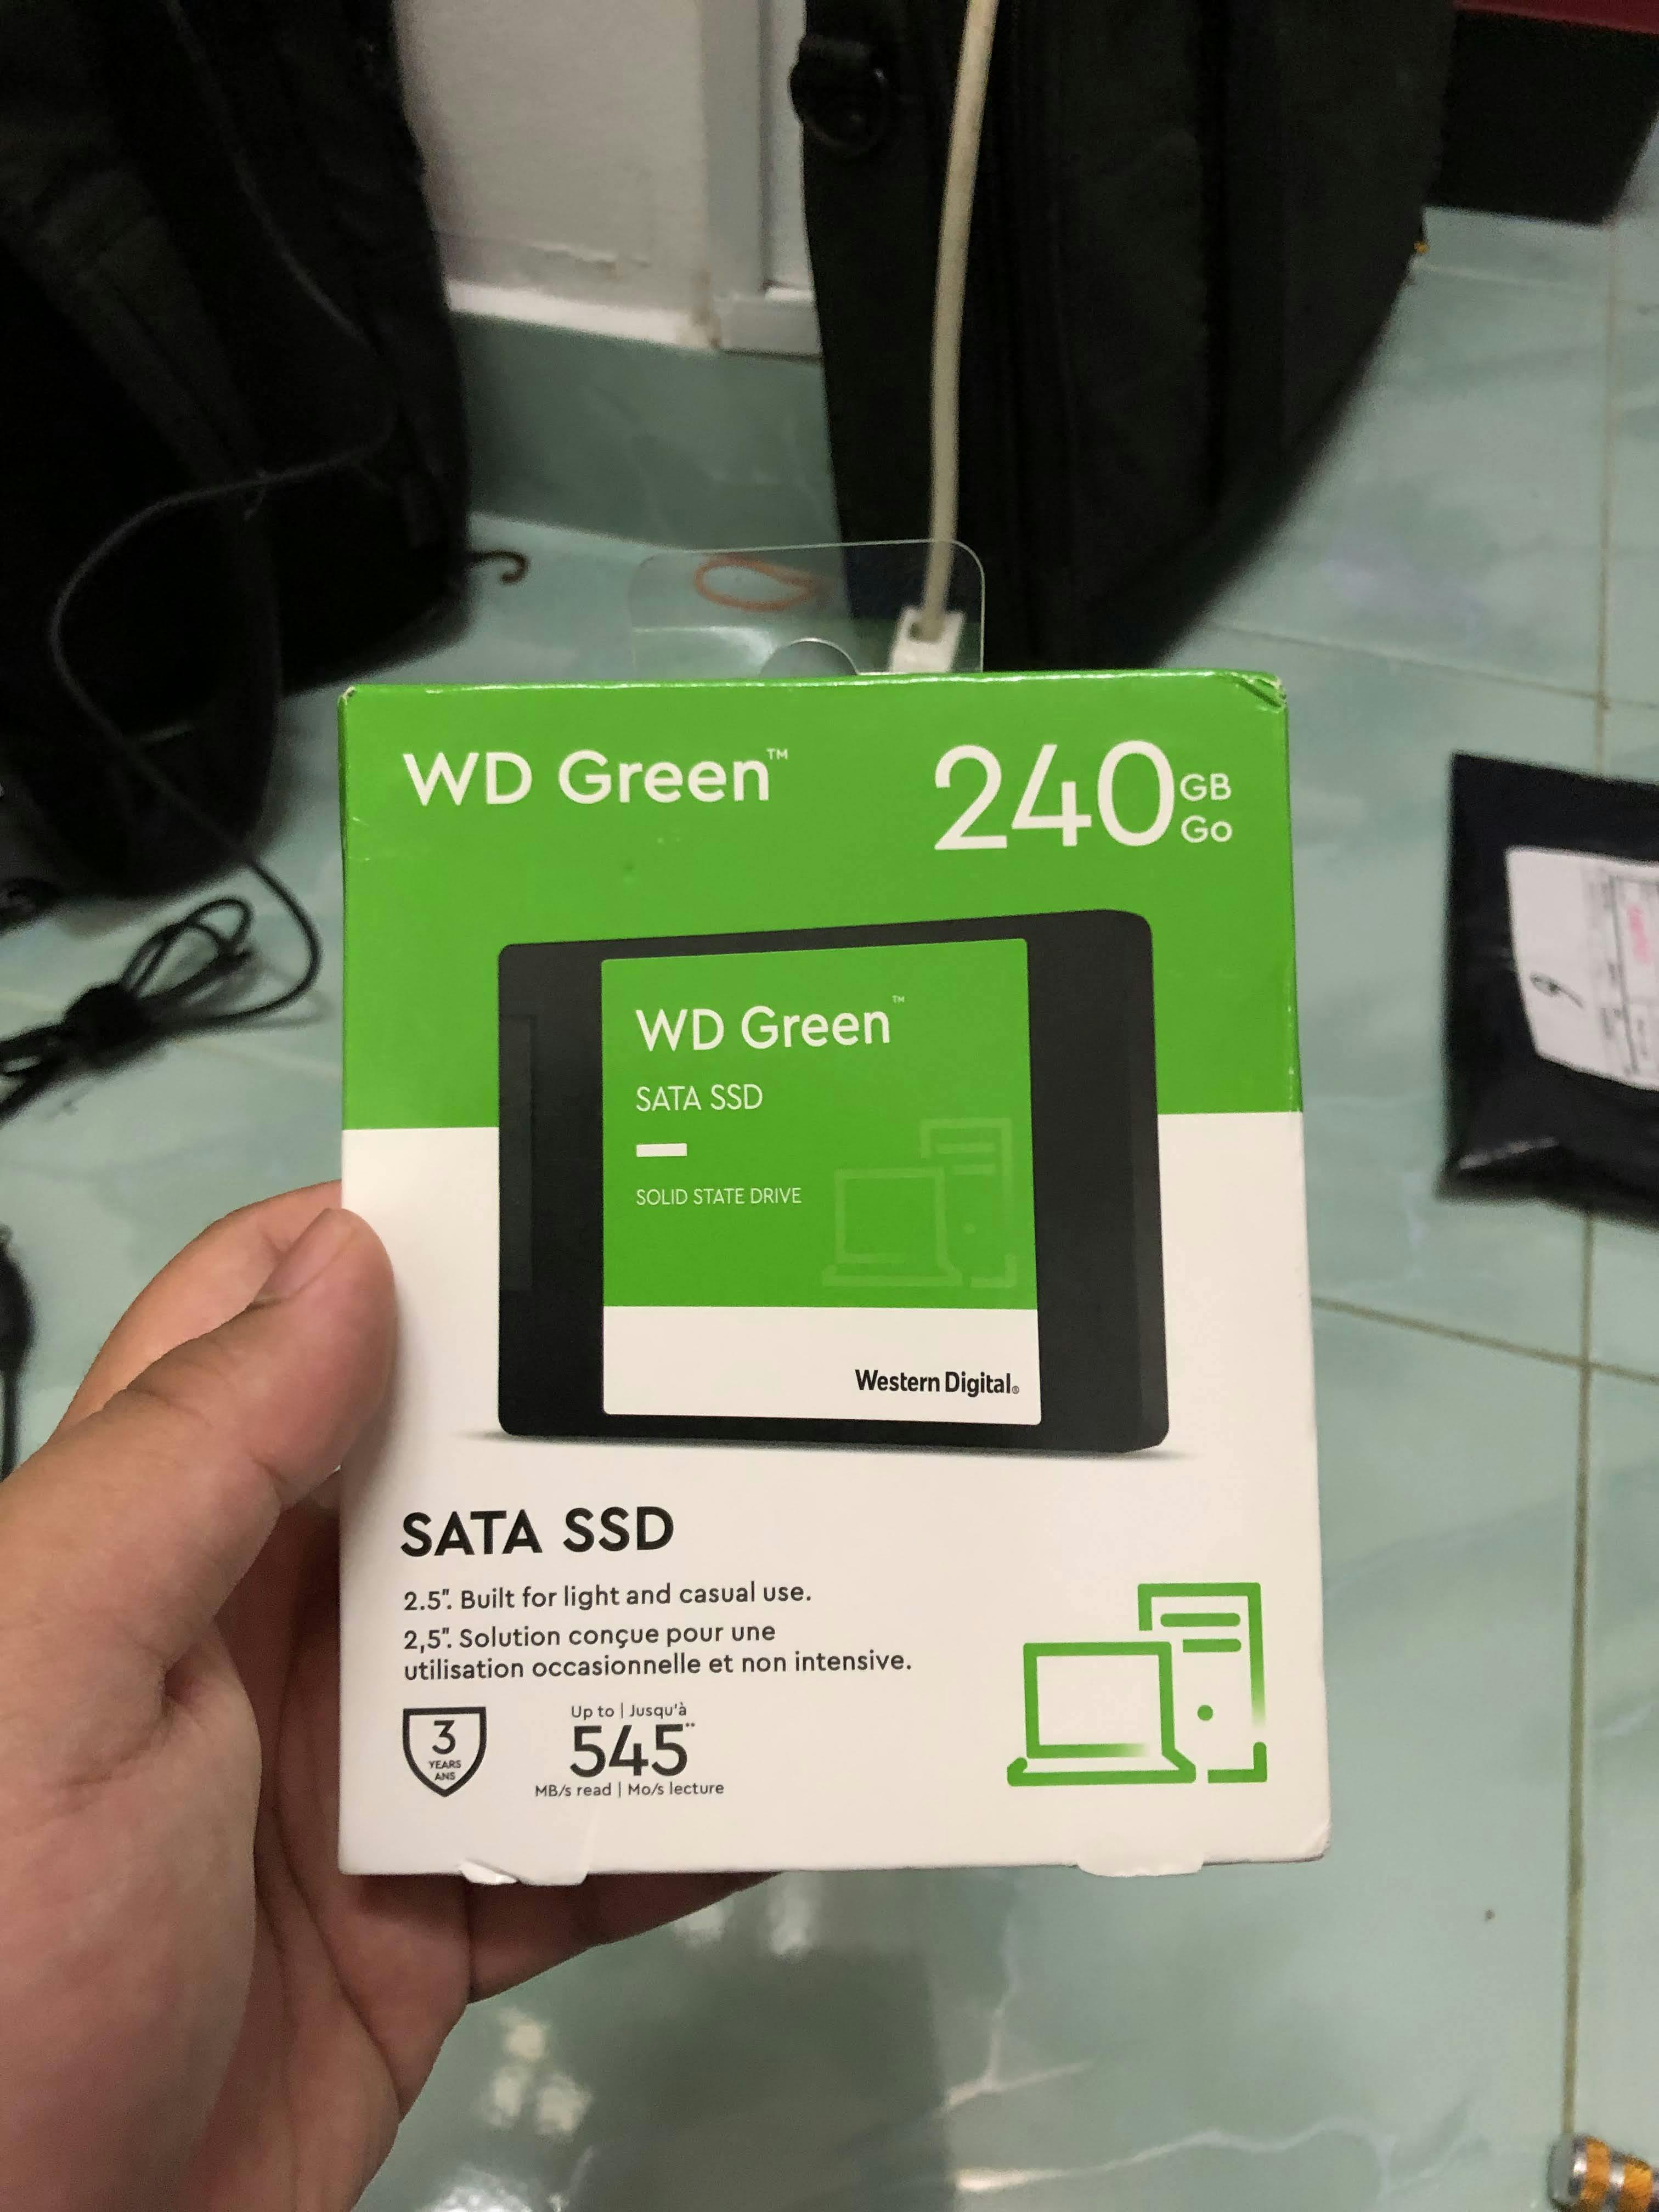
SSD is a must. Using decades-old mechanical spinning disks just makes the system slow. 240 GB should be enough for this system. Luckily, SSD prices have gone down over the years.
Installed!
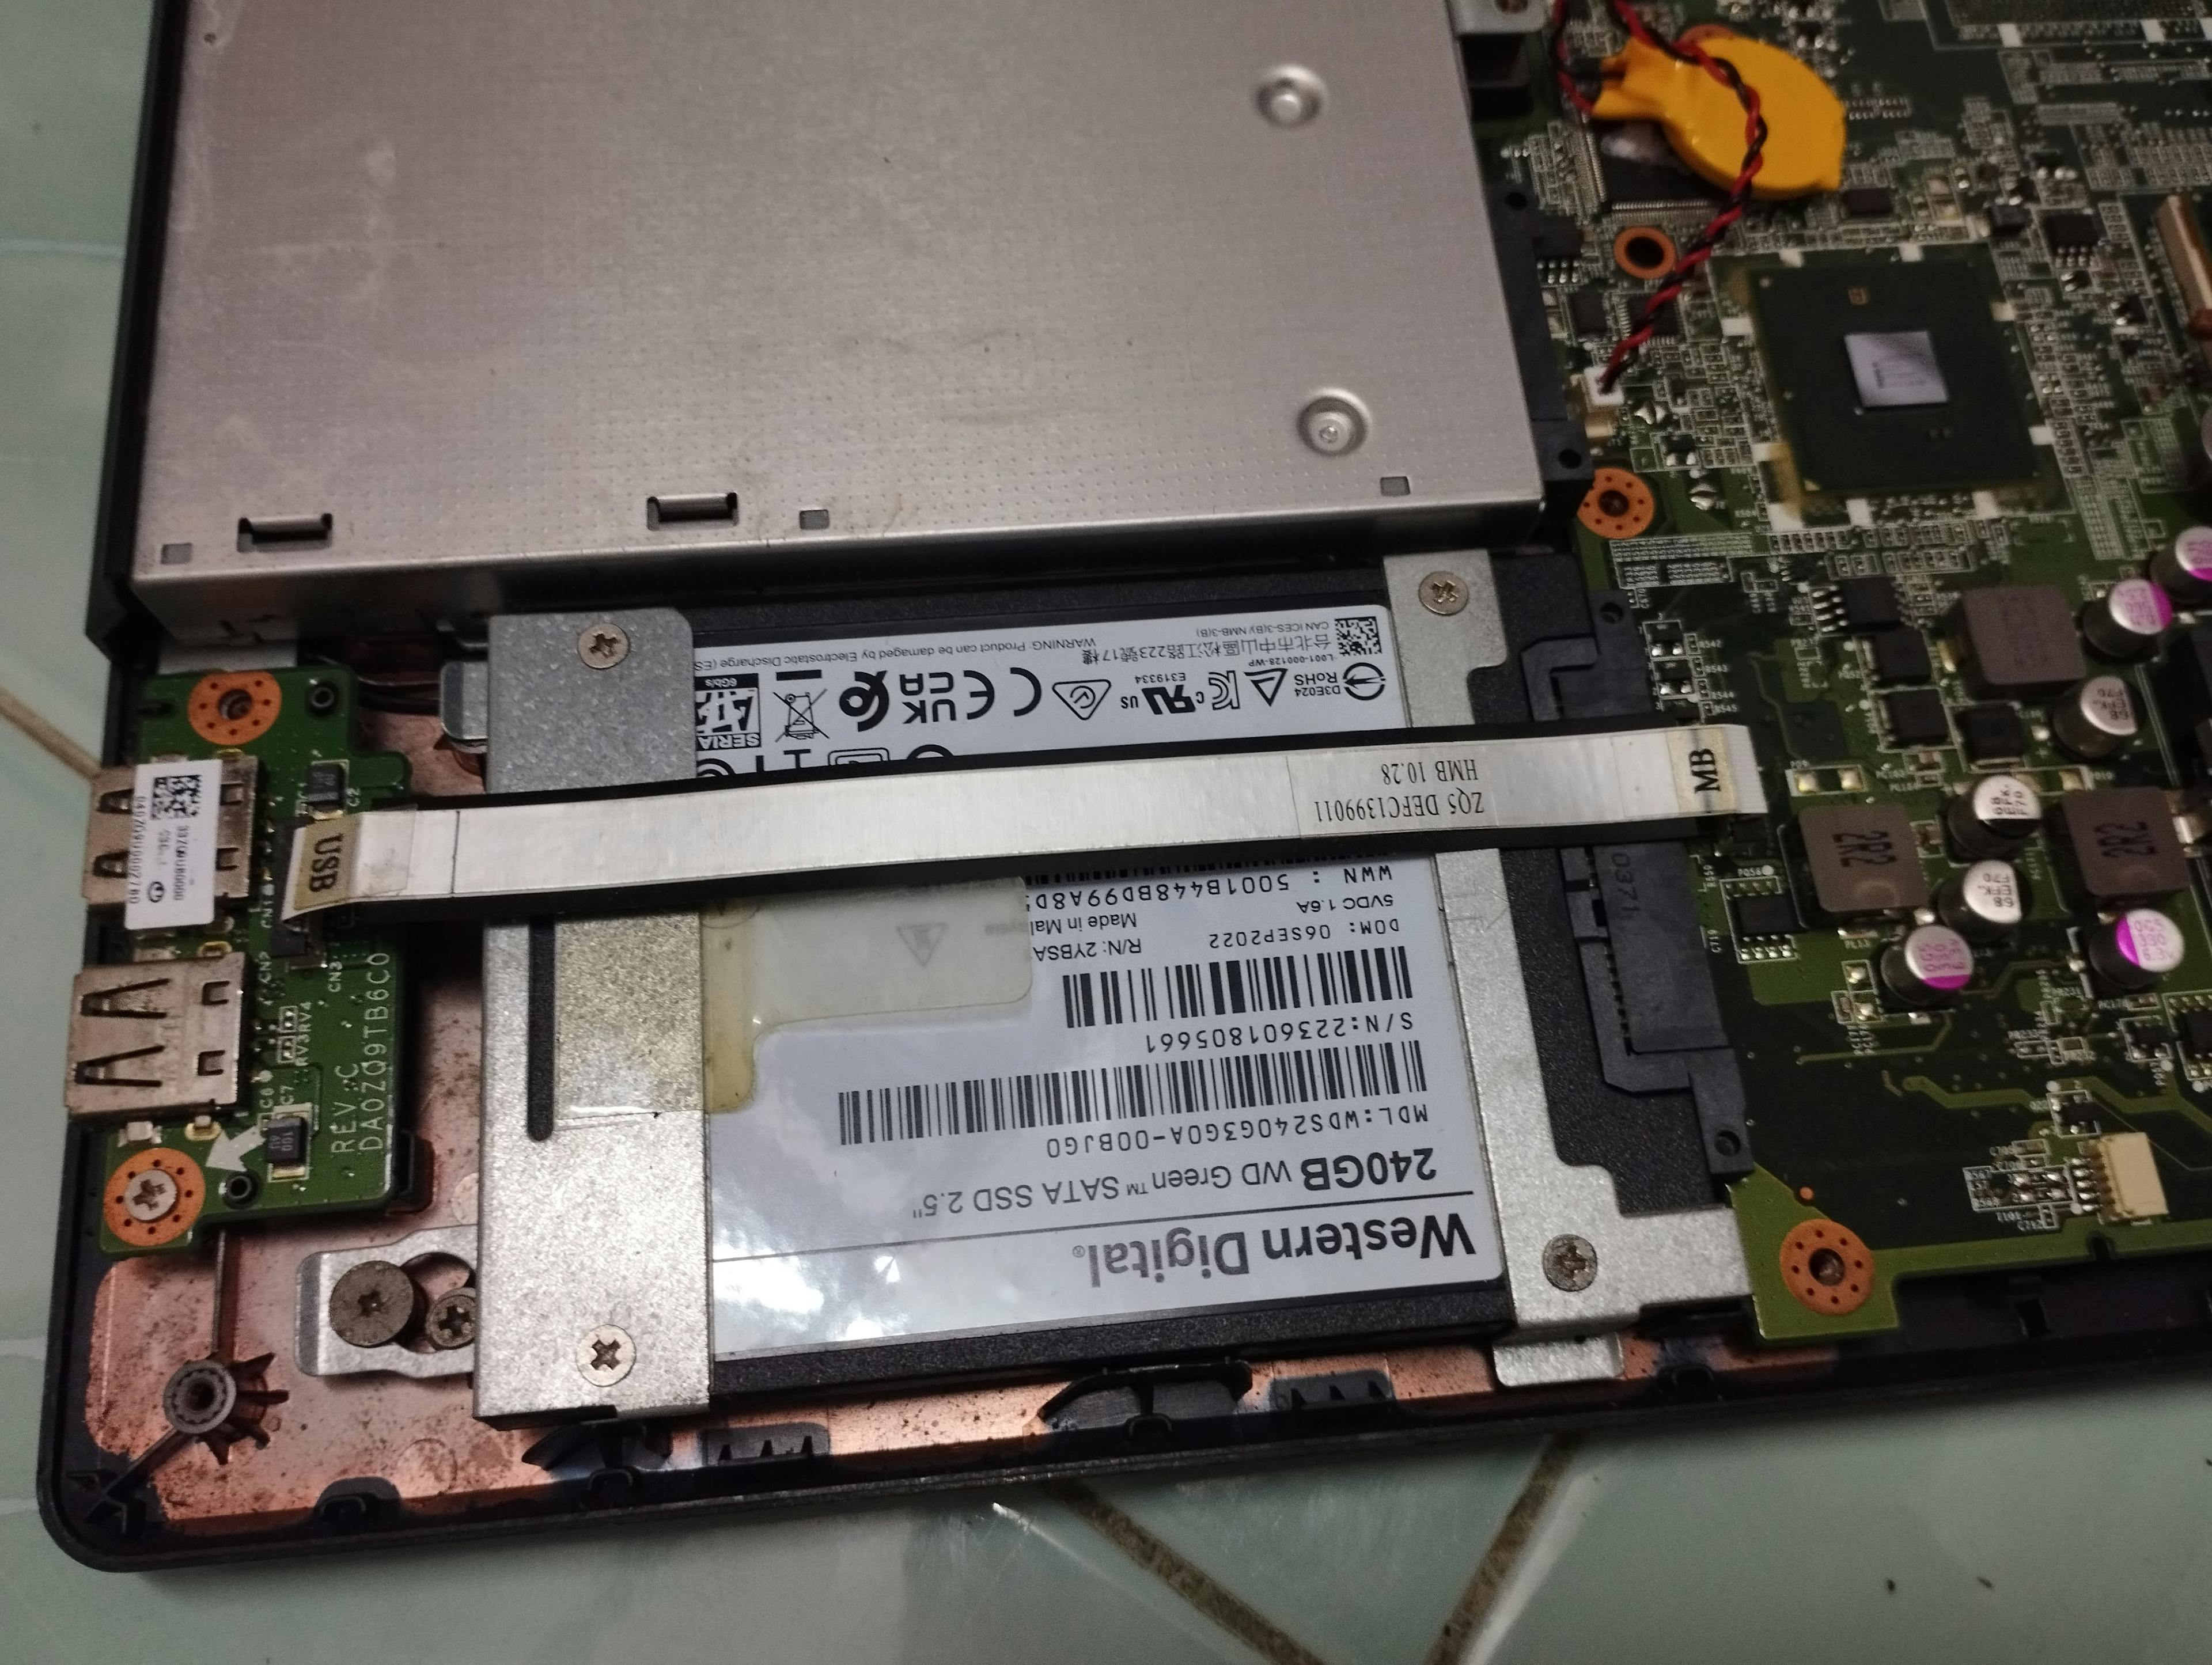
What happened to the original HDD? I bought a nice enclosure and turned it into an external drive!
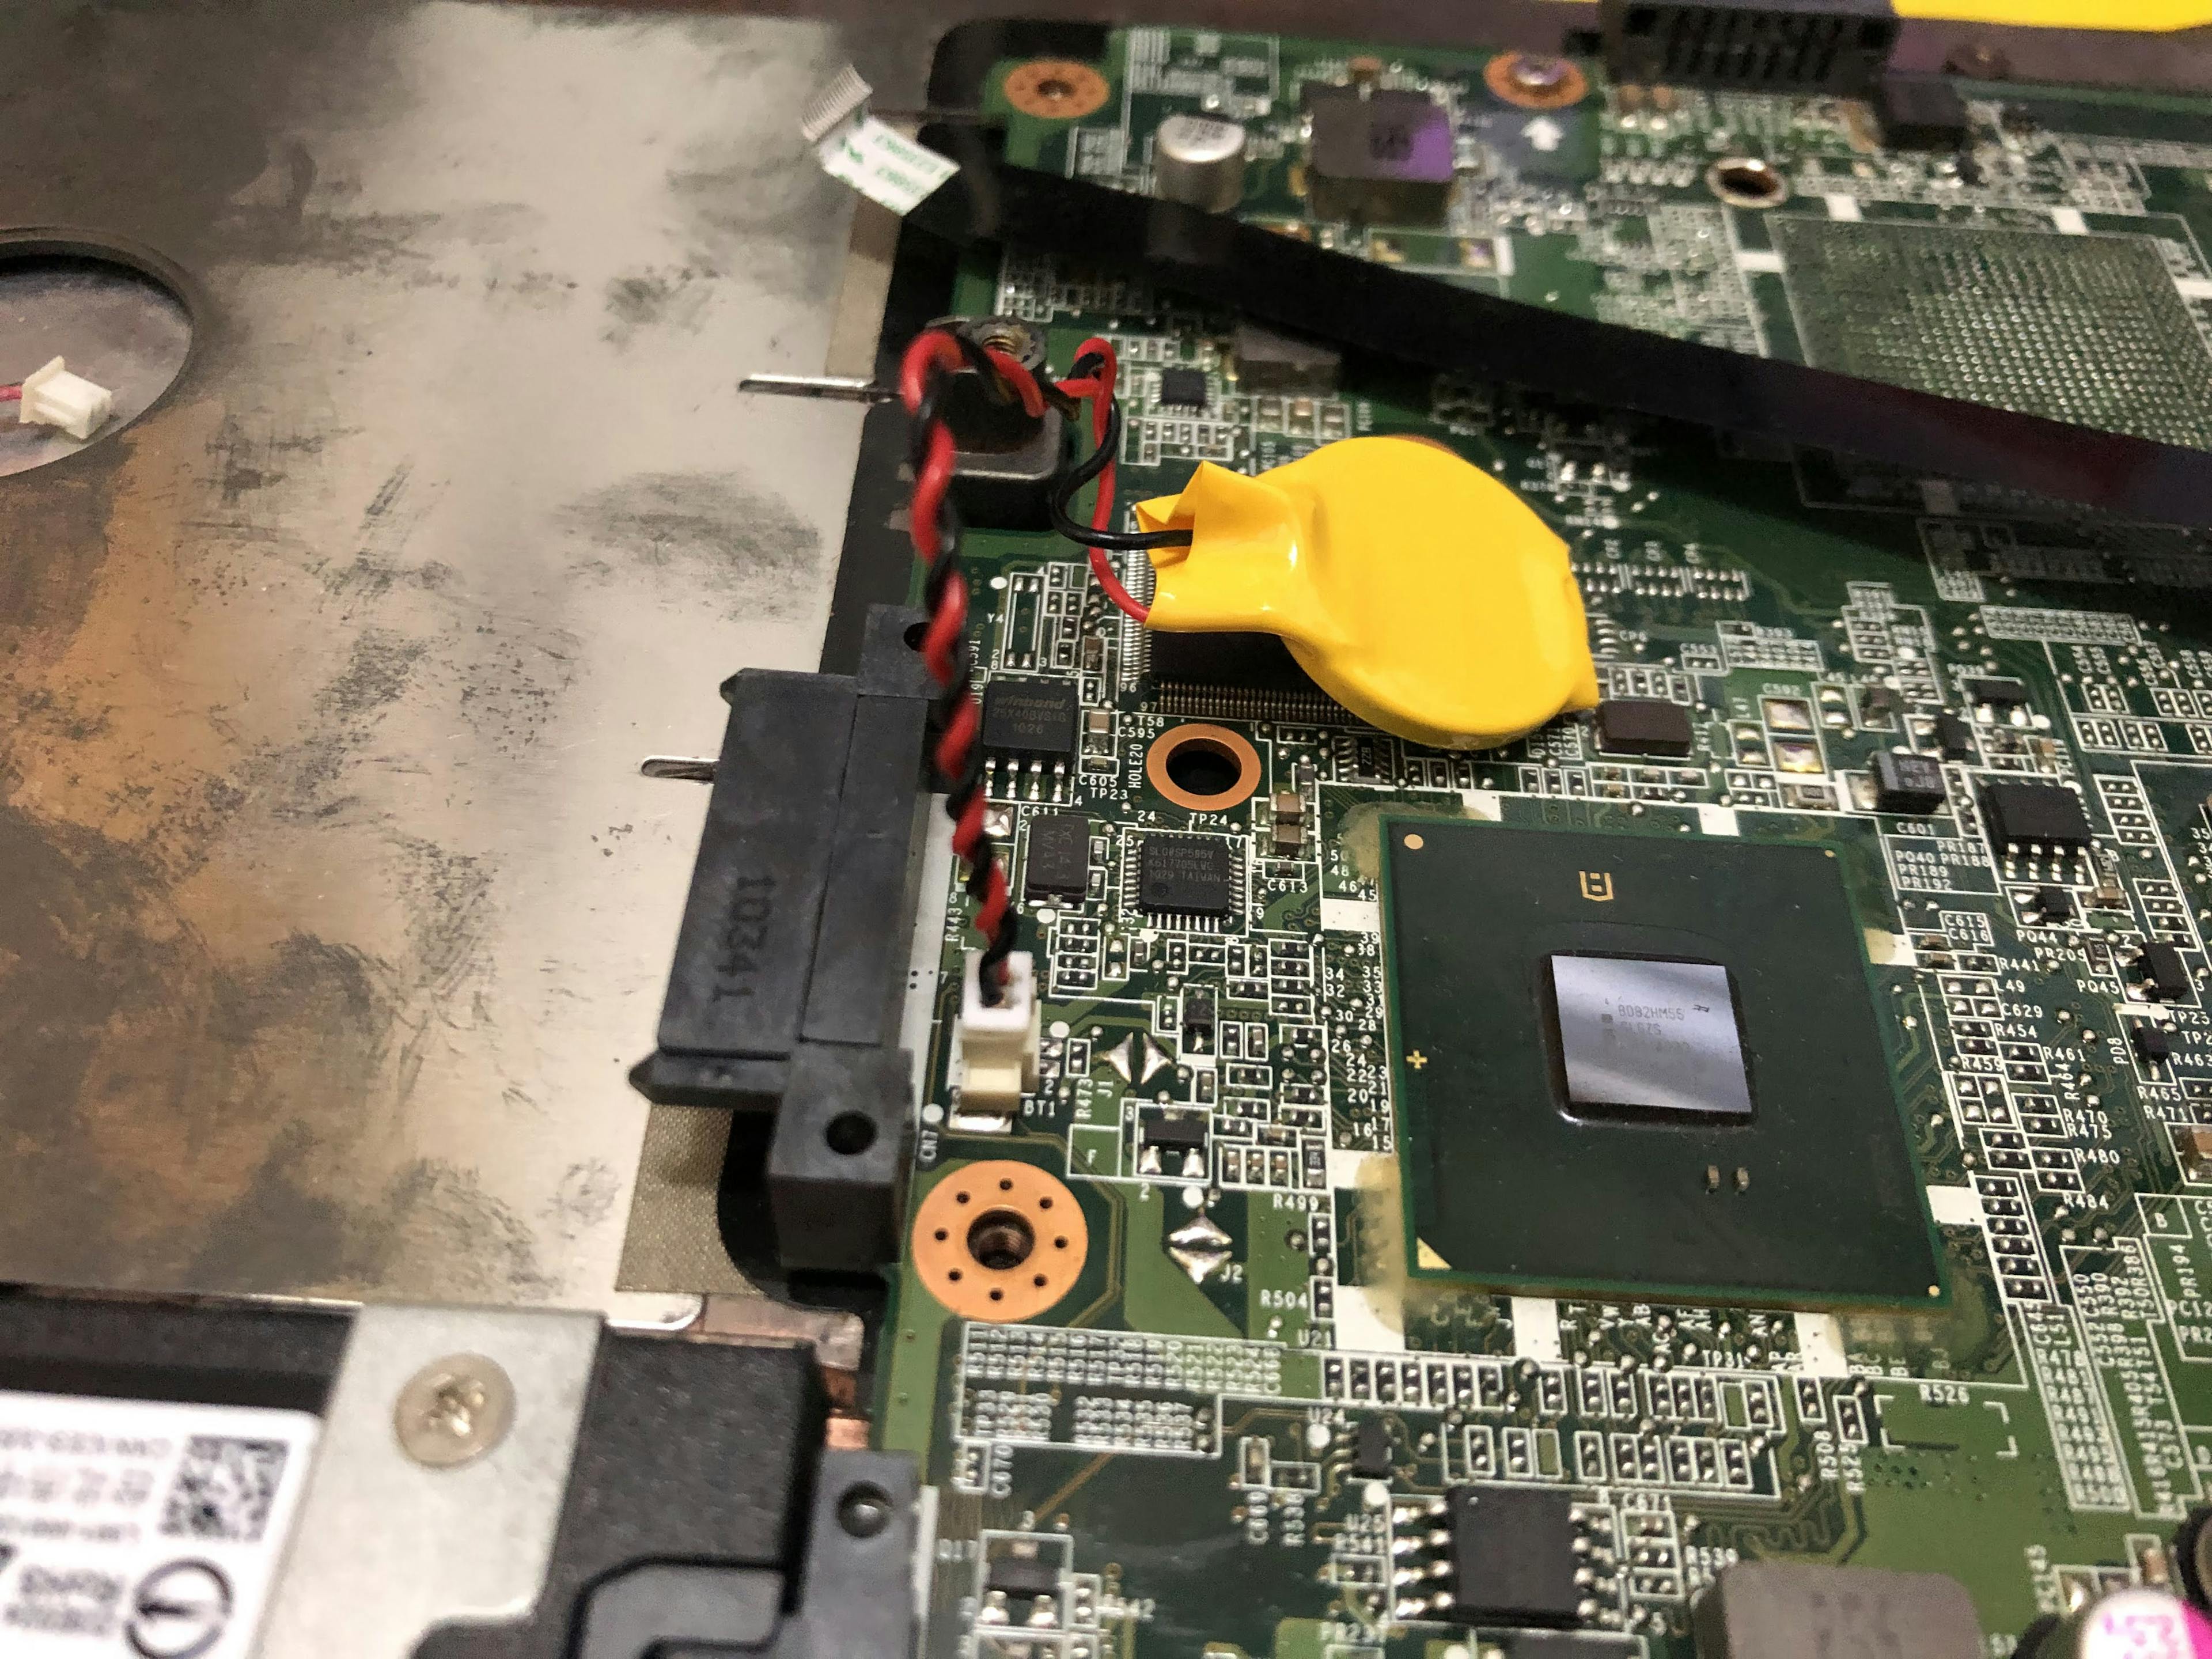
CMOS Battery
This thing is not broken or anything. But the old battery is already 13+ years old. Sooner or later, it will die. Since I already opened the laptop, why not just replace it? It is cheap anyway.
Components summary
All components I bought from Shopee.
| Component | Price (RM) |
|---|---|
| Nanya Blue4GB 2Rx8 10600S DDR3 1333Mhz | $26.39 |
| WD Green Sata 2.5" SSD 240GB | $87.90 |
| BIOS CMOS BATTERY CR2032 | $1.99 |
Installing the OS
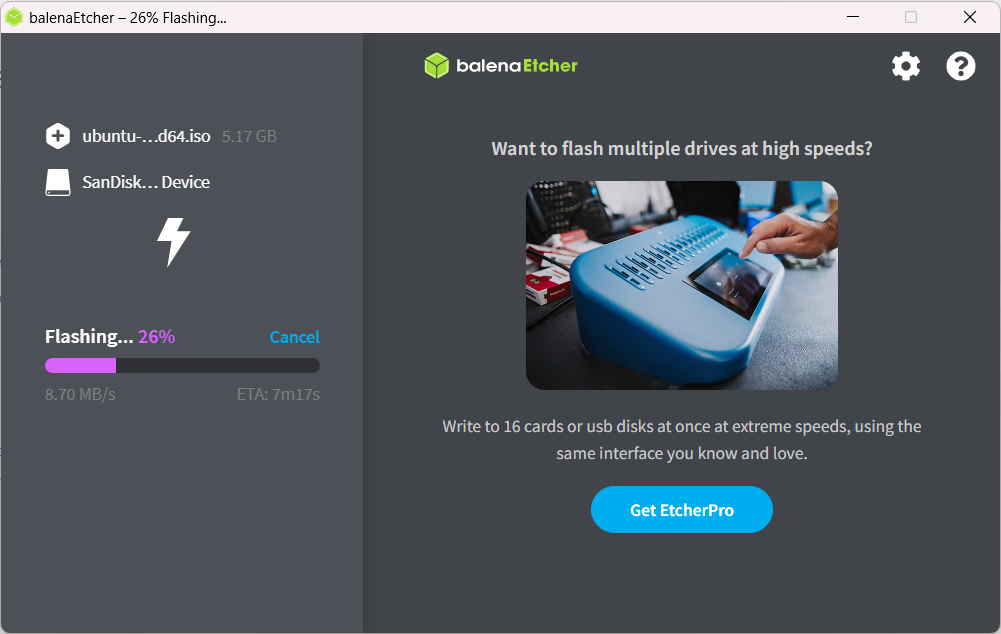
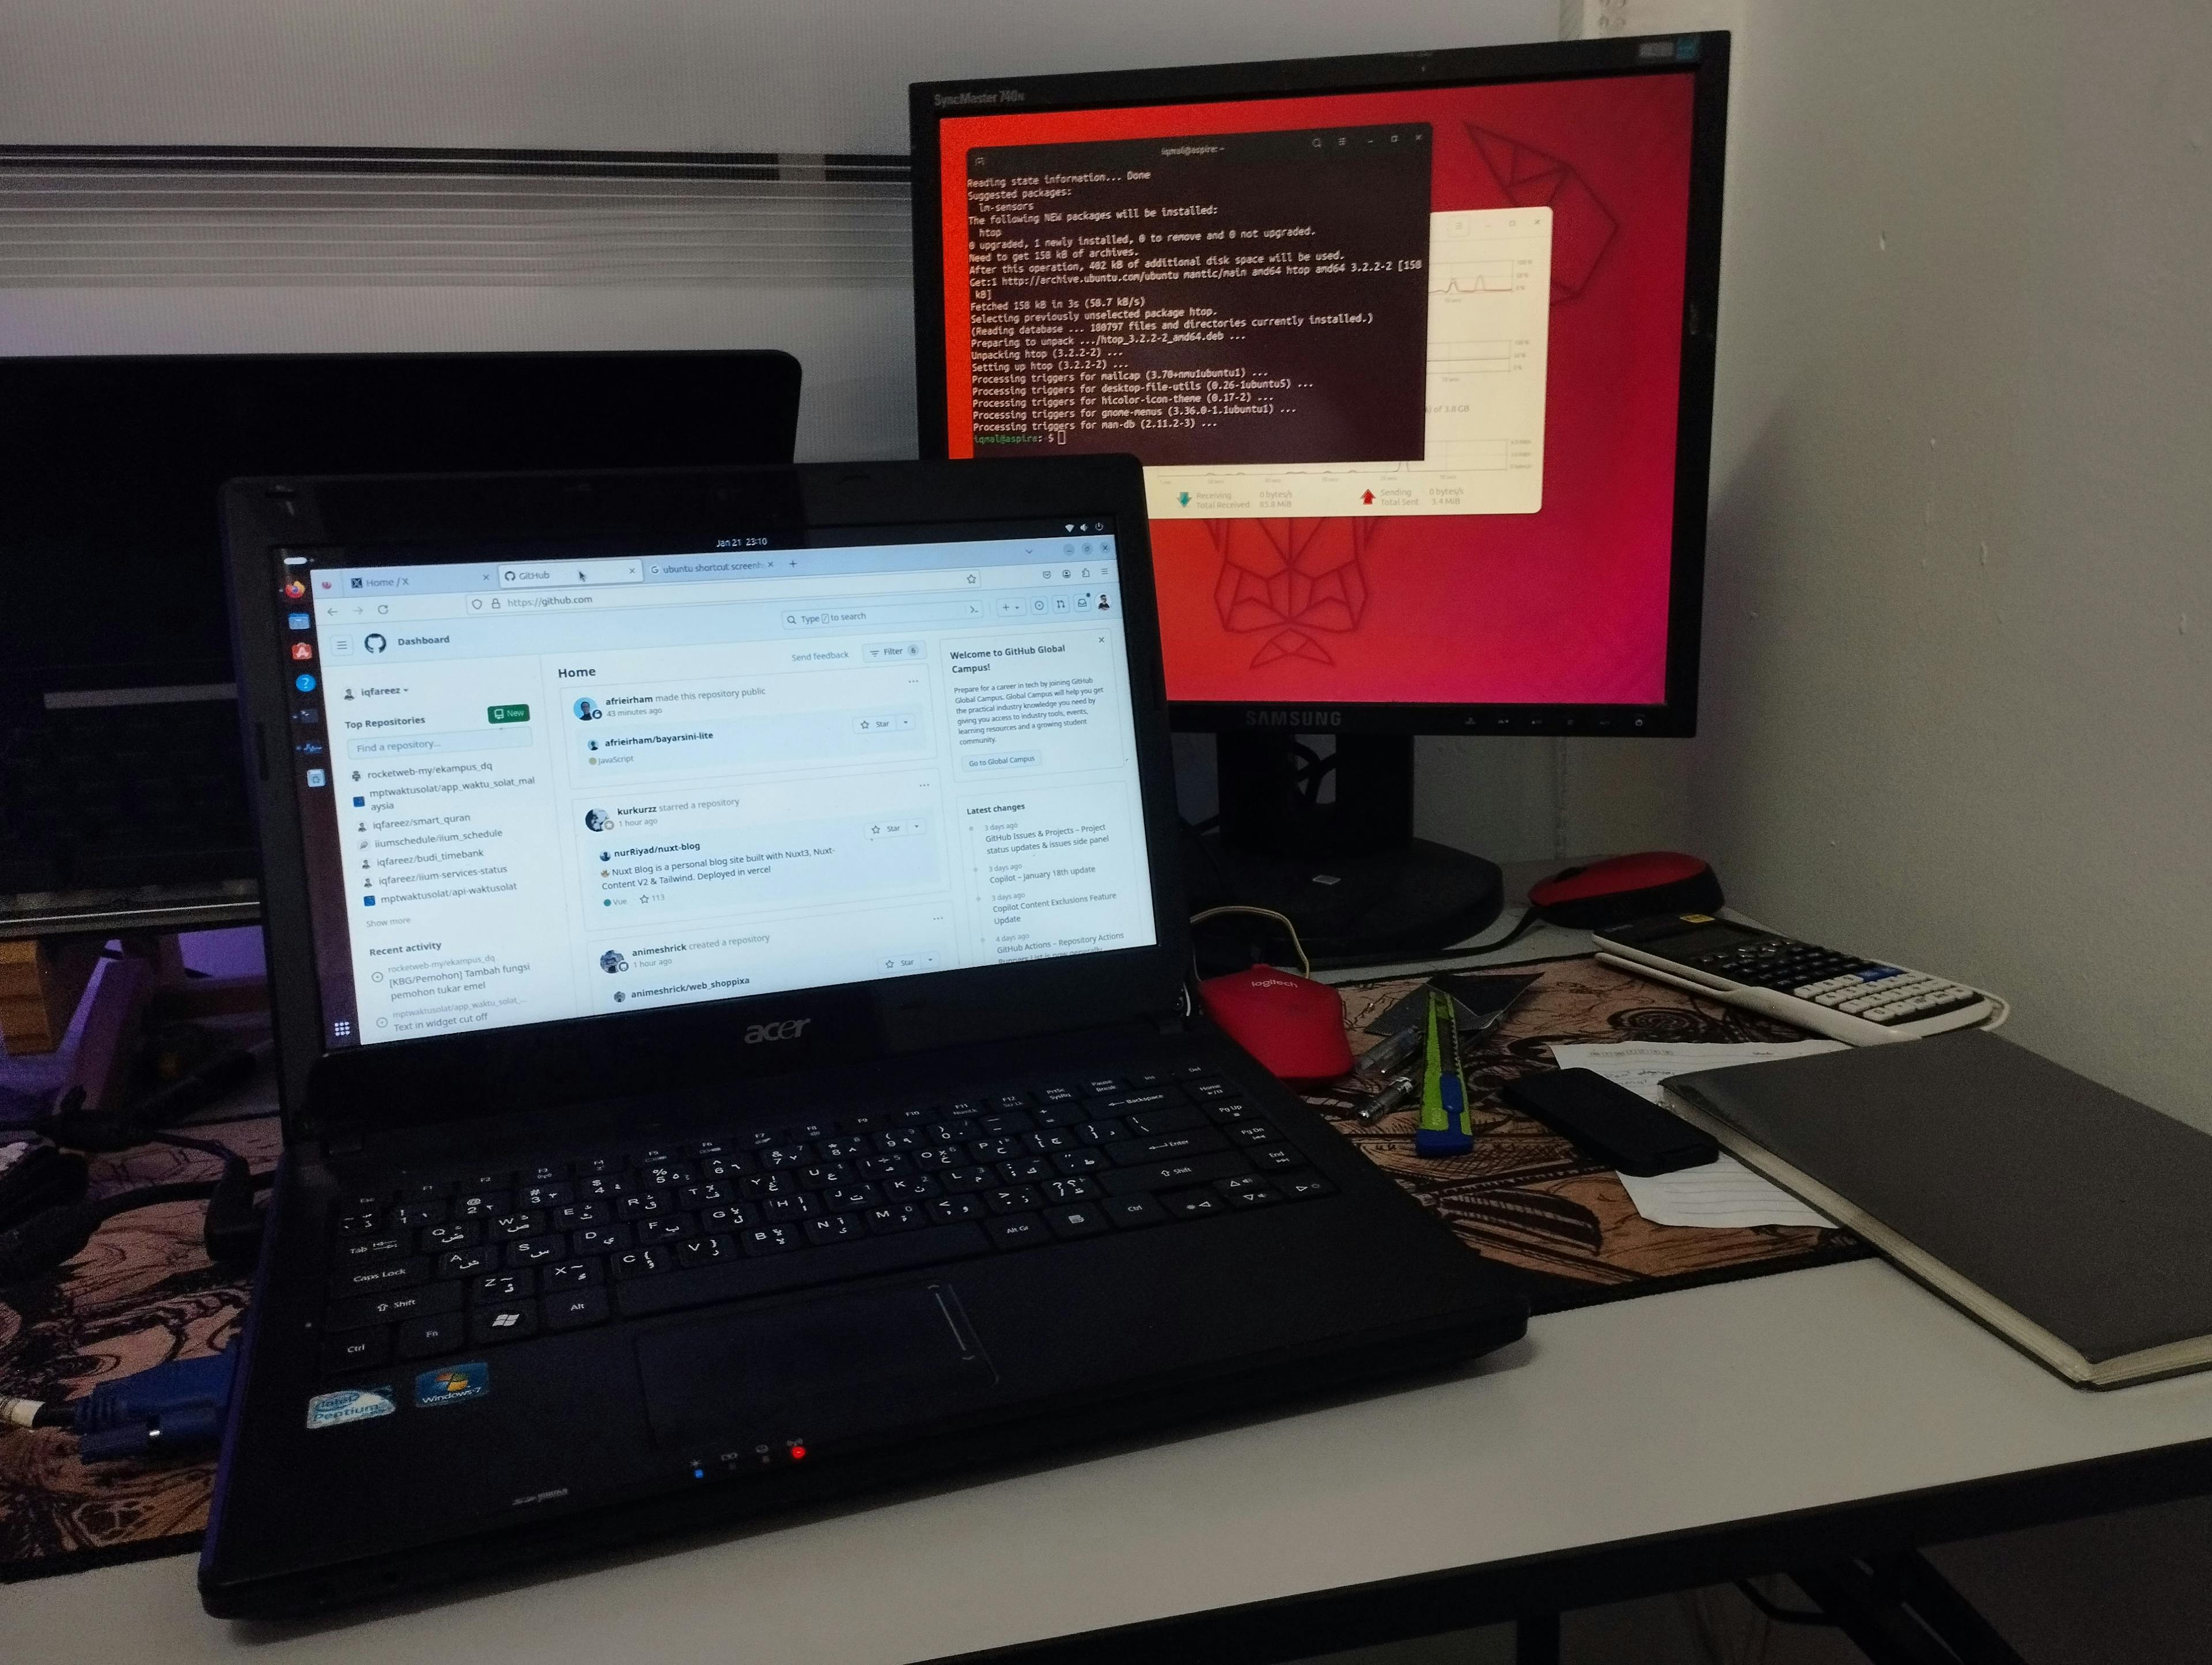
This part is straightforward and I've done this thing before. First, head to the Ubuntu Desktop site to download the ISO to another computer. Get a USB stick (8GB minimum) to flash the ISO using Balena Etcher or Rufus.
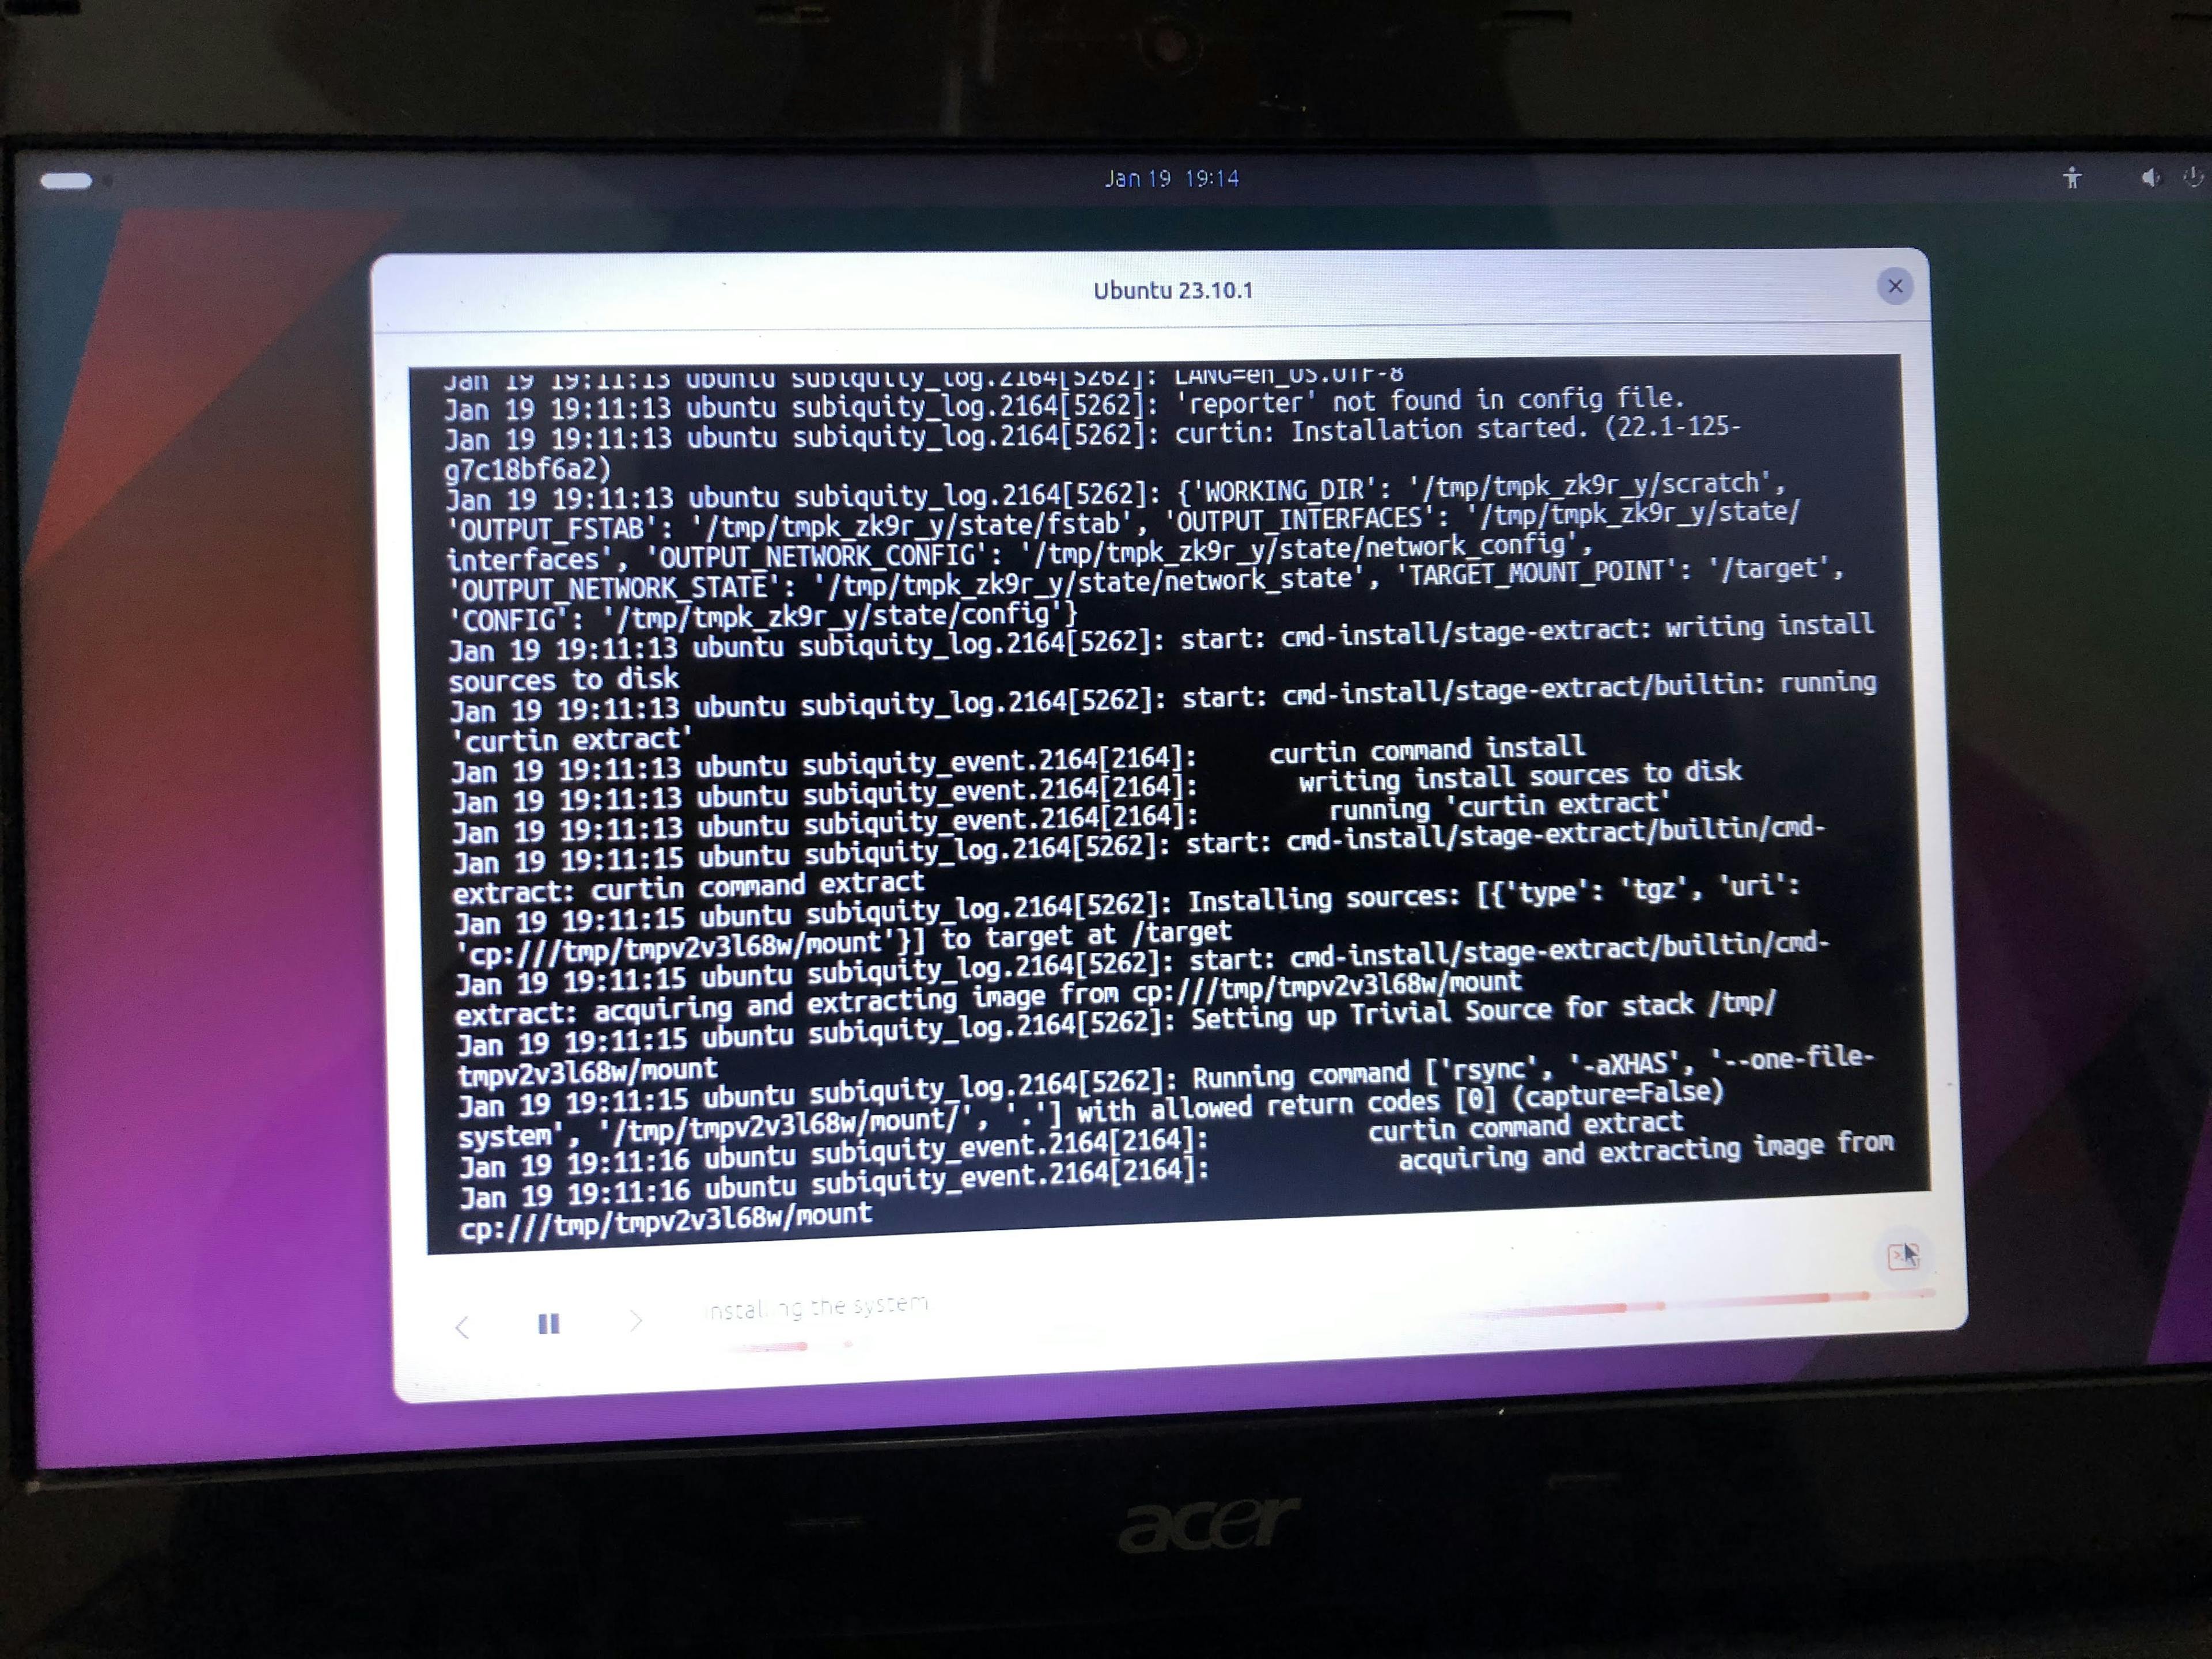
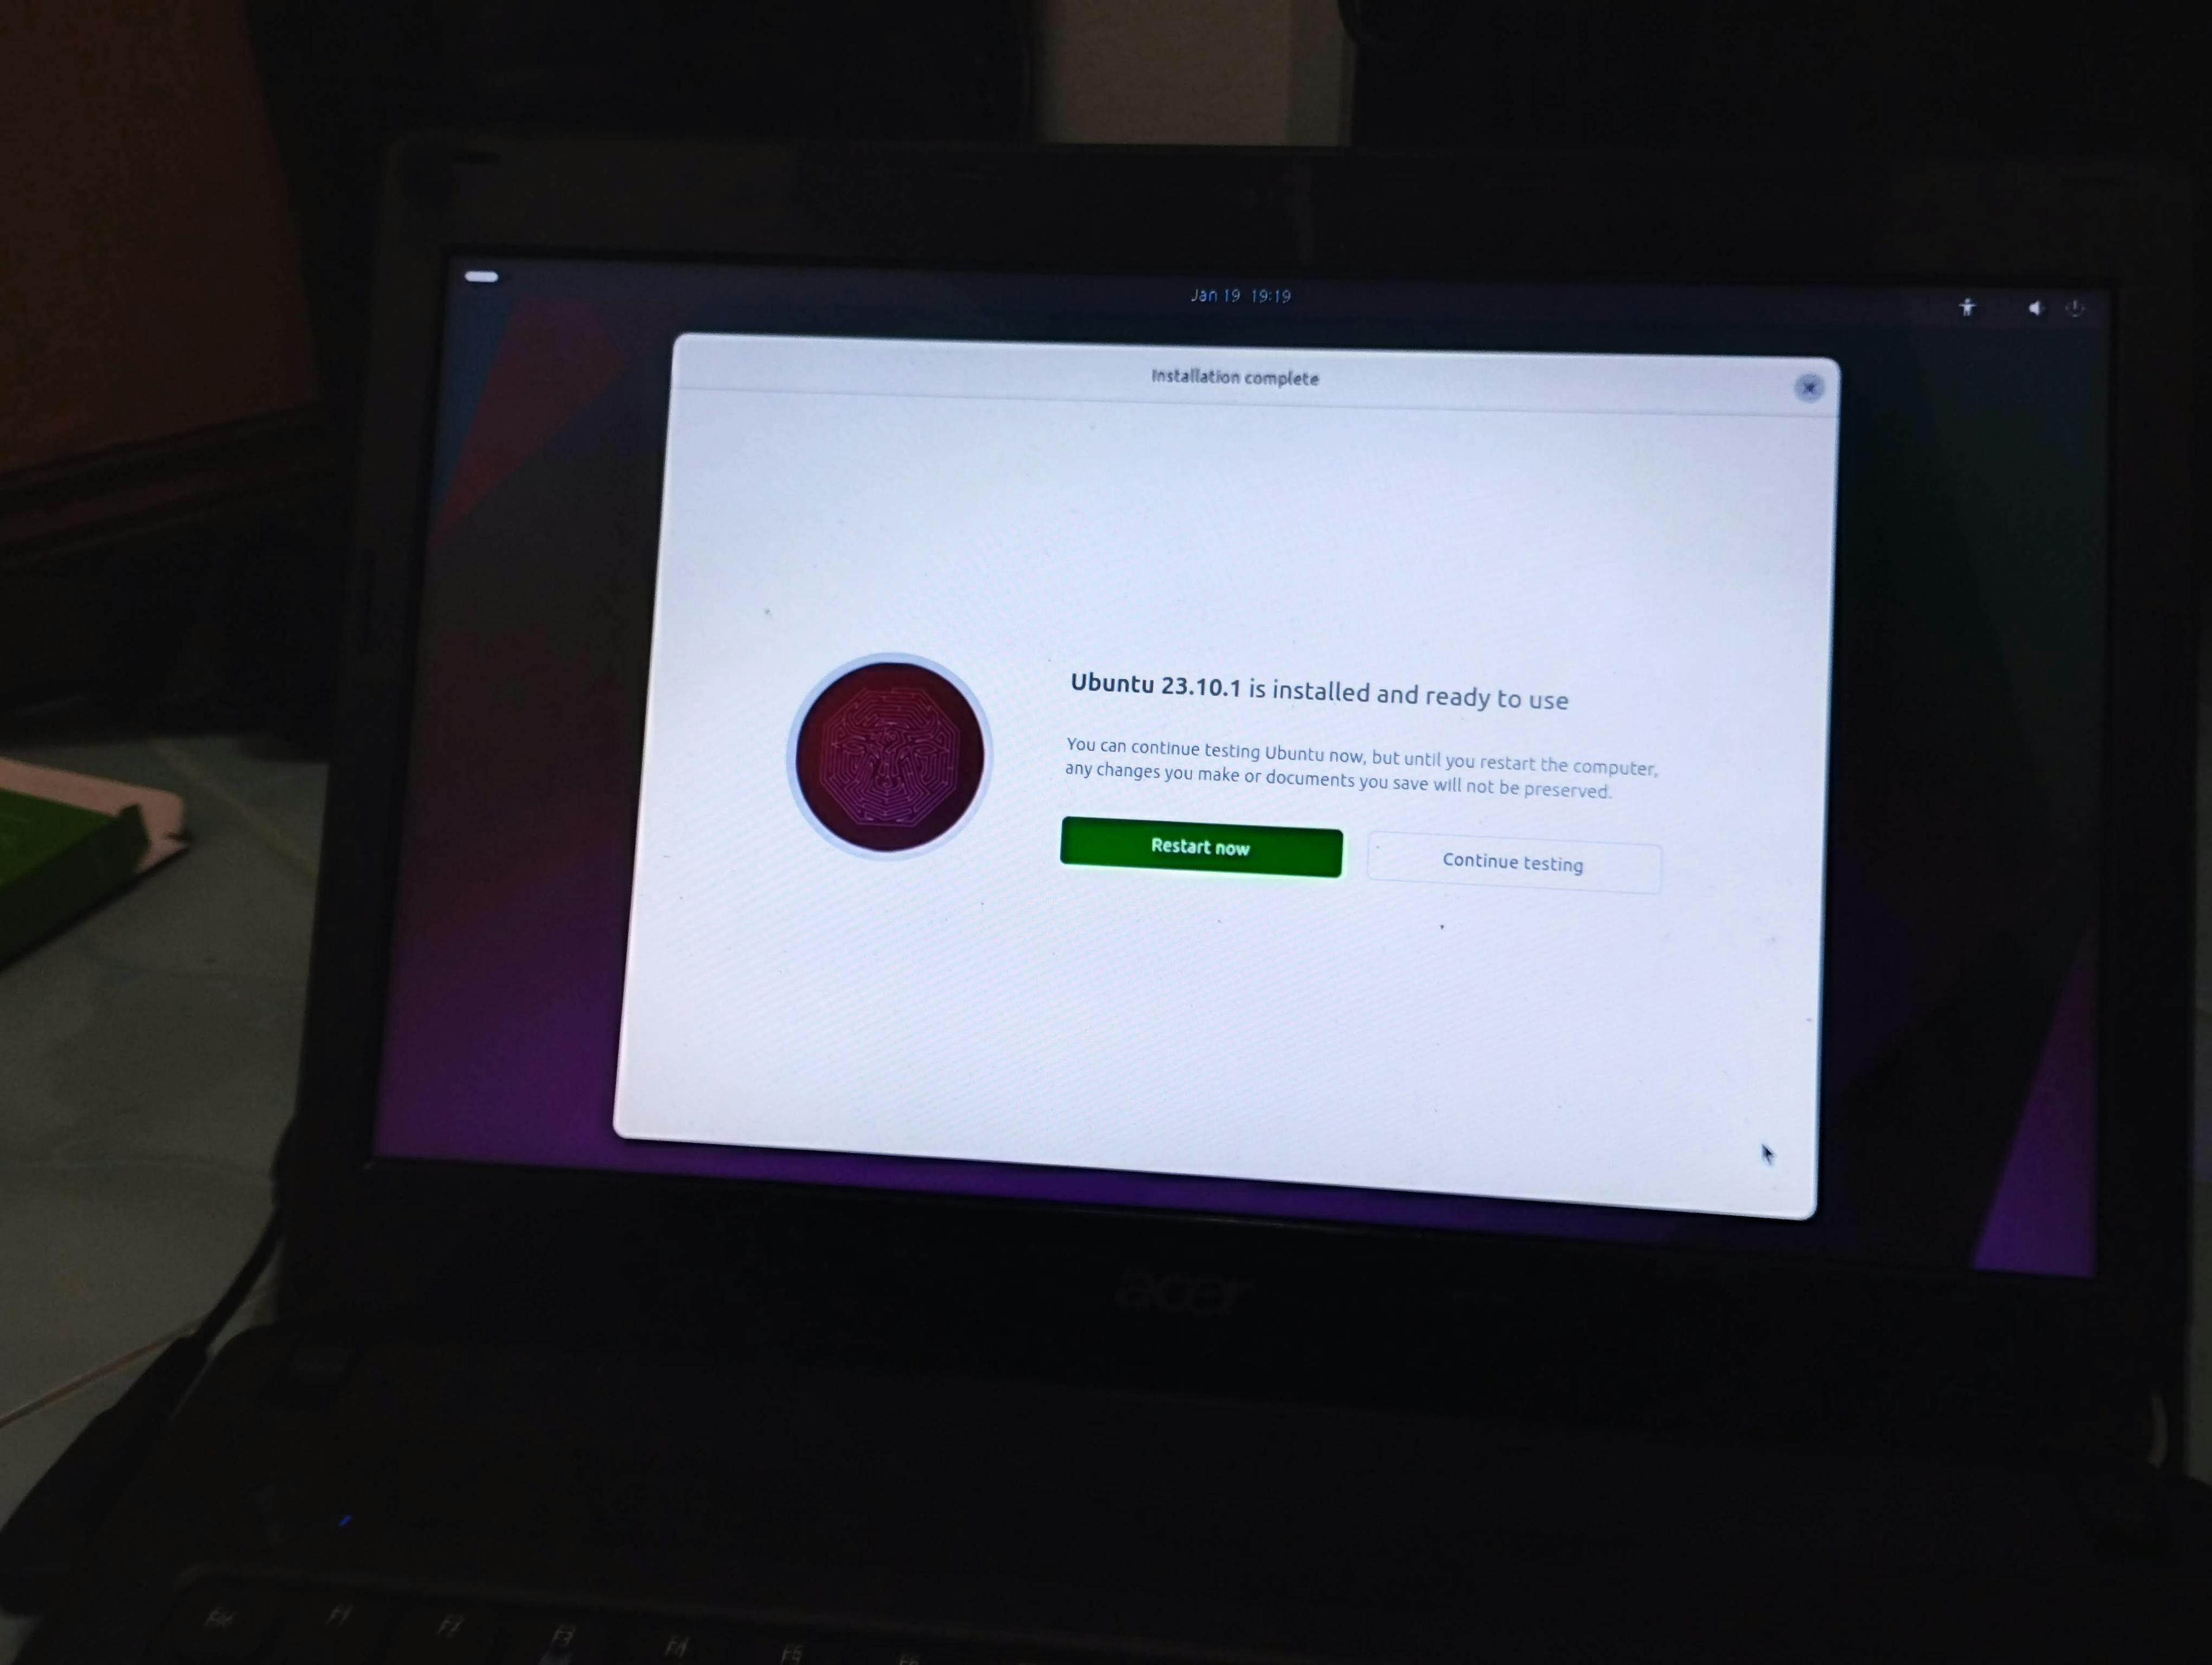
Plug the USB stick into the laptop and boot it up. Press F2 to enter the BIOS menu (depends on your laptop manufacturer). Reorder the boot priority to USB first. Save and exit. The laptop will boot to the USB stick. After this point, just follow the Ubuntu installation wizard.
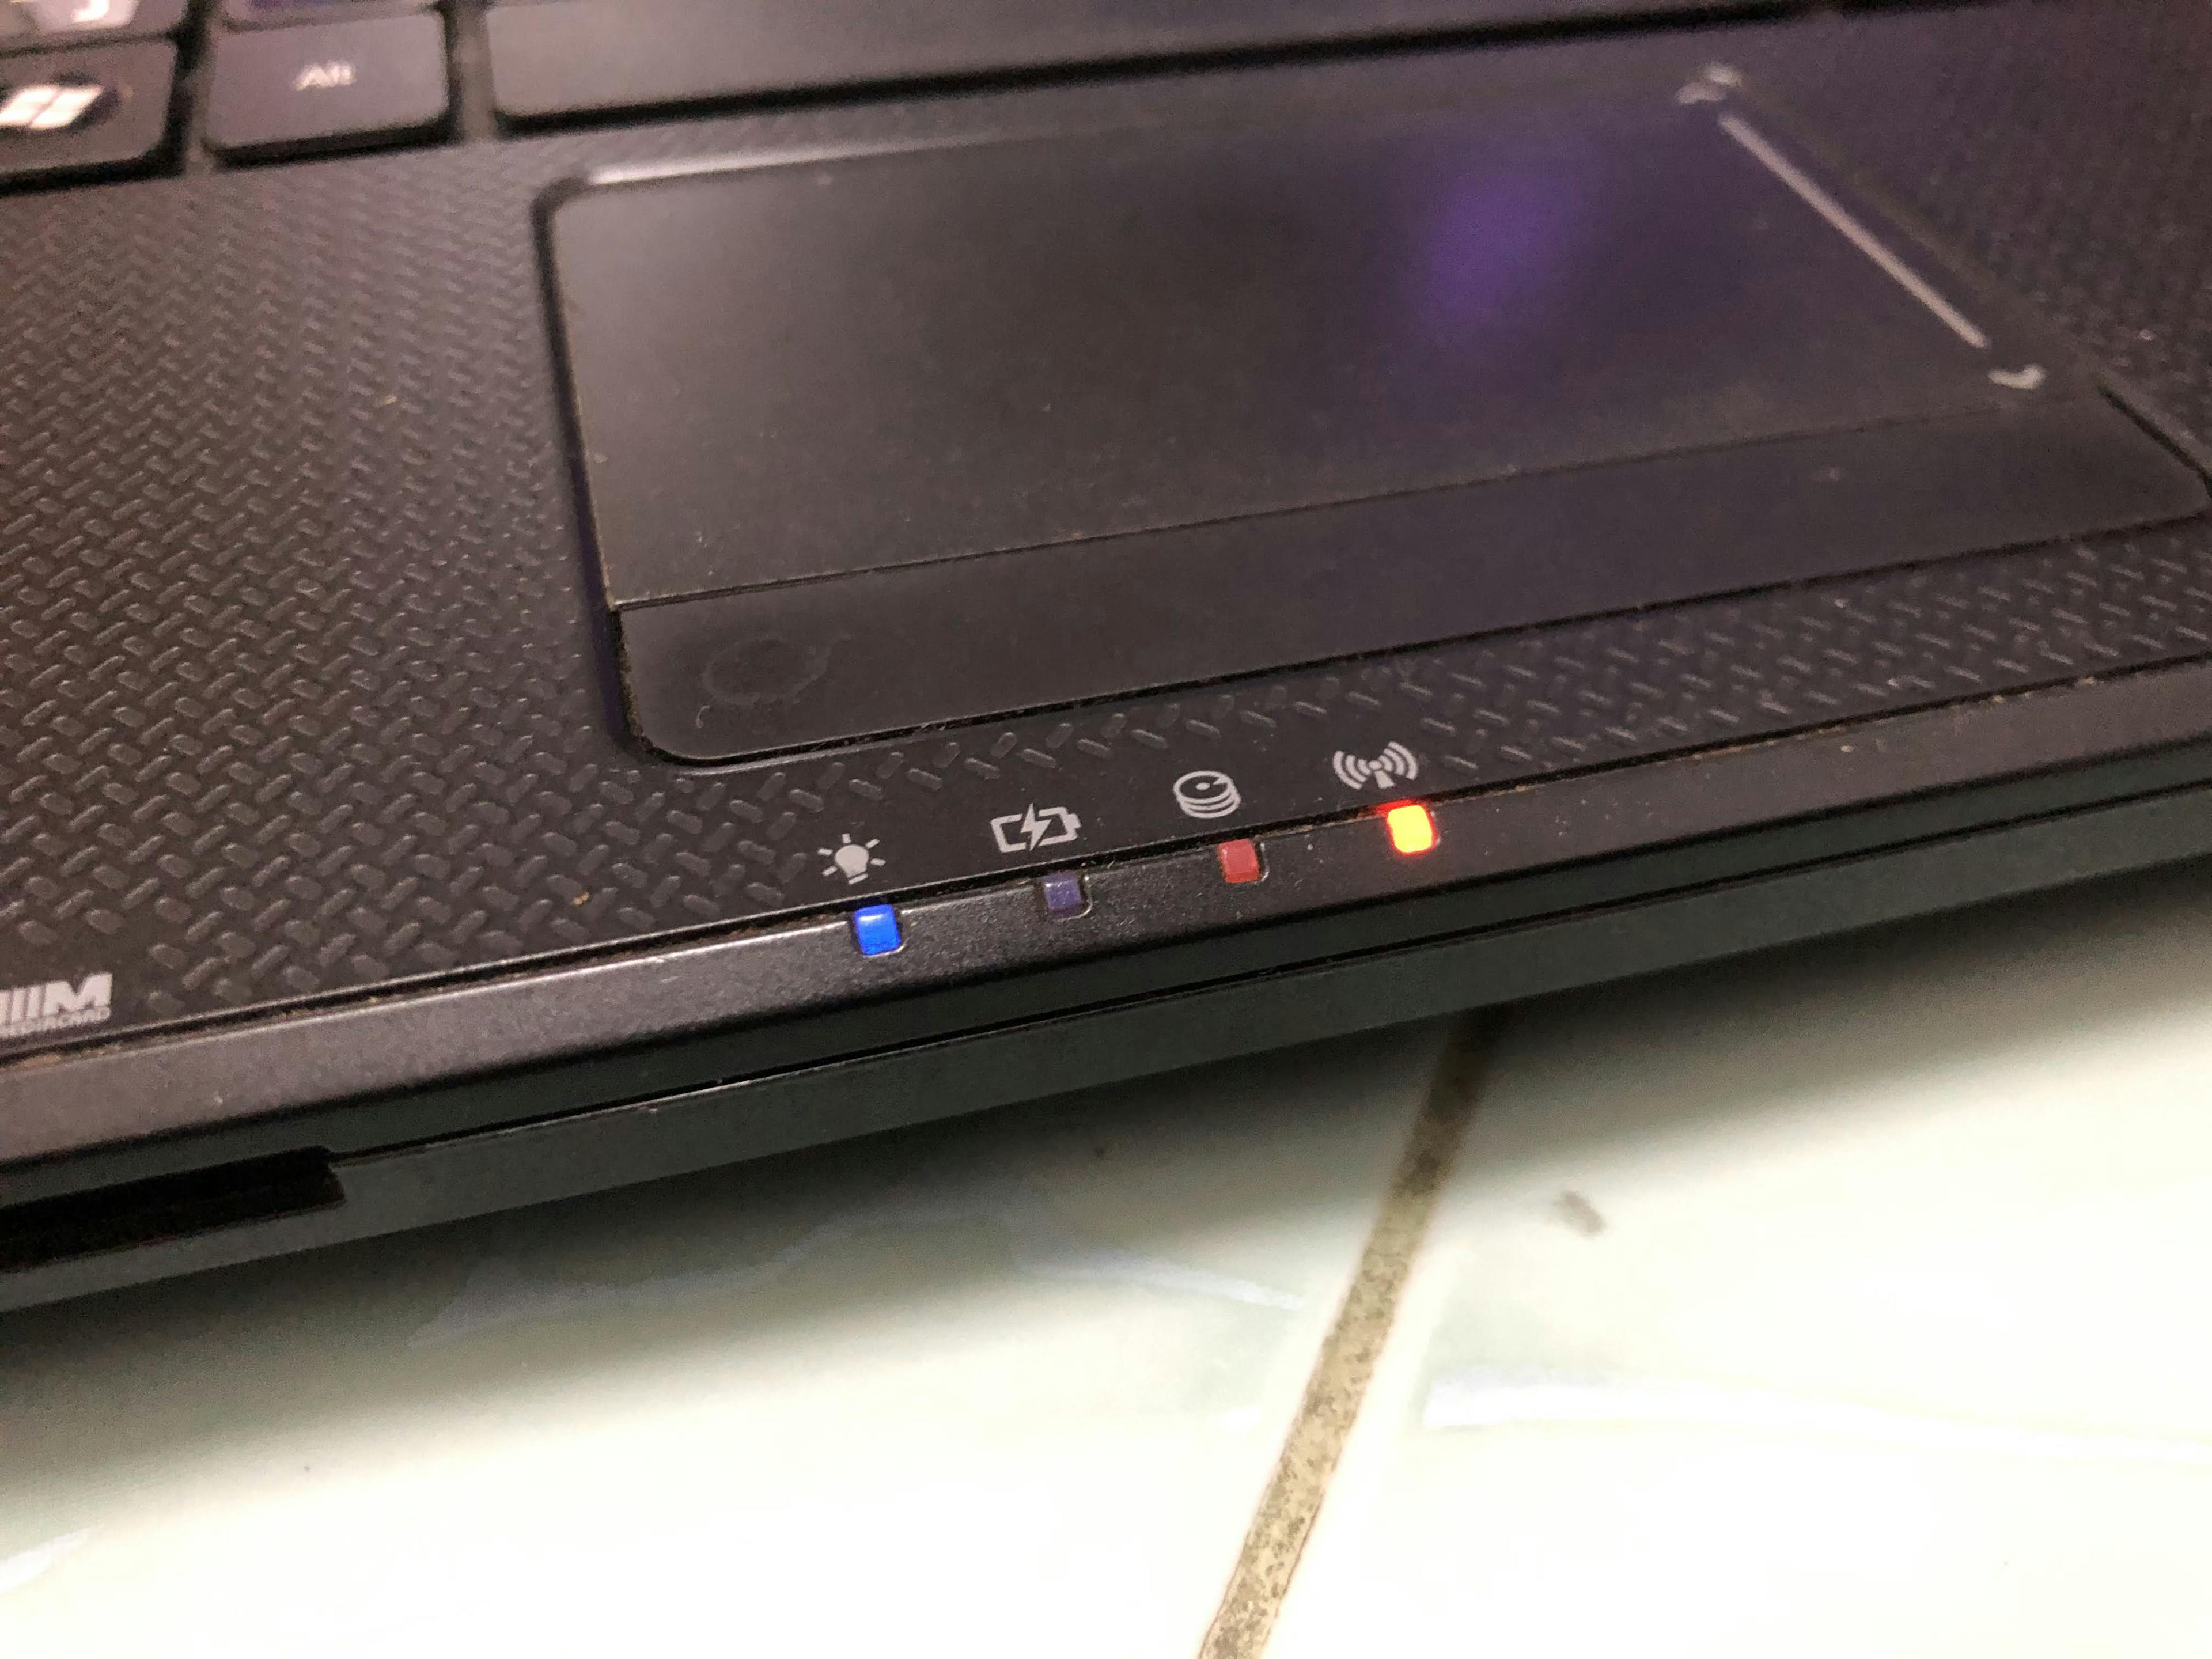
Unrelated, but I do miss when laptops have LED status indicators.
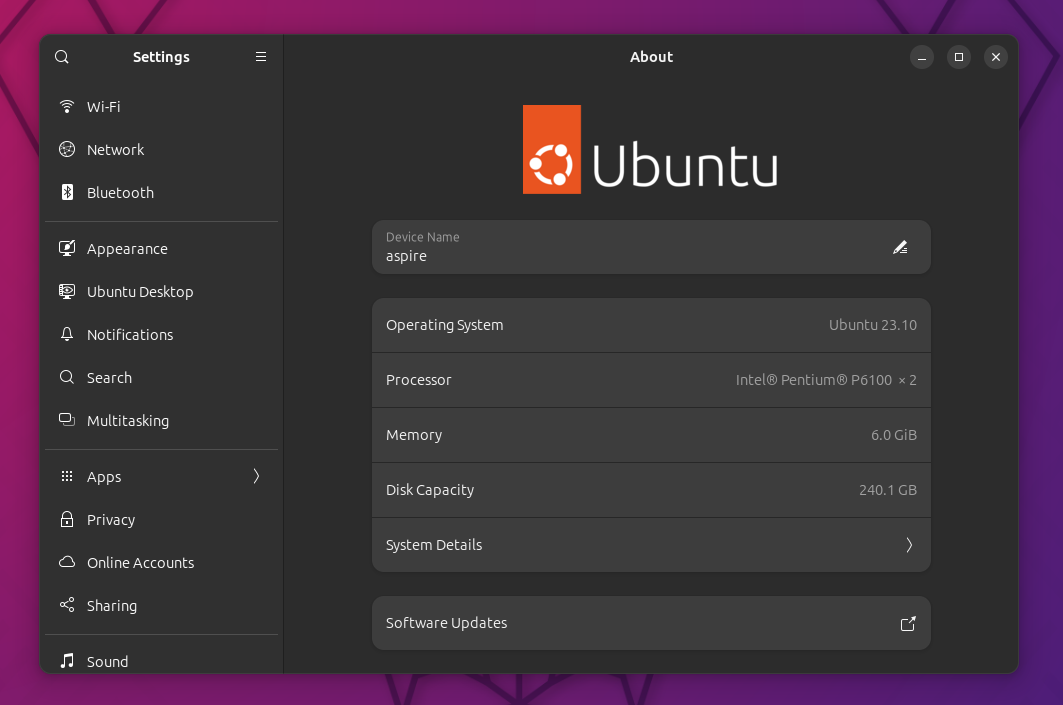
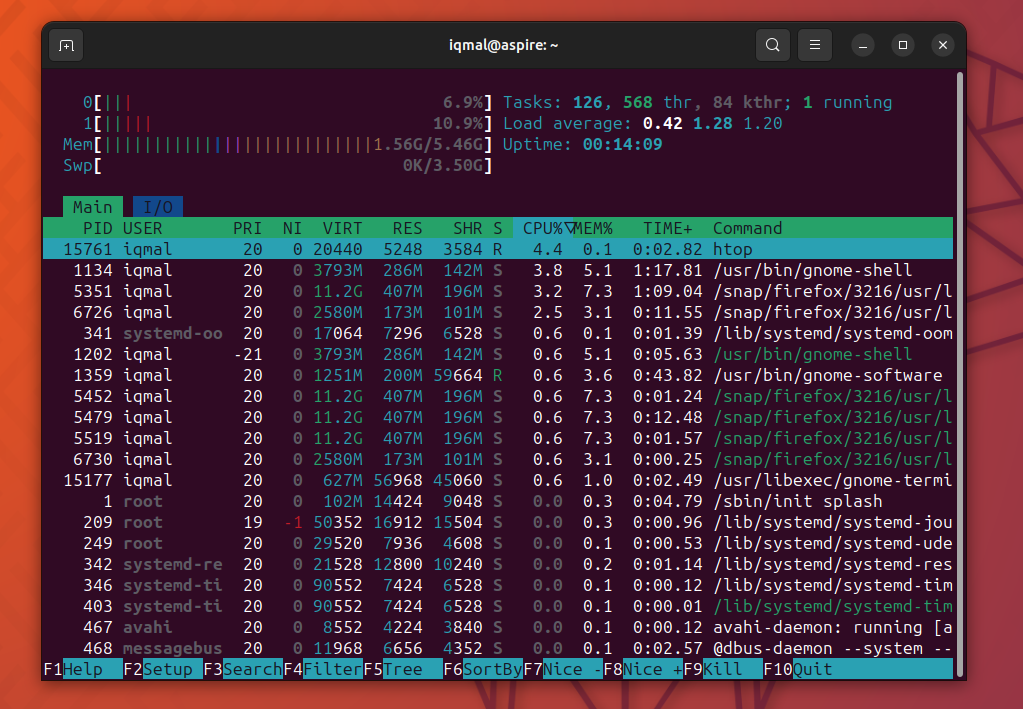
After a few restart processes, I finally can interact with the system. Below is the System Information and Activity Monitor.
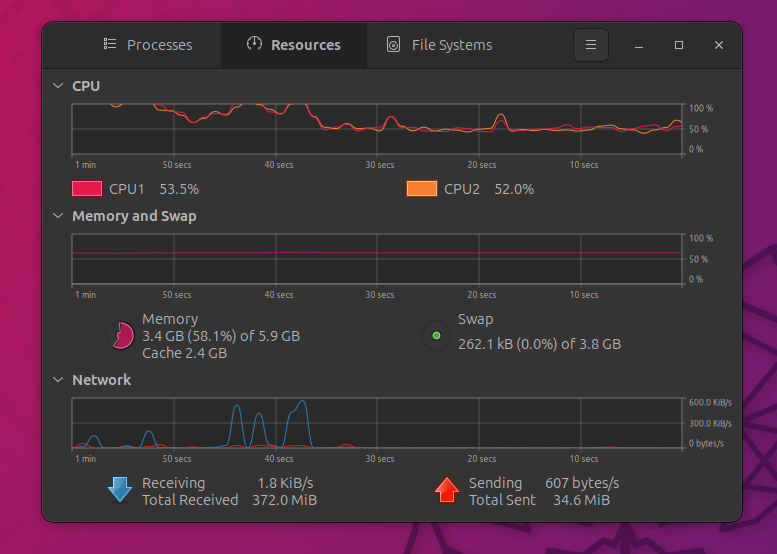
I tried to install Mission Center software. But it seems like it is having some issues with my laptop.
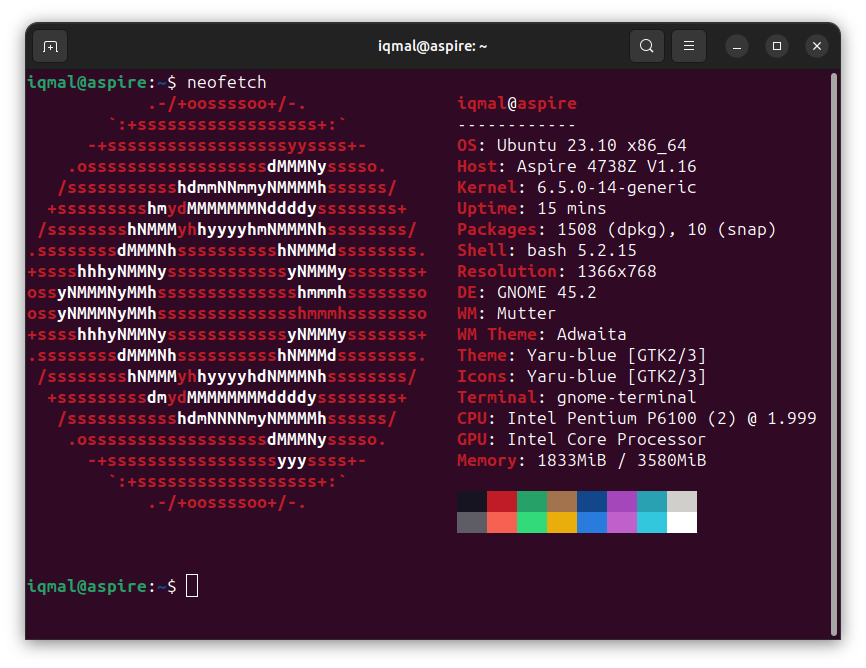
Like every time I do with Linux systems; Installing htop and neofetch. Also, using the terminal makes me look smart 😎. Haha just kidding.
I also tried coding on it. Because I'm too lazy to install Vscode, git etc. locally, I just use GitHub Codespace to code. It works great! The keyboard is still very pleasant to type on.
I think that's it for this post. Thank you for reading until the end. If you also happen to have an unused old laptop lying around, why not try to upgrade it? It is fun and you will learn a lot. You can give it to your siblings or children for light use. Or save it for yourself as an emergency laptop.
Tata!
Some issues I've encountered
- The laptop won't boot if I swap the position of the RAM installment. I had this arrangement initially; top = old, bottom = new. Solution: Swapped the position, it boots. The reason is unclear.
- Before the new RAM arrived, I attempted to install Ubuntu first. But the installer got stuck and was not responsive. I even tried to use Ubuntu Safe Graphics mode, the responsiveness improved, but the screen froze multiple times. Perhaps 2GB RAM is too little for the installer to run smoothly. Solution: Wait patiently for the new RAM to arrive.