Android Wireless Debugging
- Published on
- Last modified on
- Updated:
In this tutorial, I'll show you how to enable and set up Android wireless debugging using the command line for Android 11 or later (Android 10 and lower use a slightly different method, which is not covered in this post).
Prerequisites
- adb (Android Debug Bridge)
- Host machine (Windows, Linux, macOS, etc.)
- Physical Android device
- Wifi network
You can download adb from Android Studio or as standalone installations. Make sure the path to the adb executables is added to PATH. For example, on Windows, adb binary is located at C:\Users\<User>\AppData\Local\Android\Sdk\platform-tools\adb.exe.
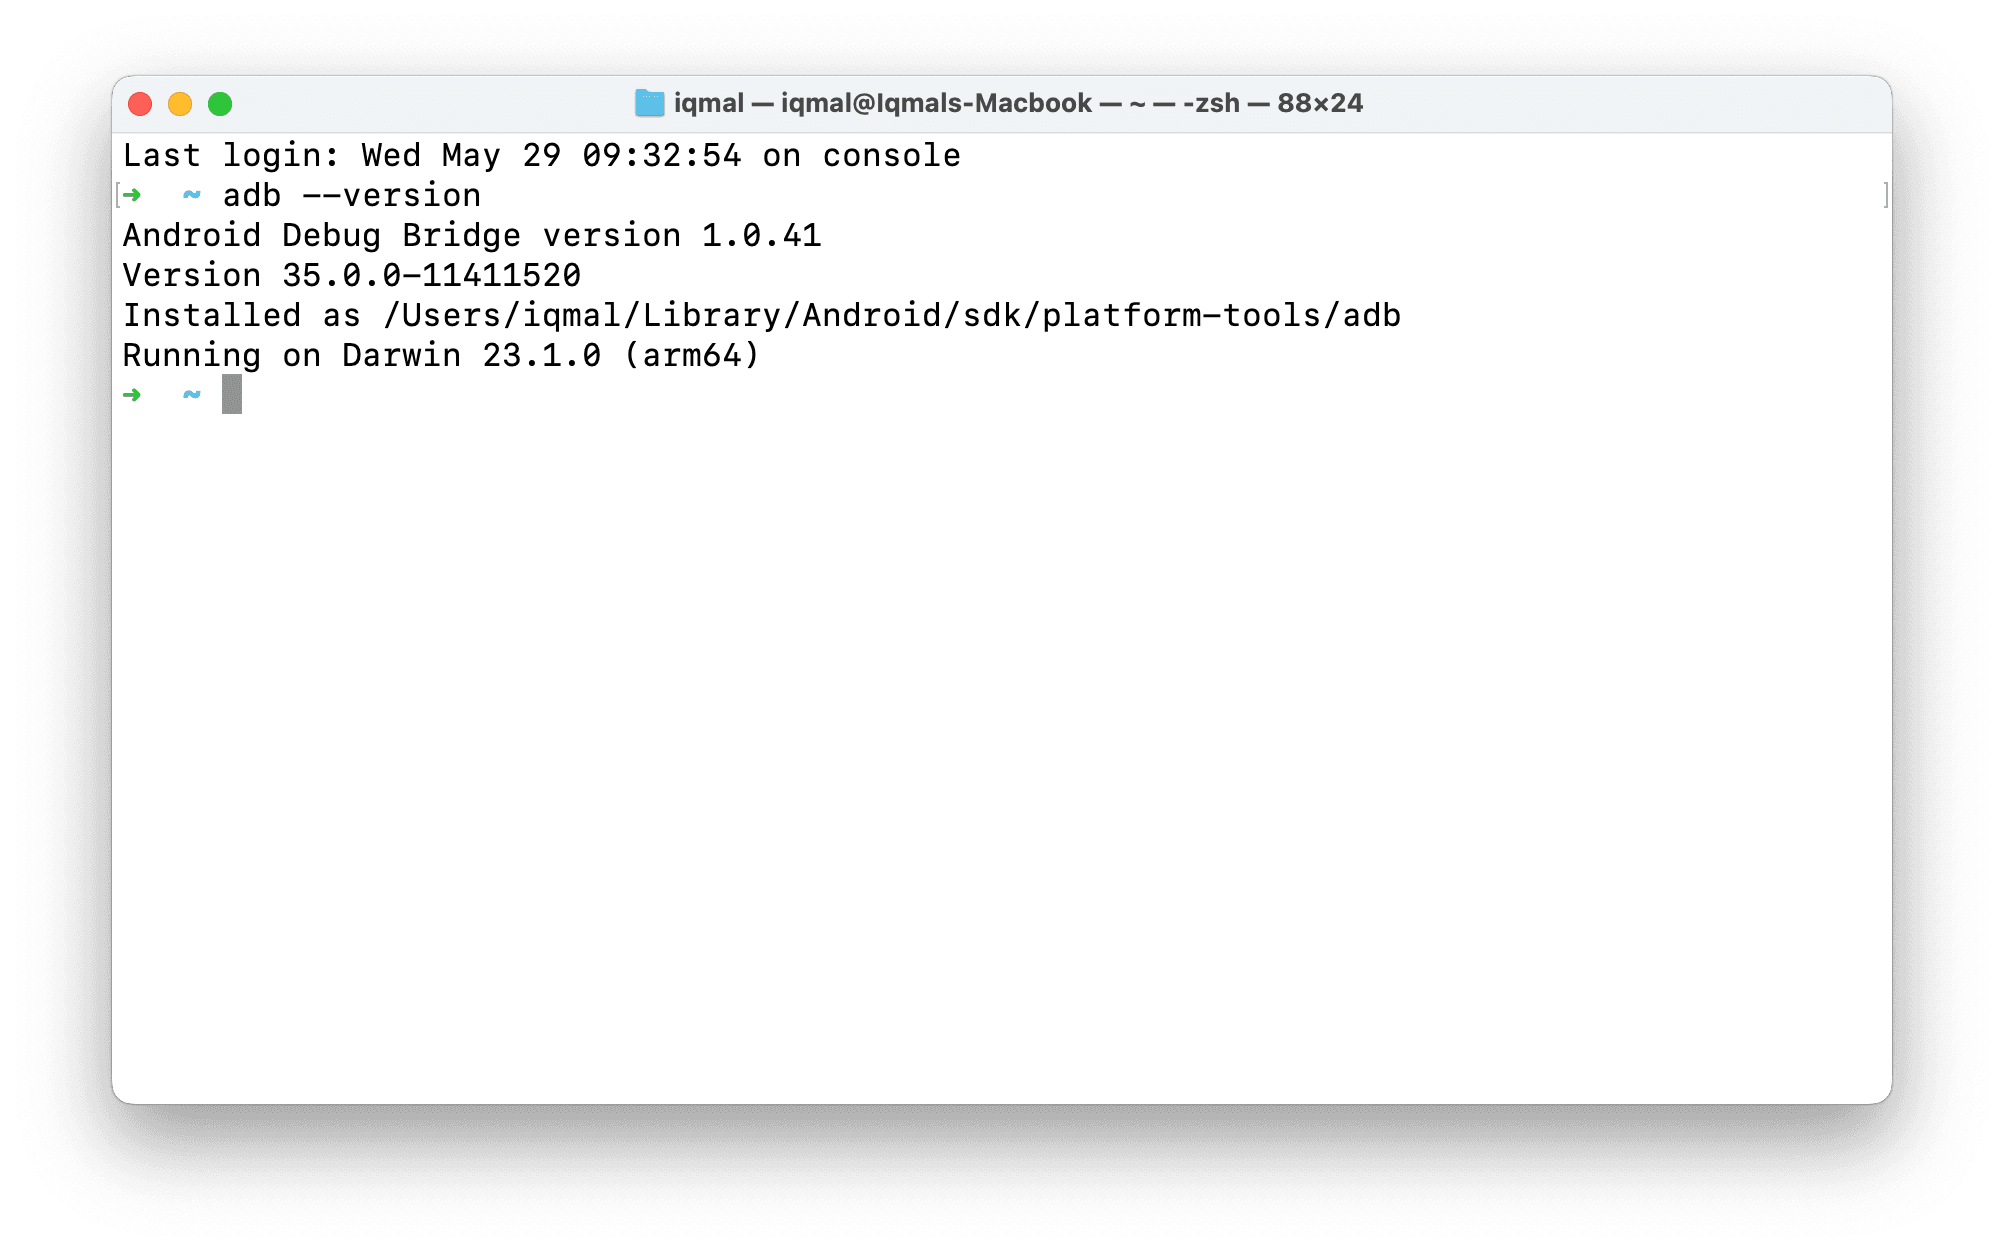
You can check if adb is ready by running the command adb --version.
Please enable Developer Options first if you haven't done so. See this guide.
Both the host machine and Android device need to be on the same Wifi network.
warning
Some public/university wifi networks have restrictions and can't be used for wireless debugging.
Pairing
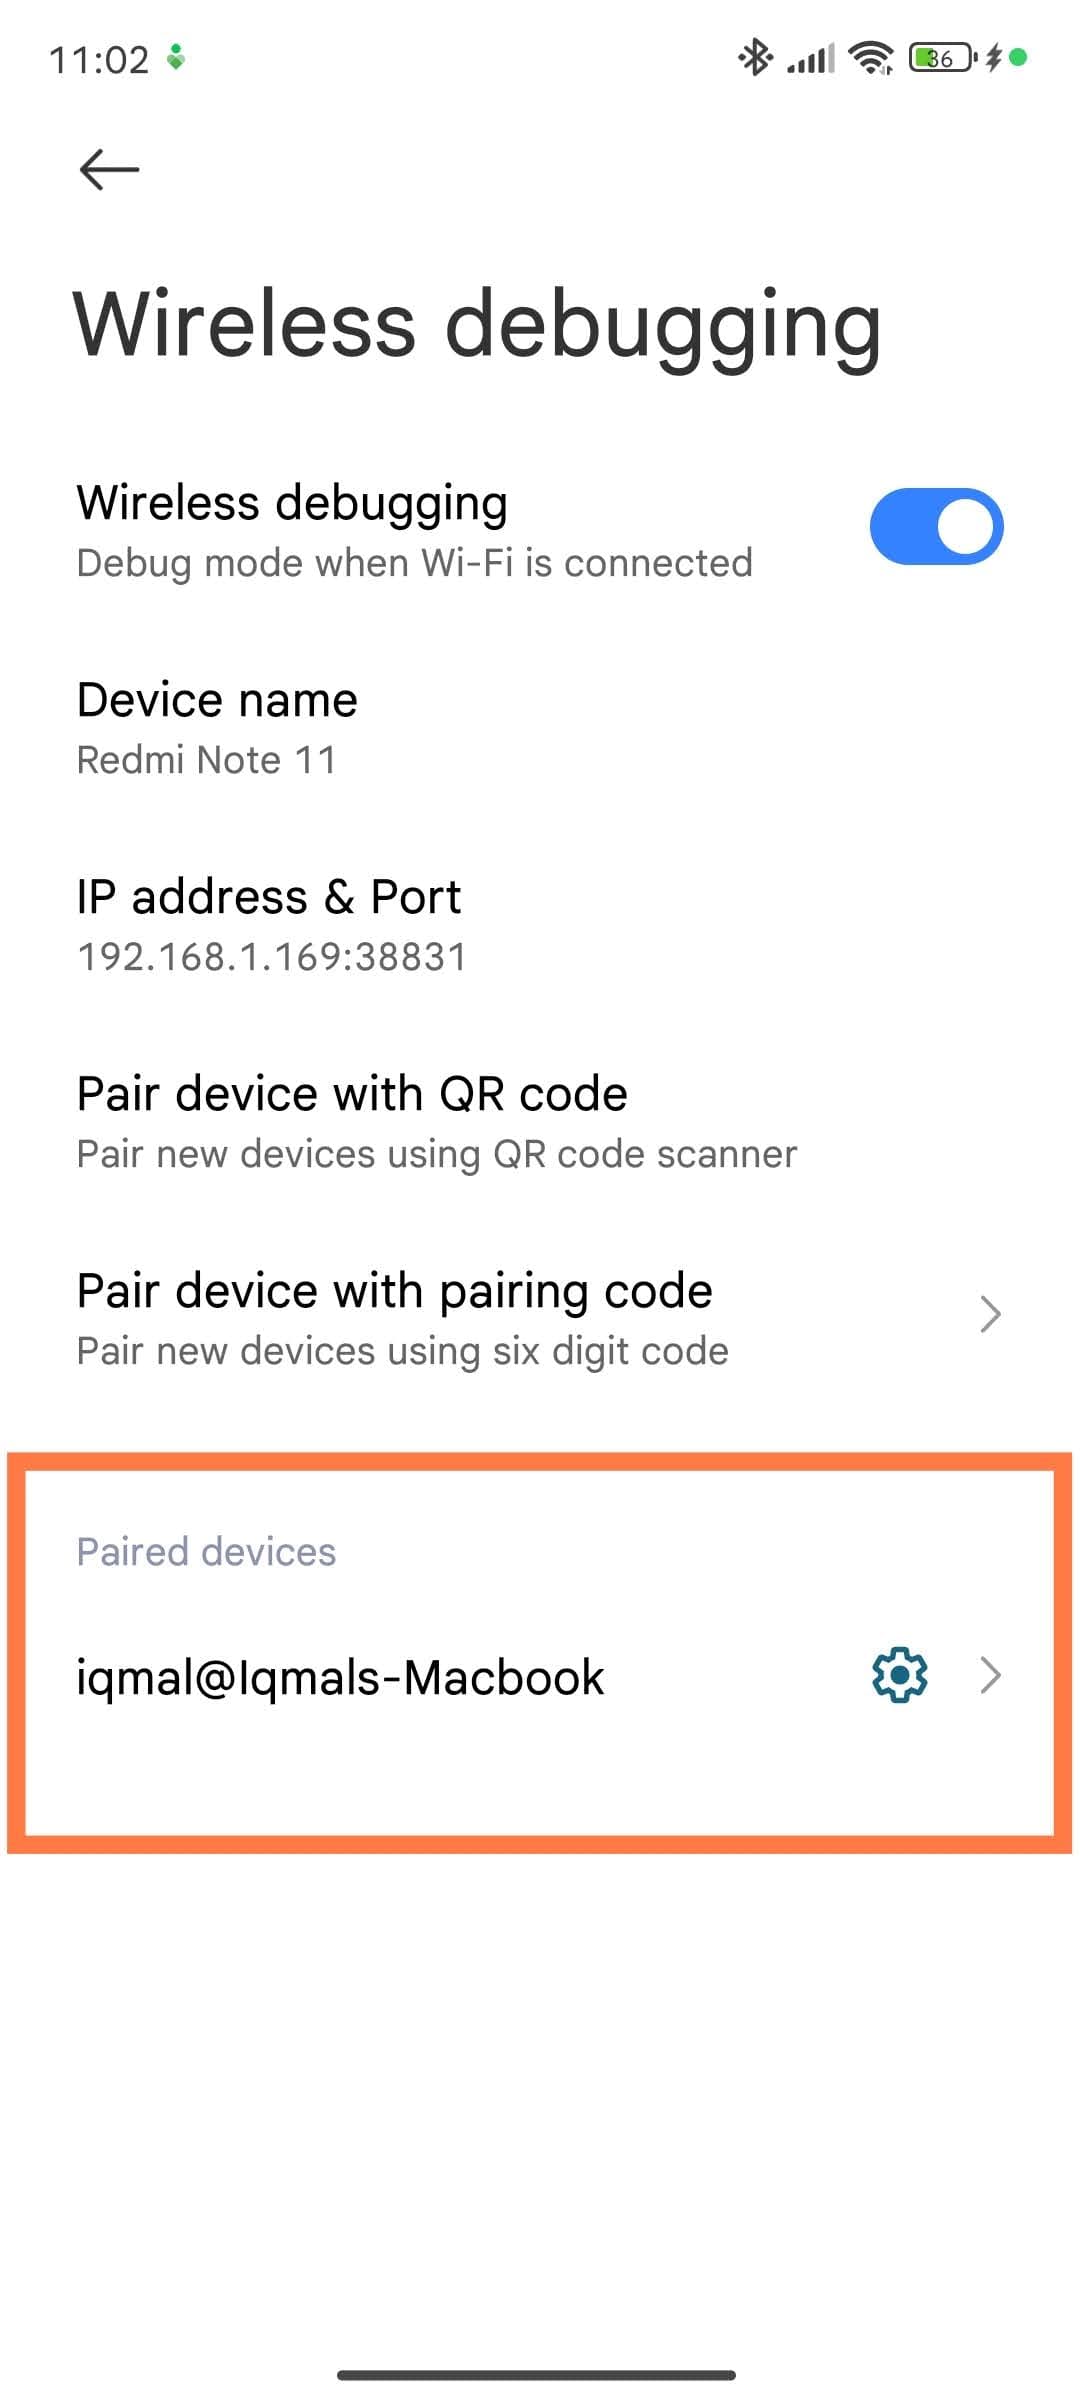
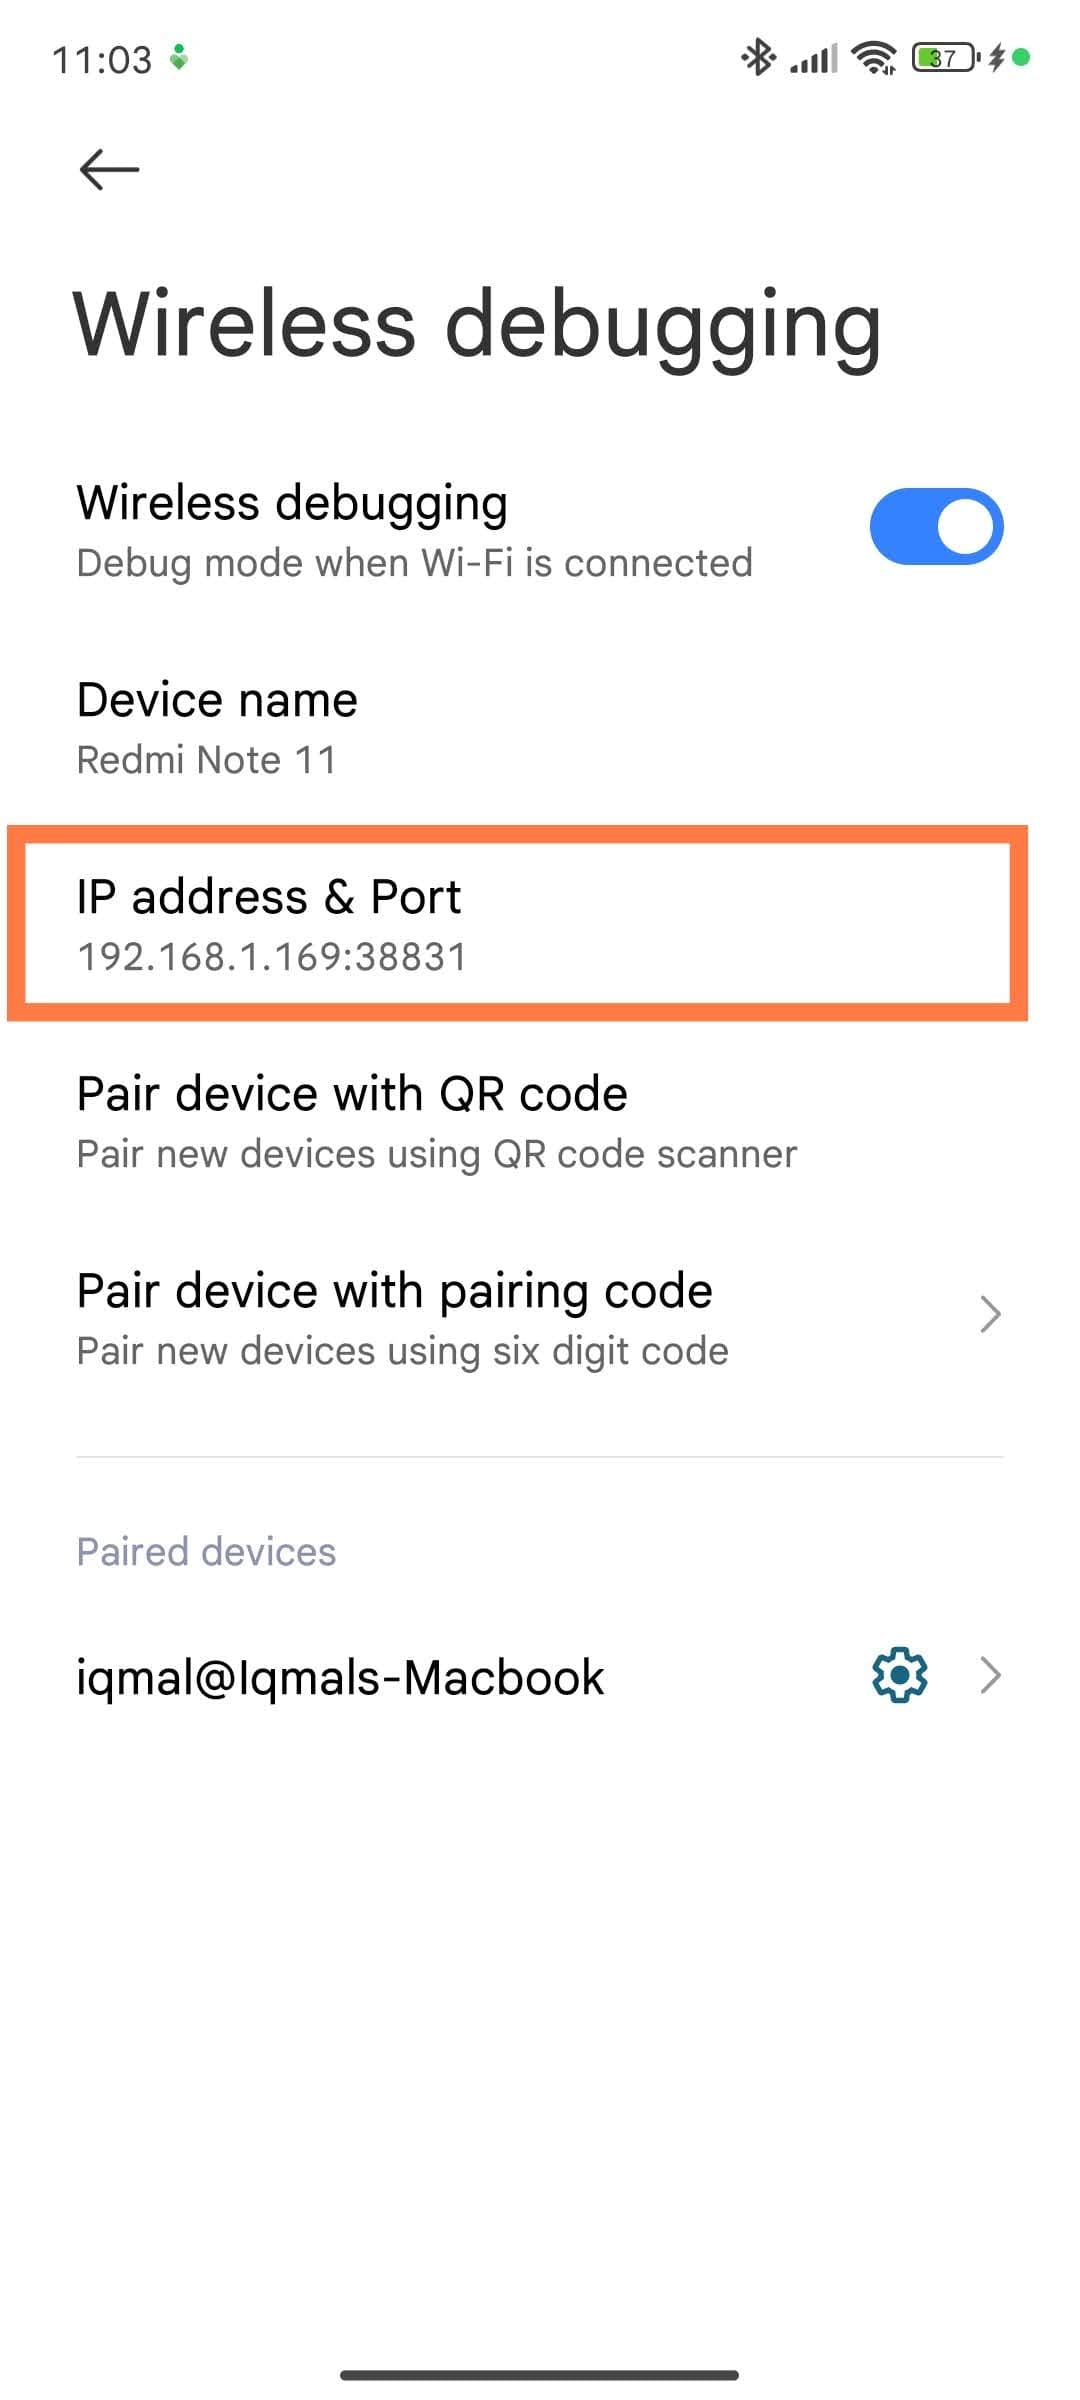
On your Android device, go to Settings > Developer Options. Scroll down and tap on the Wireless Debugging section.
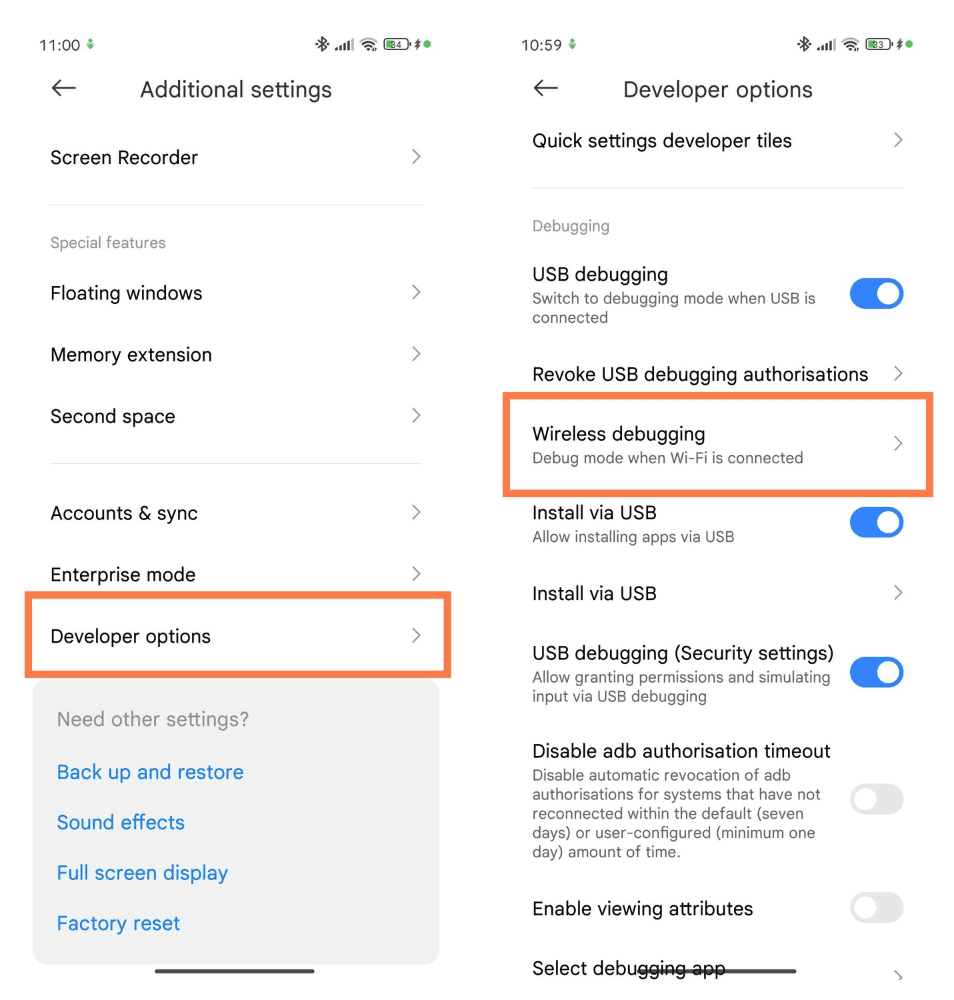
Tap on Pair Device with Pairing Code.
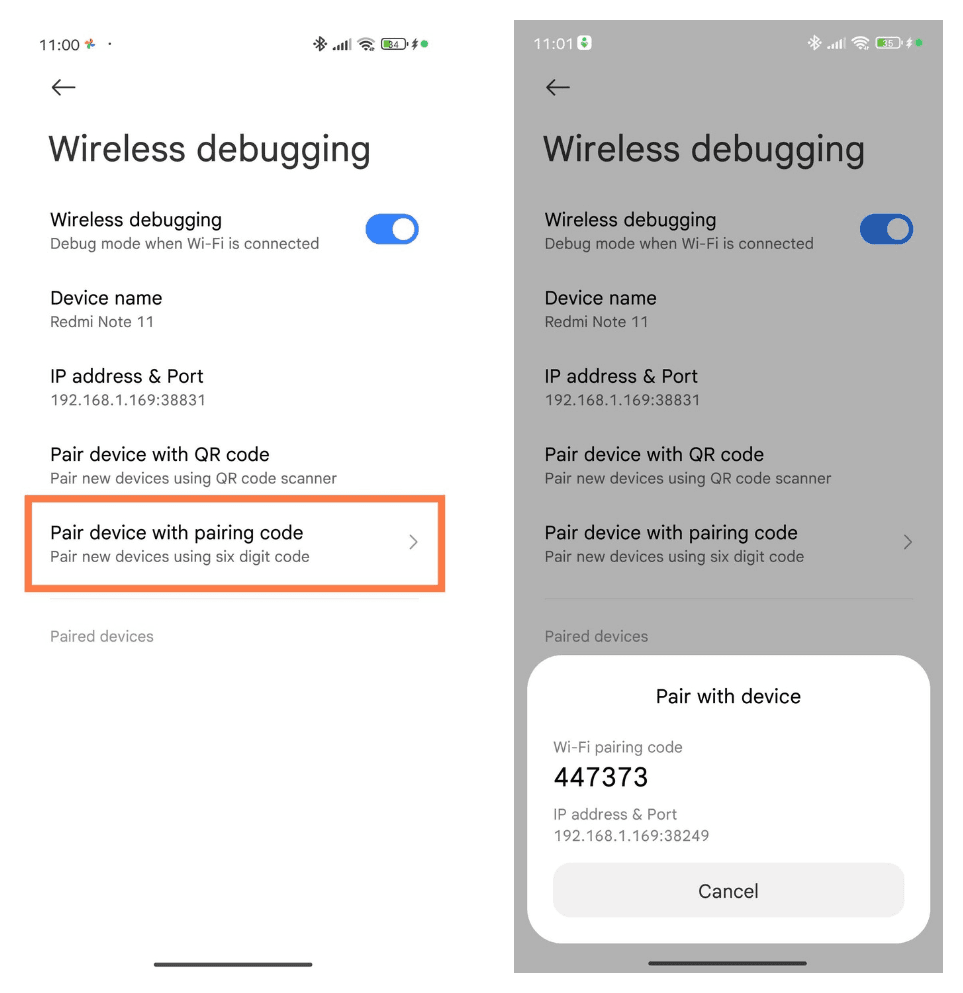
Open a terminal on the host machine. Enter the following command (replace IPADDRESS and PORT with the IP address and port shown on the Android device):
adb pair IPADDRESS:PORT
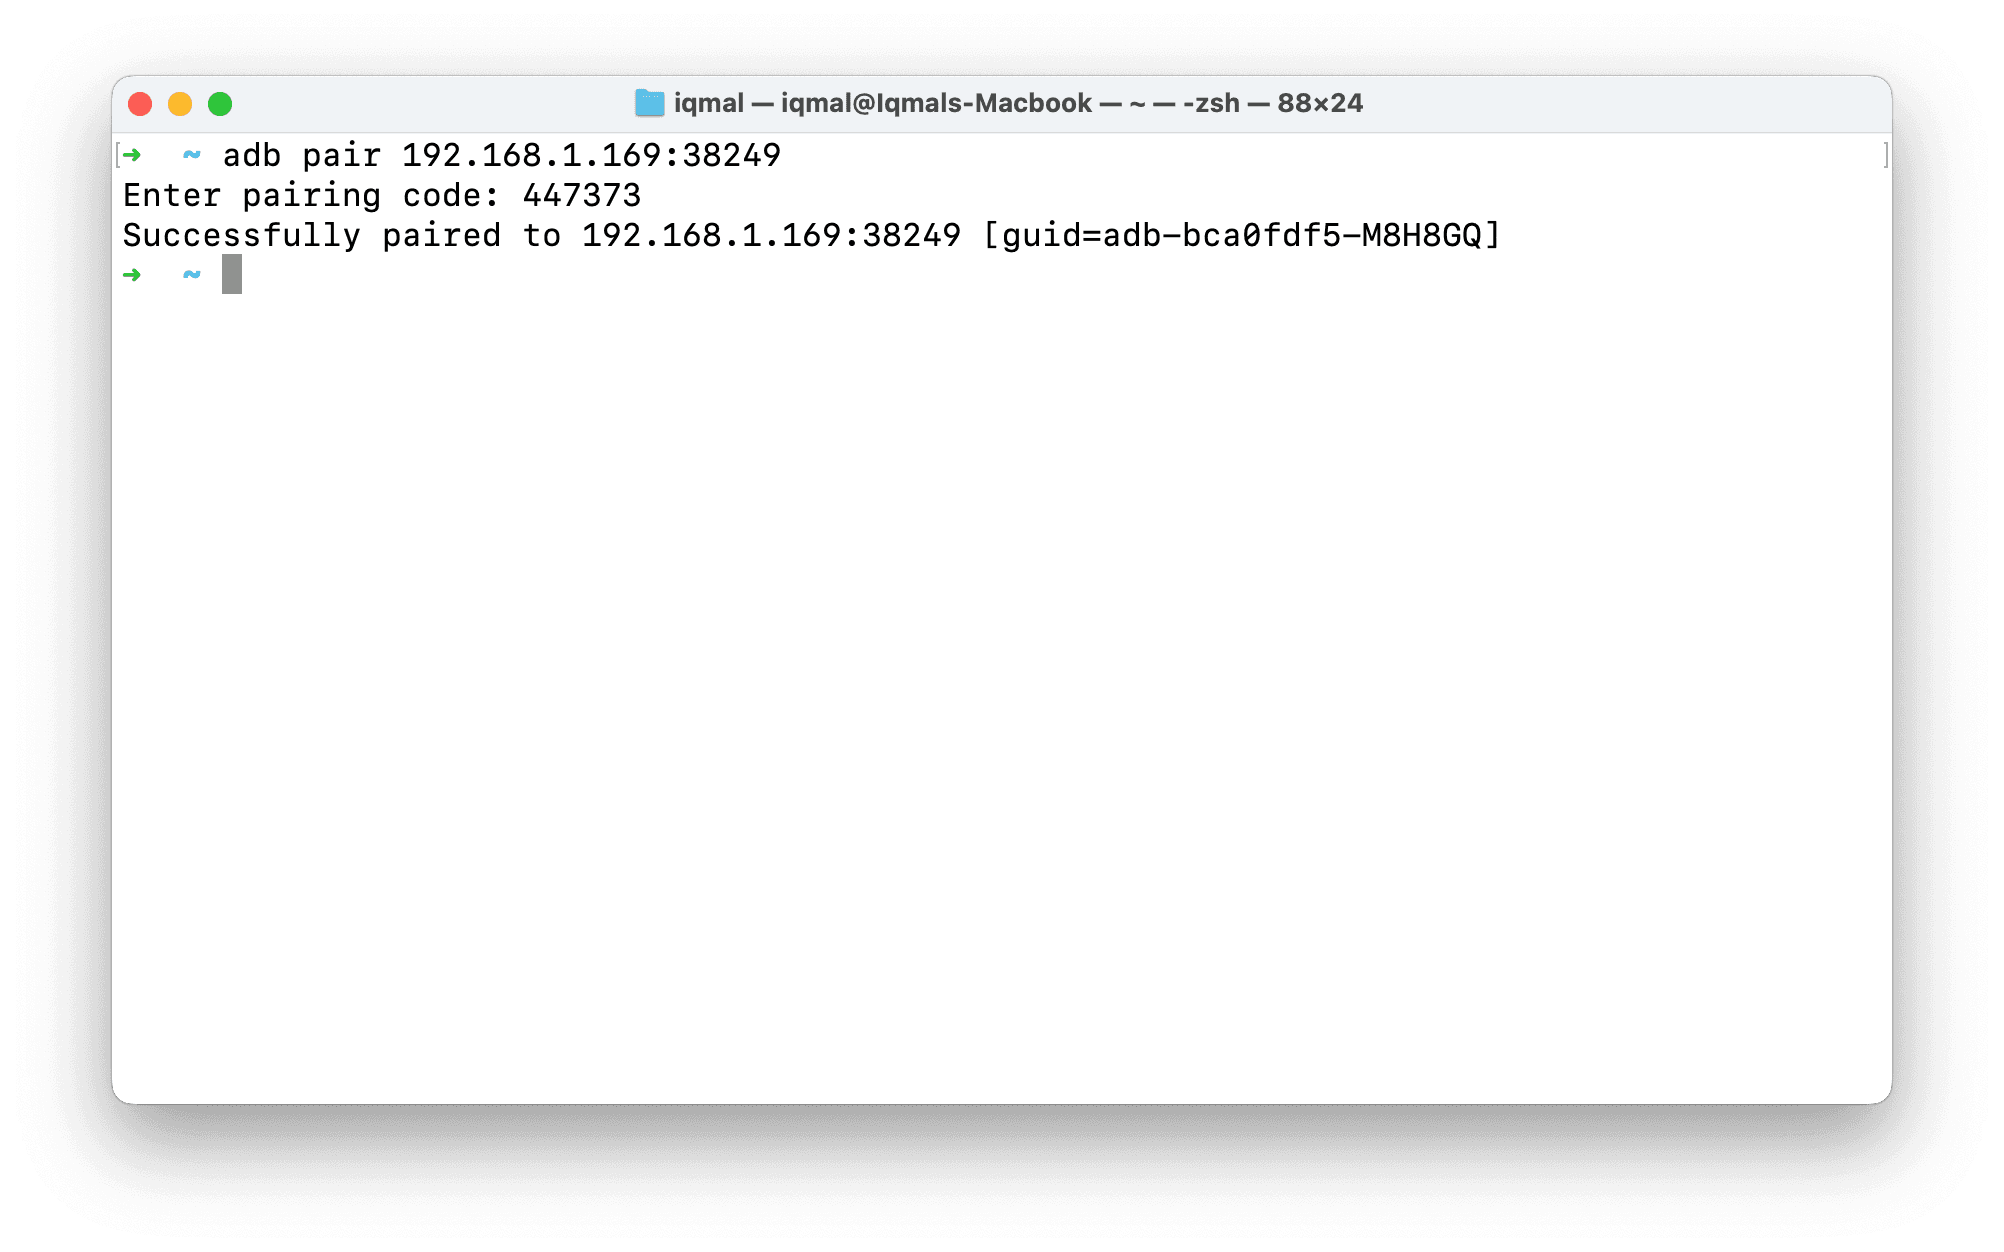
After successful pairing, the host machine will appear in the list of paired devices.
Connect to the device
Whenever you want to connect to the device, use the following command (replace IPADDRESS and PORT with the IP address and port shown on the Android device):
adb connect IPADDRESS:PORT
tip
Check which devices are connected to ADB by running adb devices.
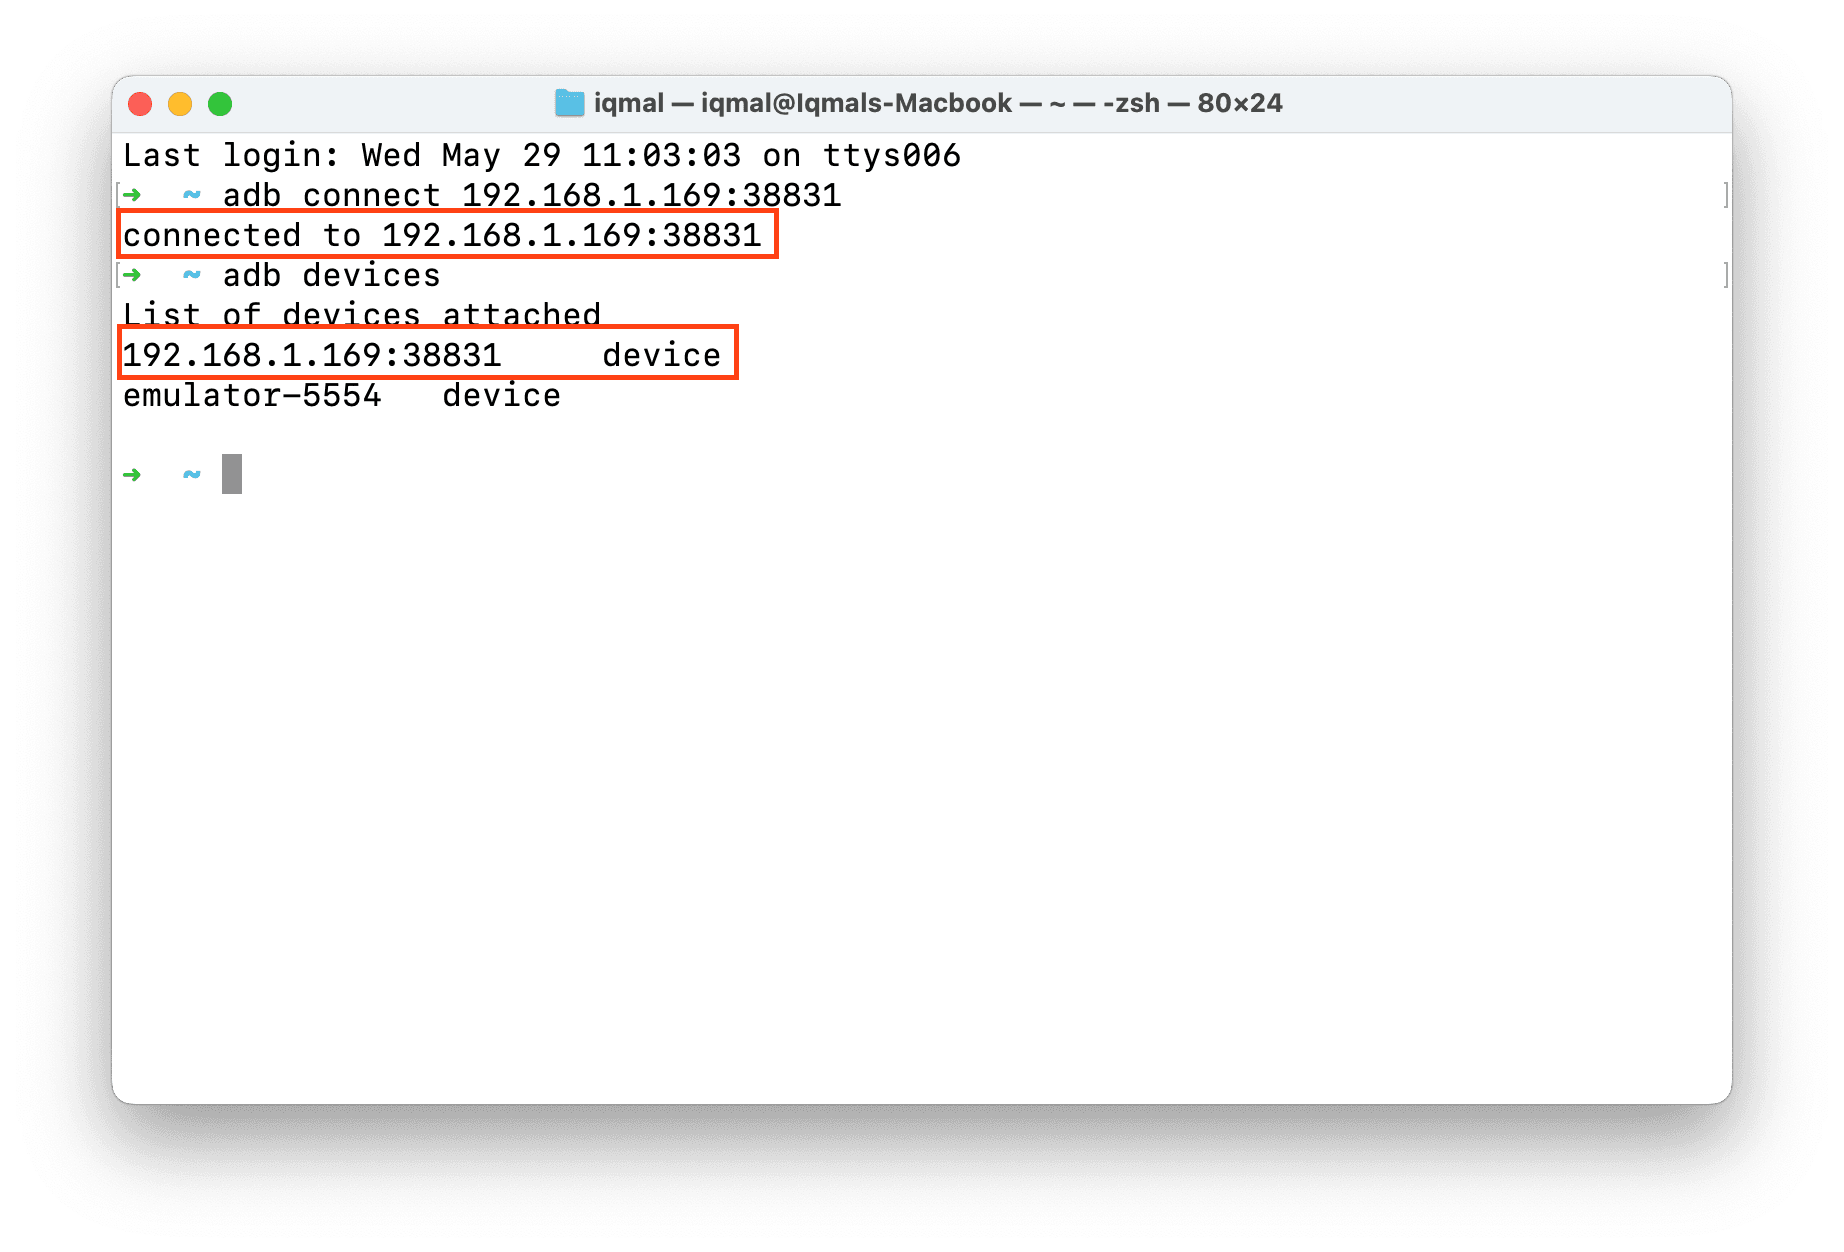
That's it! Now you can debug your app on your Android device.
I only use this feature sparingly because sometimes it disconnects unexpectedly, and the transfer speed may be limited as well. Most of the time, I use cables because they feel more reliable and can charge the device at the same time. Use whichever method works best for you. Happy debugging!