- Published on
- Published on
- (Last revised
Get started on IoT with Node-RED & ESP32
- Authors

- Name
- Muhammad Fareez Iqmal
- @iqfareez
The Internet of Things (IoT) is revolutionizing the way we interact with devices and the world around us. With the rise of connected devices, it has never been easier to control and monitor your devices remotely. In this tutorial, I will show you how to get started on IoT with Node-RED, ESP32 and MQTT. I will take you step-by-step through the process of setting up your ESP32, connecting it to the internet, and using Node-RED to control and monitor your devices. This tutorial is perfect for anyone who is new to IoT and wants to learn how to create interactive projects using Node-RED, ESP32, and MQTT.
In this tutorial, we are going to make LED blink on ESP32 and sync the status to the Node-RED dashboard. Let's get onboard!
Prerequisites
Before we begin, please prepare your machine with the following tools:
- nvm and nodejs (16.x is recommended, but I'm using 18.x)
- Arduino IDE (That are ready for ESP32 boards development)
- ESP32 (ESP8266 theoretically can also work, some minor changes to the code may be needed)
Installing Node-RED
There are many methods to run a Node-RED instance (eg, in the cloud, locally, or on a Raspberry Pi). I'm going to choose the local method.
note
I'm using Windows OS. So, if you're using other than Windows, some commands/software might work a bit differently. Please refer to the official documentation.
Fire up your Terminal and run the command below to download and install Node-RED.
npm install -g --unsafe-perm node-red
Once Node-RED is successfully installed, you can start the instance by running:
node-red
It will take a few seconds to start.
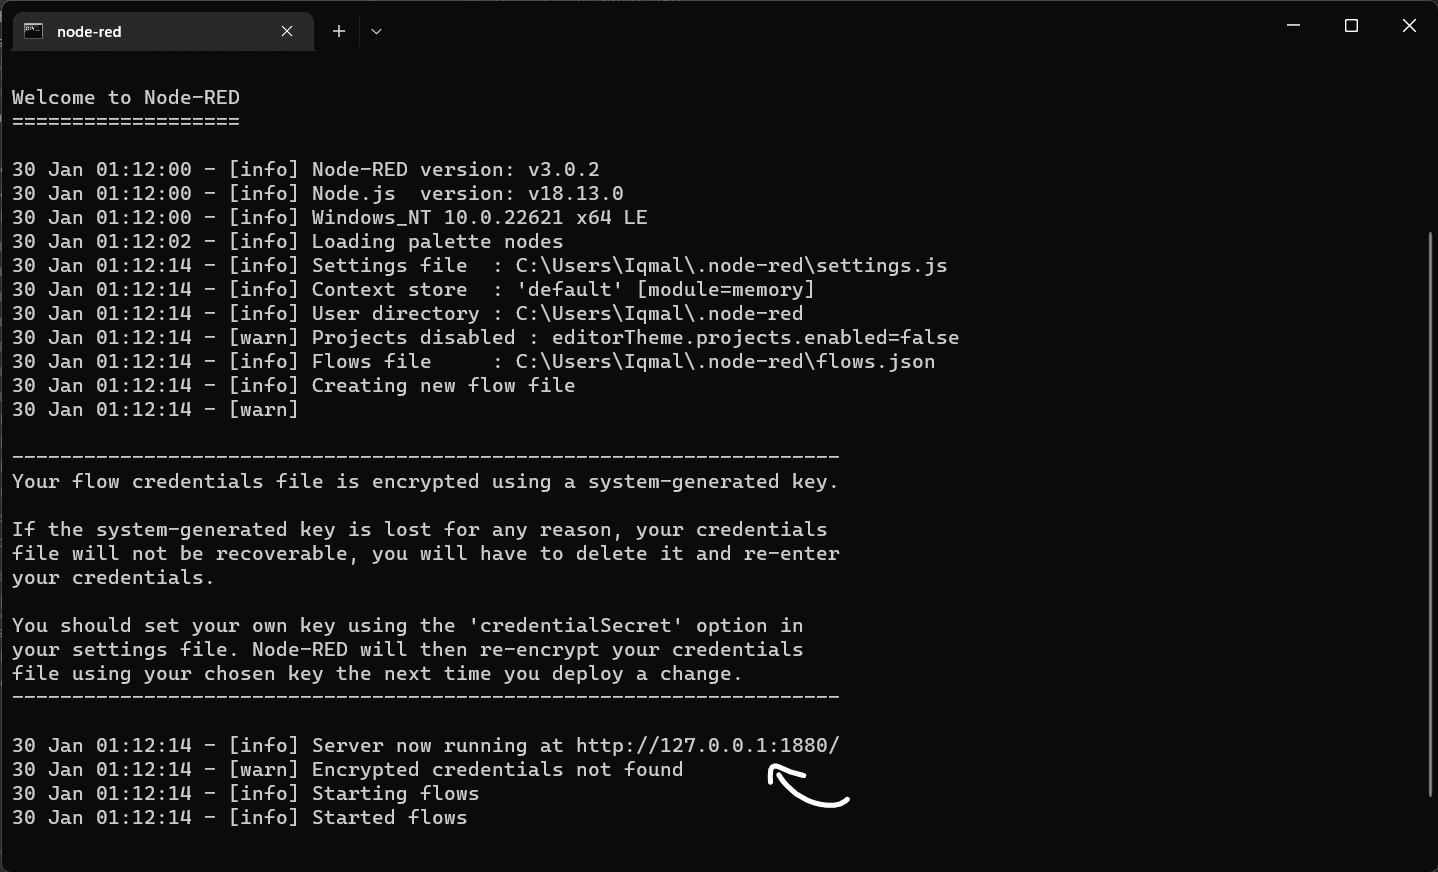
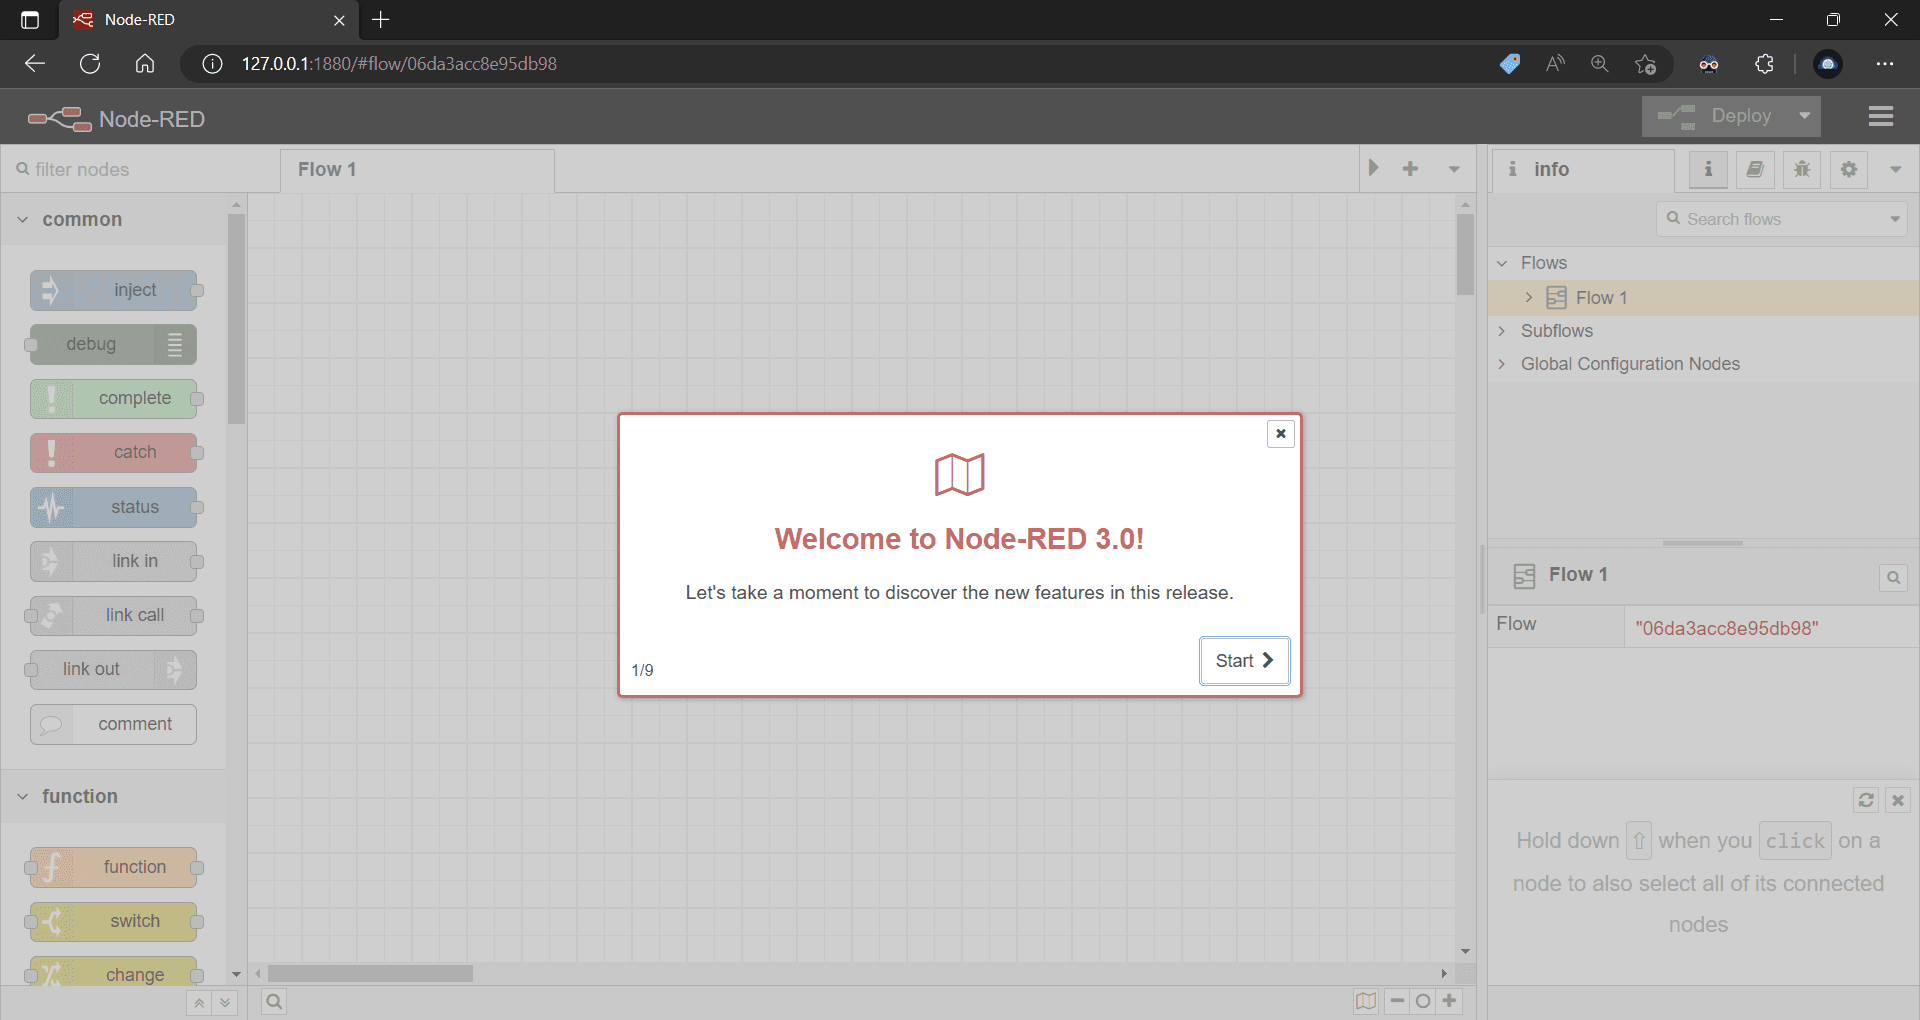
Once started. Open the instance URL (eg: http://127.0.0.1:1880/) in the browser. You should see something like this:
warning
Designing flow
A flow is represented as a tab within the editor workspace and is the main way to organize nodes.
When you first start, it will start with Flow 1. We will define the nodes, workflow, etc. for a program to run in this flow.
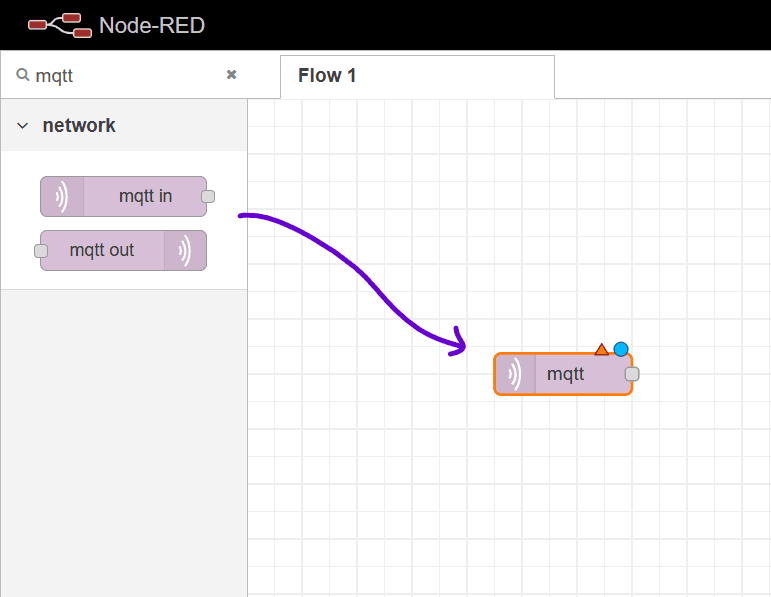
You can drag and drop nodes from the left bar to the canvas. We'll begin by adding MQTT nodes to the flow
Adding MQTT
learn
MQTT (Message Queuing Telemetry Transport) is a lightweight, publish-subscribe network protocol used in IoT (Internet of Things) to facilitate communication between devices. It allows devices to send and receive messages through a broker, which acts as a central hub to route messages between devices based on their topics. MQTT is designed to be efficient, reliable, and easy to implement, making it a popular choice for IoT applications that require a low-bandwidth communication protocol.
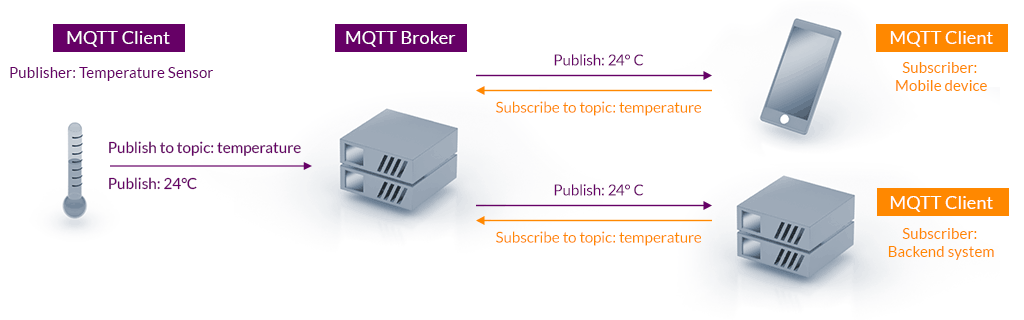 Image credit: https://mqtt.org/
Search for mqtt in the left sidebar. Drag the mqtt in nodes to your flow.
Double-click the added nodes to edit their configuration.
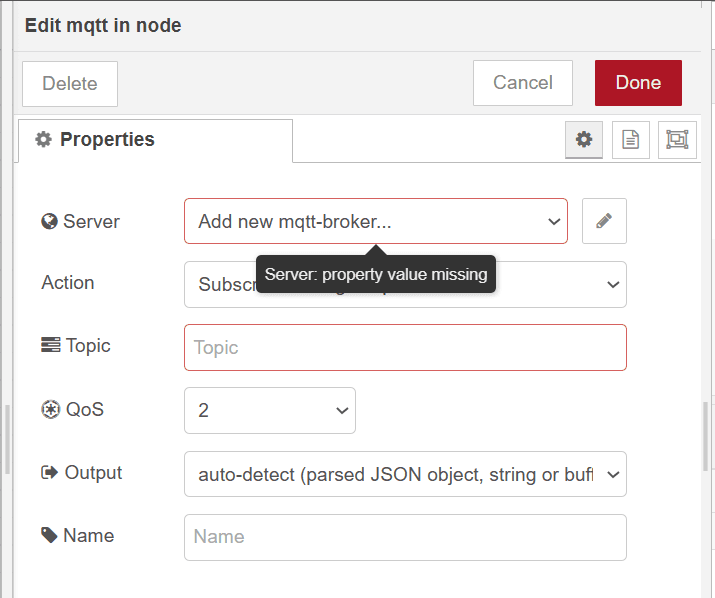
To use MQTT, we need a broker and topic.
If you're unfamiliar, a broker is a server that facilitates communication between IoT devices. It receives published messages from devices, and then routes those messages to other devices that have subscribed to the same topic. The topic is a string identifier used to categorize and filter messages so that they can be efficiently routed to the correct devices.
We can set up the broker on our own, but it is much easier to use the public and free broker provided by some companies or organizations. In this article, I'm going to use HiveMq's public MQTT broker.
On the Server field, click the pencil icon to add a new MQTT broker. Add broker.hivemq.com to the URL field. Leave the other fields as they are.
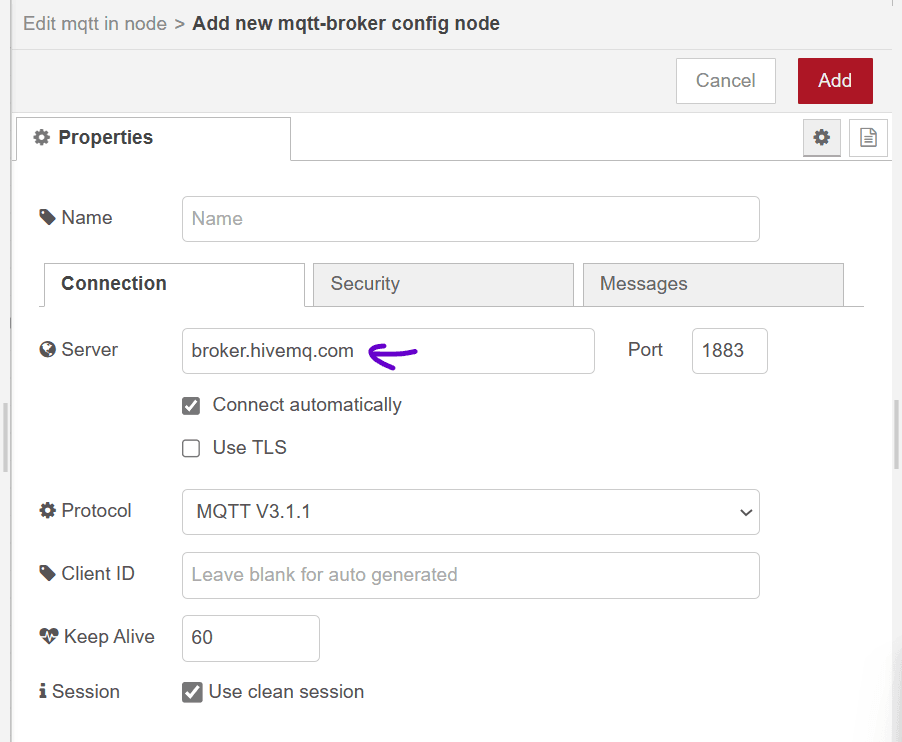
Click the Add button.
Now, for the topic, we can give any String value. Let's put mynode/led1. For QoS, we will leave it as default.
learn
QoS or (Quality of Service) is a property of MQTT that determines the reliability and speed of message delivery between devices. If you're interested, you can read details here.
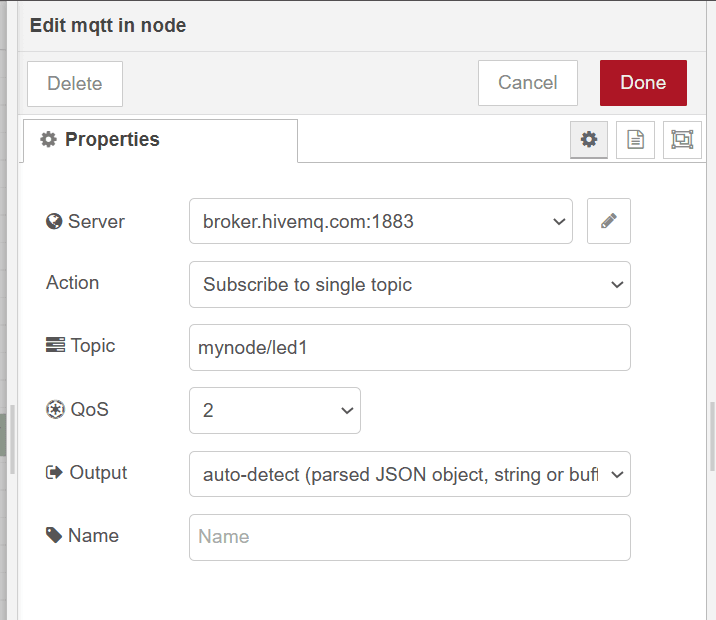
Click Done to finish editing.
Now, we want to show the received message in a UI Dashboard. The Dashboard plugin isn't installed by default so we need to install it first.
Installing Node Dashboard
In the upper right corner of the dashboard, click the hamburger menu > Manage palettes.
Click on the Install tab and search for node-red-dashboard. Install the first top most result you see (Some warning dialog maybe shown, just click Install).
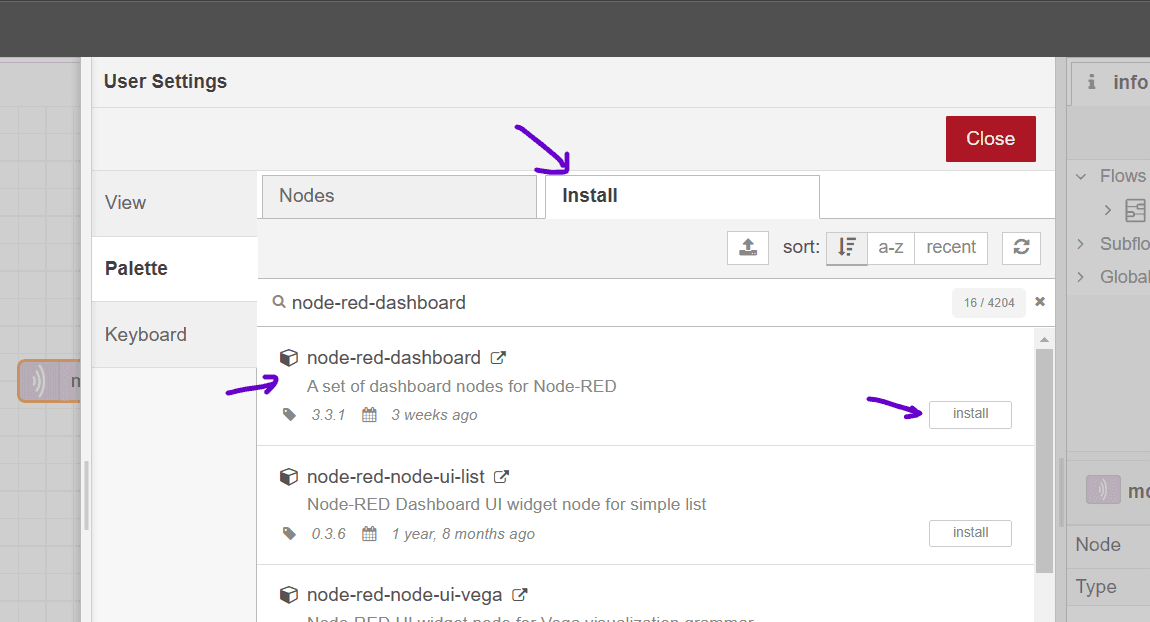
After installation. Close the manage palettes dialog. You can now see the Dashboard nodes from the nodes list.
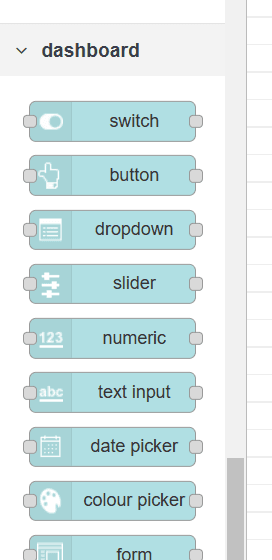
Now, search for Text nodes and add them to the flow. Connect the mqtt node to the text node.

Double-click the Text node to edit its properties. On the Group field, click the pencil icon, then, on the Tab field. click the pencil icon again. Then, click Add
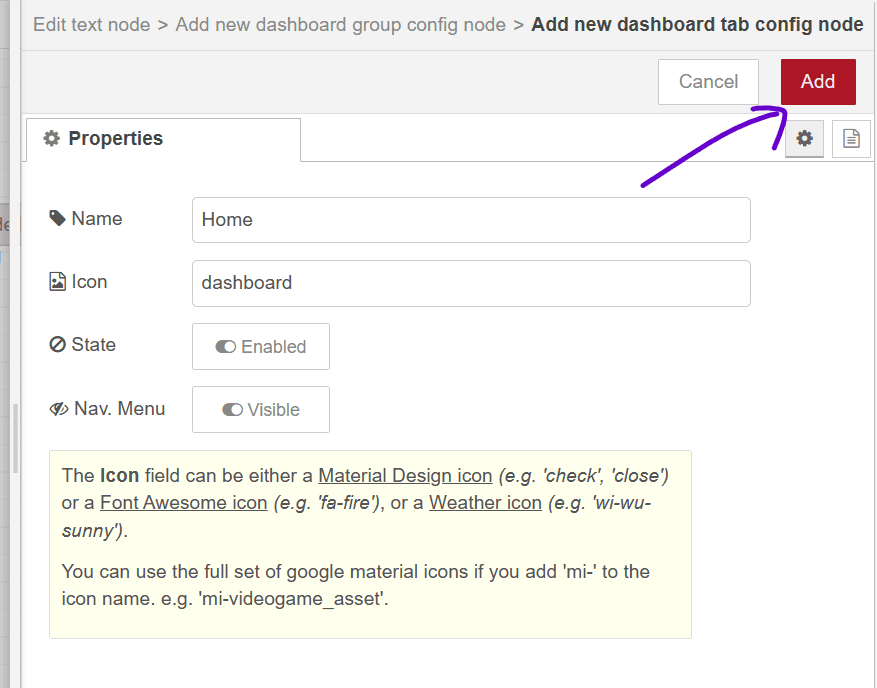
The added 'Home' dashboard will be auto-selected in the Tab field, click on Add to accept.
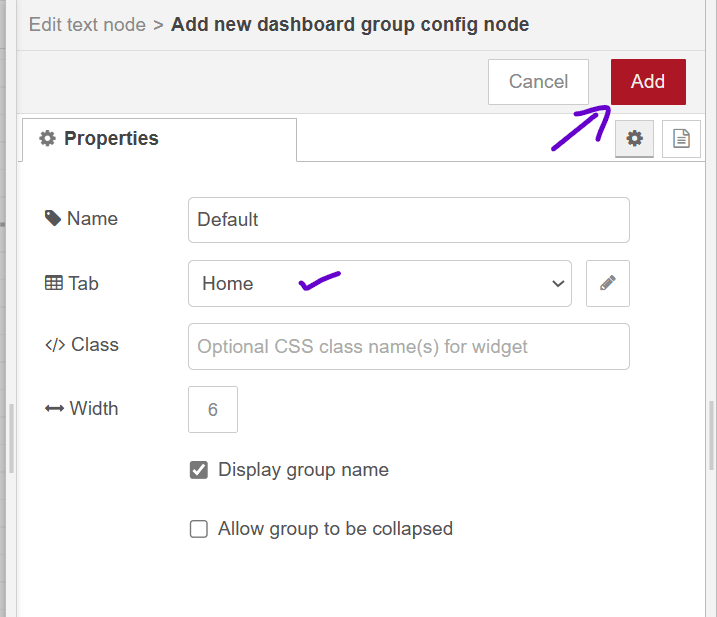
Similarly, in the Group section, the added group will be auto-selected. You can change the label to something meaningful, for example: LED Status. Click on Done to finish editing.

In the upper right corner of the screen, click on the Deploy button to save and deploy your flow.

A message 'Successfully deployed' will be shown.
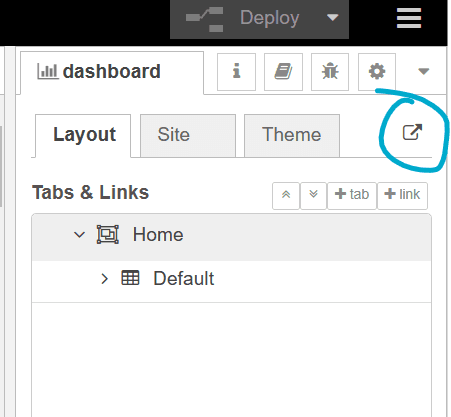
On the left sidebar, click on the little dropdown arrow to expand the selection. Find Dashboard and click it.
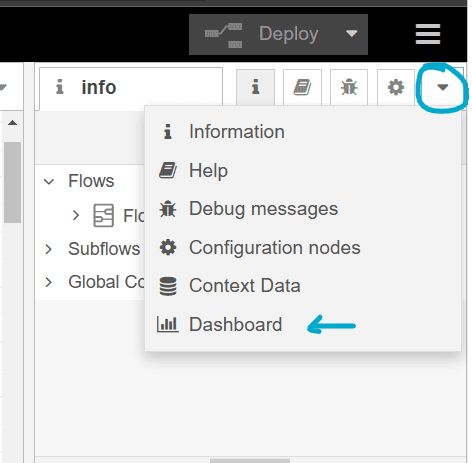
Click on the arrow button to open the dashboard
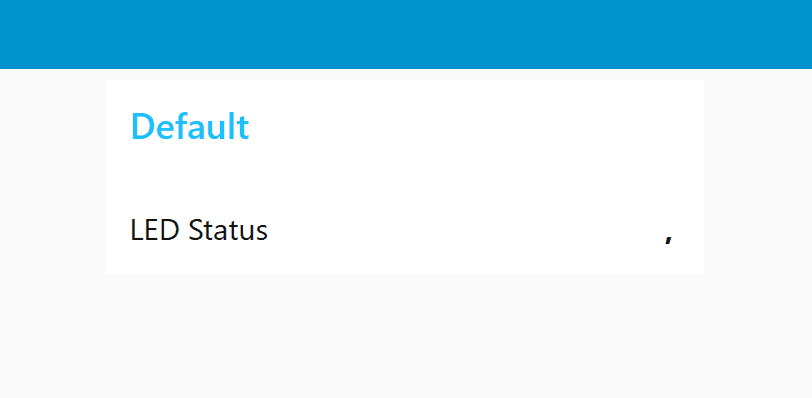
Your dashboard will be opened in the new tab. The LED status text may be empty or showing some other values. This is because we haven't set up our ESP32 to publish messages to this topic yet.
tip
The dashboard is super customizable. For example, you can change the theme (light/dark), icons, fonts, layout etc.
Now to the ESP32
Open Arduino IDE. Make sure your IDE is ready for ESP32 development, i.e. the relevant board manager is already set up. If you haven't already, please follow this tutorial.
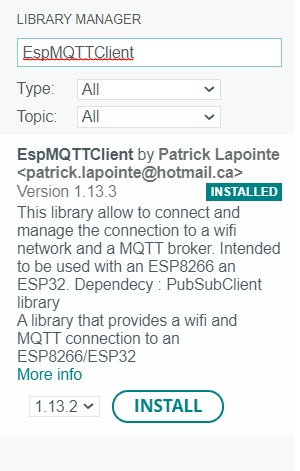
Then, install the following library: EspMQTTClient by Patrick Lapointe.
Then, copy and paste the following code (adapted from the library's example):
#include "EspMQTTClient.h"

#define MYLED 2  // Built-in LED Pin

EspMQTTClient client(
  "iqf11",                     // wifi SSID
  "meow4000",                  // wifi password
  "broker.mqttdashboard.com",  // MQTT Broker server ip
  "",                          // MQTT Username: Can be omitted if not needed
  "",                          // MQTT Password: Can be omitted if not needed
  "espclientID",               // Client name that uniquely identify your device
  1883                         // The MQTT port, default to 1883. this line can be omitted
);

void setup() {
  Serial.begin(115200);

  client.enableDebuggingMessages();  // Enable debugging messages sent to serial output
  pinMode(MYLED, OUTPUT);
}

// This function is called once everything is connected (Wifi and MQTT)
// You can add subscription here
void onConnectionEstablished() {
  Serial.println("Connection established..");

  // you can add topic subscription in this function
}

int led_state = HIGH;

void loop() {
  client.loop();

  delay(2000);

  led_state = !led_state;  // change state
  digitalWrite(MYLED, led_state);
  // Publish message
  client.publish("mynode/led1", String(led_state));
}
Below is the overall working principle of our sketch.
Note on the topic mynode/led1, it must be the same as the topic we set up on the Node-RED above.
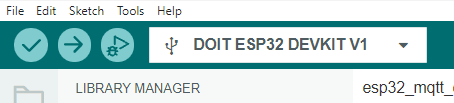
Connect your board to start uploading. I'm using ESP32 DOIT Devkit V1.
Open the Serial Monitor and see if the board has successfully established a connection to the broker and published the message.
WiFi: Connected (226.262000s), ip : 192.168.235.63
MQTT! Trying to publish when disconnected, skipping.
MQTT: Connecting to broker "broker.mqttdashboard.com" with client name "espclientID" and username "" ... (228.262000s) - ok. (229.144000s)
MQTT! Trying to publish when disconnected, skipping.
Connection established..
MQTT << [mynode/led1] 1
MQTT << [mynode/led1] 0
MQTT << [mynode/led1] 1
MQTT << [mynode/led1] 0
...
Demo
Conclusion
Here is the nodered flows JSON file for the above project. You can import it to your Node-RED instance:
https://gist.github.com/iqfareez/80a9c3ae246ffcbcf58dc2ea6c4cb115
You can make the UI more interesting by incorporating LED indicator for example. But, that's it I have time for now.
If you would like to have a cloud Node-RED instance, you can check out my tutorial here. If you run the Node-RED on Raspberry Pi, and would want to the outside world to access it (not LAN), you can explore solutions like ngrok or TailScale.