- Published on
- Published on
- (Last revised
CUDA on Nvidia MX130 GPU
- Authors

- Name
- Muhammad Fareez Iqmal
- @iqfareez
This post was revisited in March 2025 after I clean-installed Windows on my laptop. Some content of this post has been updated to reflect the current behavior of the system.
Welcome to this guide on how to enable CUDA on an Nvidia MX130 GPU for machine vision inference on laptops. CUDA is a parallel computing platform and programming model developed by NVIDIA for general computing on graphical processing units (GPUs).
The Nvidia MX130 is a dedicated GPU that is commonly found in laptops. It is not as powerful as the RTX GPU families, but it can still run some machine vision tasks efficiently. In this guide, we will cover the installation of necessary drivers and software, as well as any configuration required to properly utilize the GPU for these types of computations using Pytorch. Keep in mind that the mileage may vary when using other frameworks.
At the end, I will demo the performance using SuperGlue's demo script.
Checking the GPU you have
Usually, a laptop with an NVIDIA GPU already has NVIDIA drivers preinstalled along with the NVIDIA Control Panel. So, open that to see your GPU version.
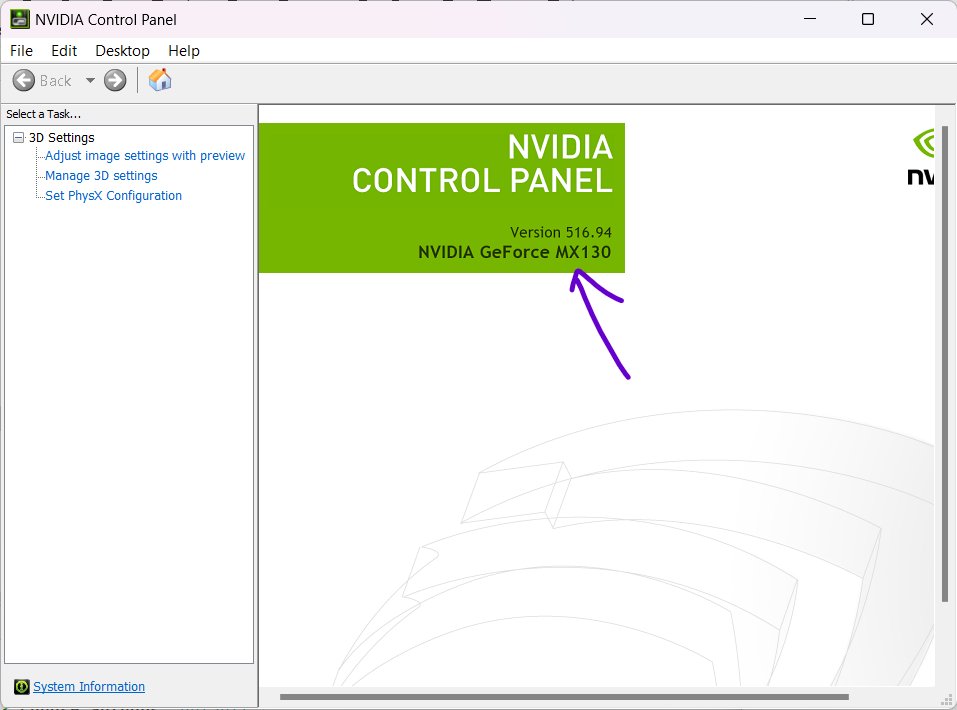
According to the specifications page, the Nvidia MX130 supports CUDA. If you own a different Nvidia GPU, you can still follow this guide, but the results may vary depending on your hardware.
Optionally, you can verify the CUDA support using Python.
from numba import cuda # run pip install numba
cuda.detect()
Output:
Found 1 CUDA devices
id 0    b'NVIDIA GeForce MX130'                 [SUPPORTED (DEPRECATED)]
                      Compute Capability: 5.0
                           PCI Device ID: 0
                              PCI Bus ID: 1
                                    UUID: GPU-7b092133-34da-571d-9506-9de68403ed55
                                Watchdog: Enabled
                            Compute Mode: WDDM
             FP32/FP64 Performance Ratio: 32
Summary:
	1/1 devices are supported

Process finished with exit code 0
Setup Pytorch
First, create a new project folder or open an existing one. I recommend using a virtual environment to manage your packages. Example:
python -m venv venv
source venv/bin/activate
Go to PyTorch's Get Started page. Select the setting accordingly, copy and run the command generated.
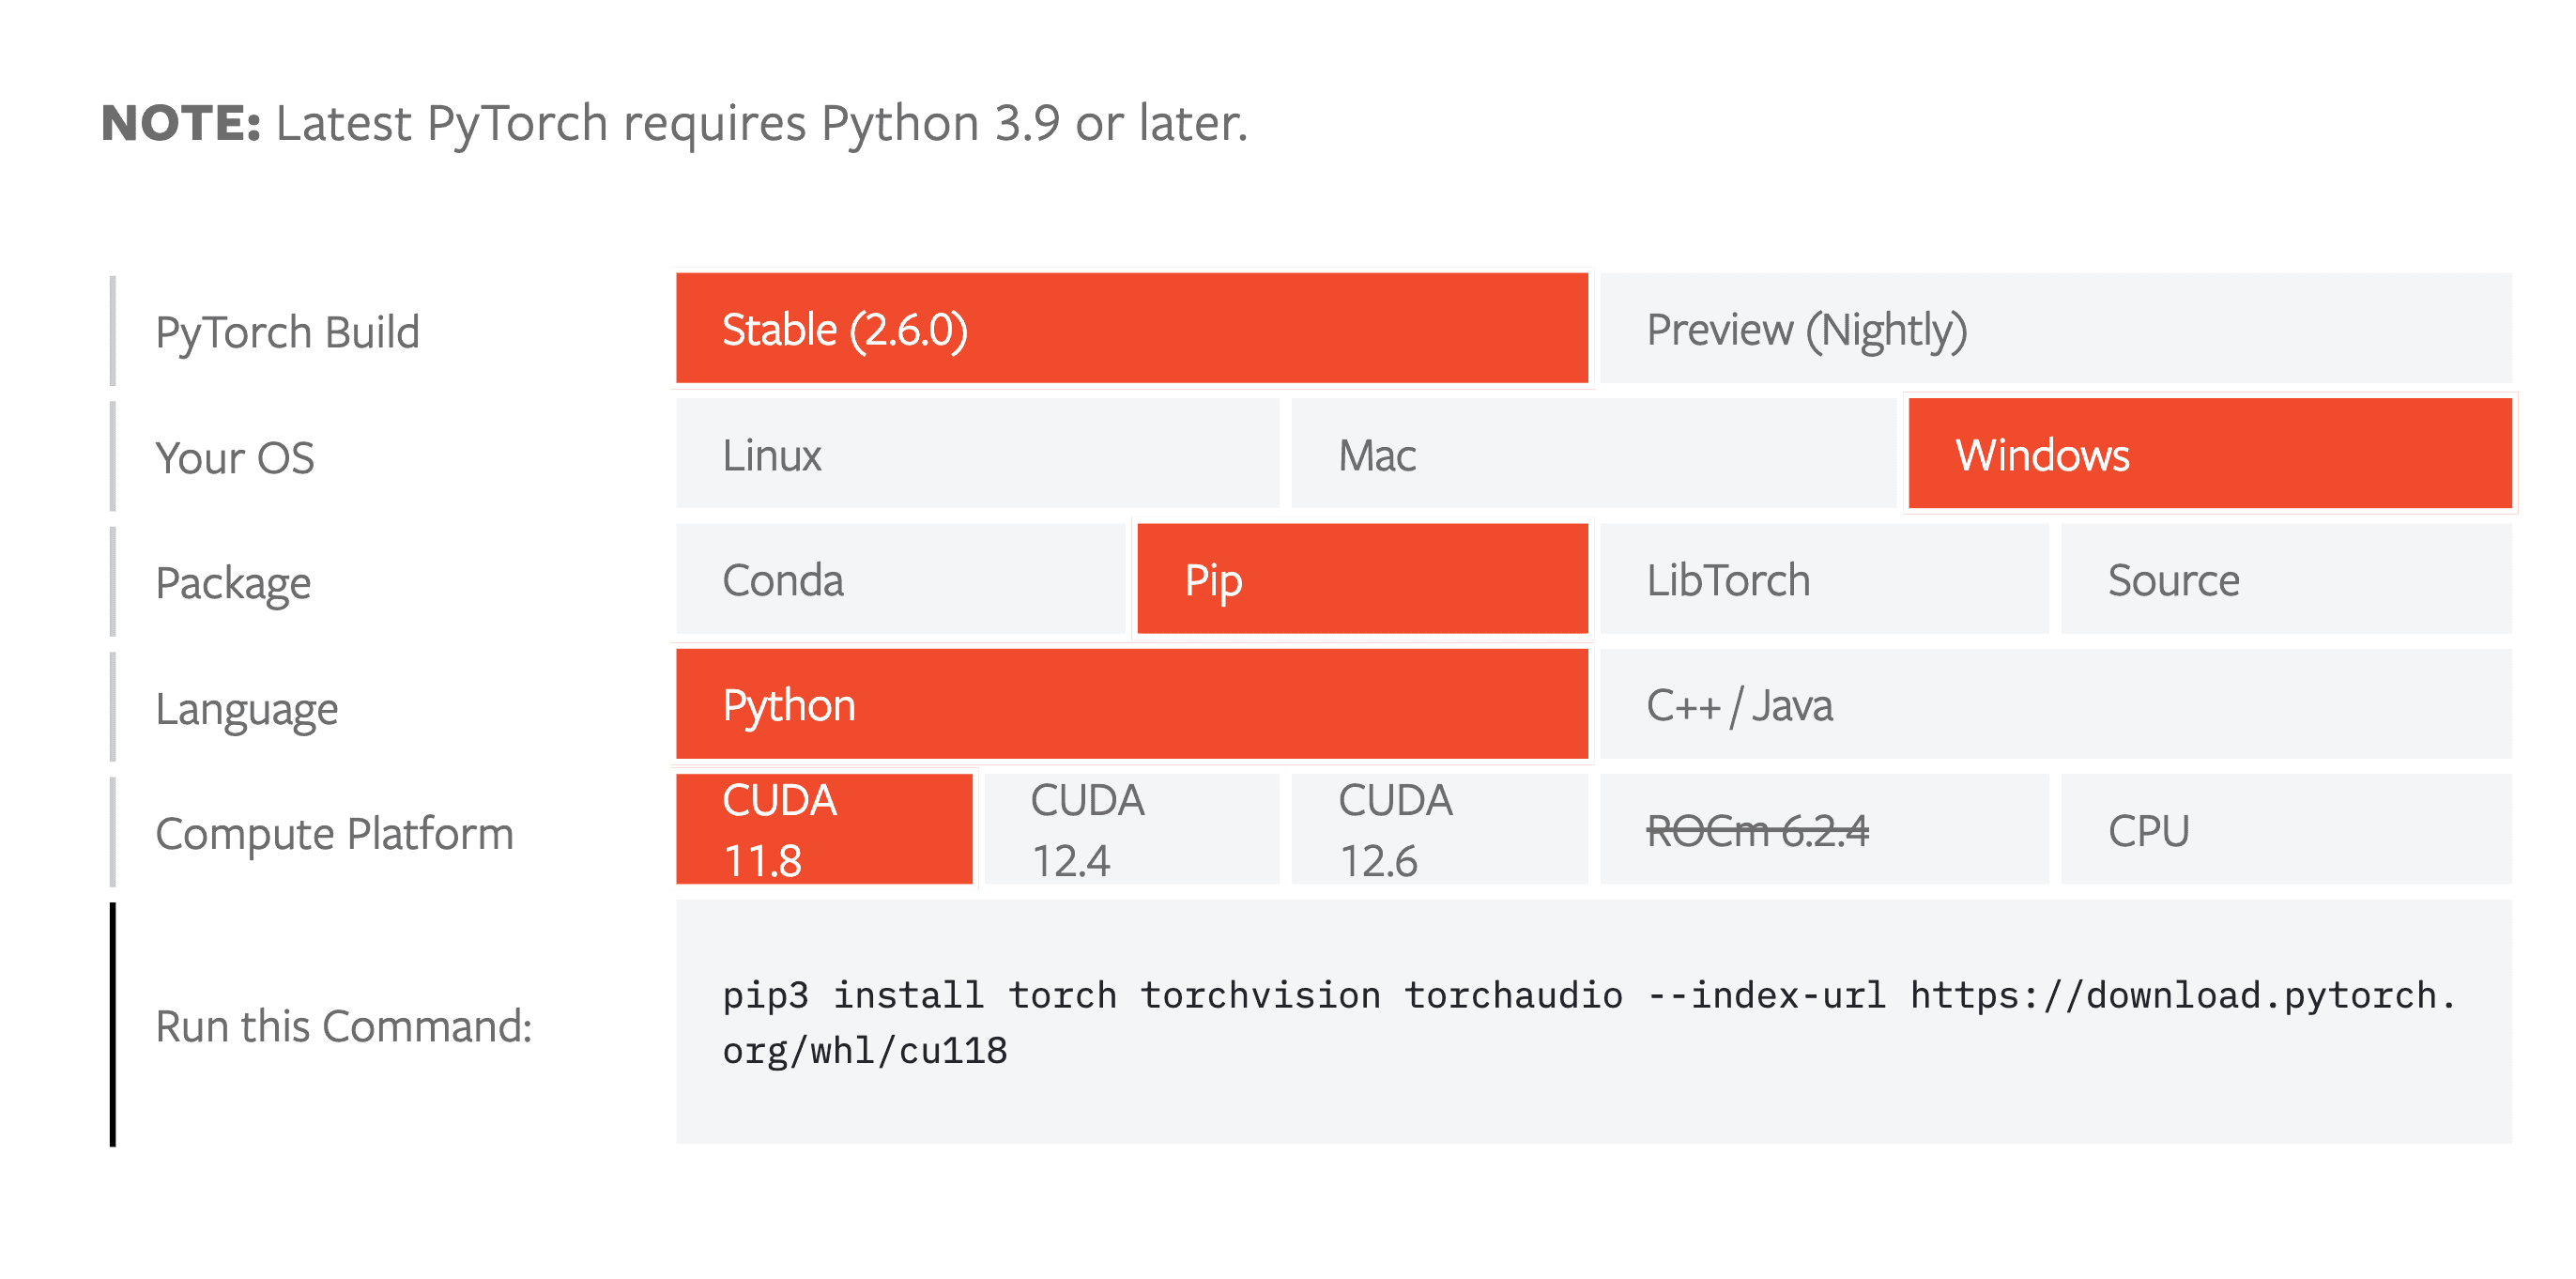
Copy the command it generated and run it in your terminal of your python project.
note
If you have previously install the normal PyTorch (perhaps by running pip install pytorch or pip install -r requirements.txt), you may need to uninstall it first (pip uninstall torch) before running the command above.
Verify CUDA availability
Create a new file (eg: main.py) in the project folder and paste the following code:
import torch as torch

cuda_available = torch.cuda.is_available()
device_name = torch.cuda.get_device_name(0) if cuda_available else "No CUDA device found"
print(f"CUDA Available: {cuda_available}")
print(f"Device Name: {device_name}")
Run the code, you should see the output like this:
CUDA Available: True
Device Name: GeForce MX130
If your output is False, check your PyTorch installation and the CUDA drivers. You might also wanted to install the CUDA toolkit and Visual Studio (optional) as described in the Advanced section.
Demo
I'm using the demo of the machine vision project SuperGlue Inference and Evaluation Demo Script without CUDA (using CPU) and with CUDA running on MX130.
warning
Without CUDA
Running inference on device "cpu"
Average FPS = 0.4
With CUDA
Running inference on device "cuda"
Average FPS = 1.0
The performance with CUDA has improved, but it's important to note that it may not achieve significantly higher FPS due to the GPU's limitations in handling intensive calculations.
Advanced
Update 2025: I found out the steps of installing Visual Studio & CUDA toolkit are optional. Therefore, the section to install Visual Studio and CUDA toolkit was moved here for reference. Also visit official installation guide here.
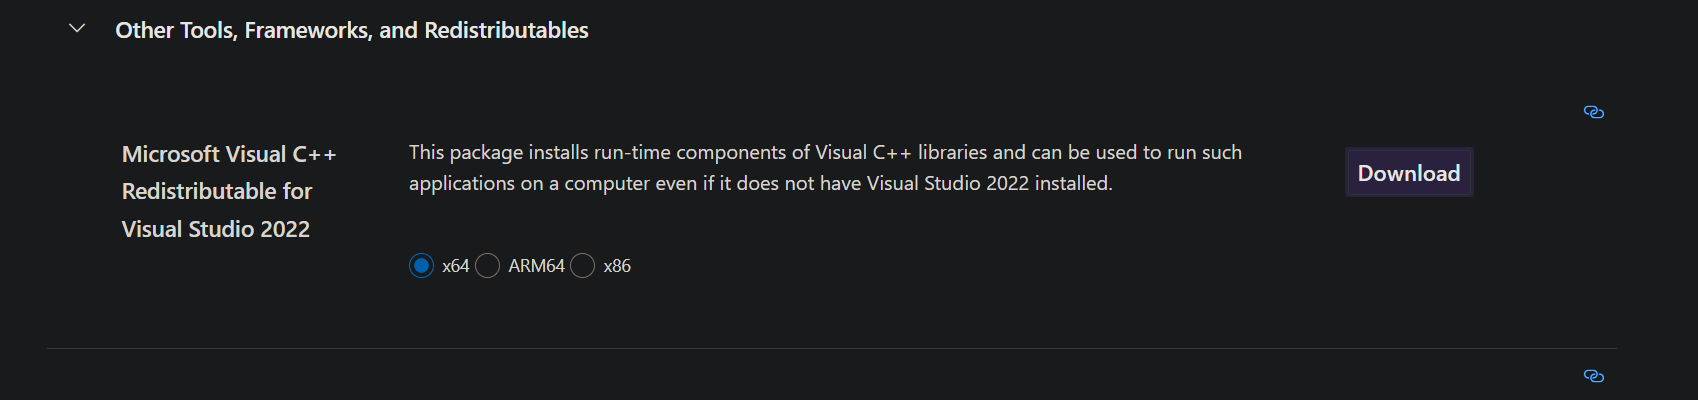
Install Visual Studio
You may need to install Visual Studio 2022 to correctly install CUDA.
warning
But for my case, I don't install the full VS due to storage constraints, but I have the VS Build Tools already installed with C++ development. I just downloaded Microsoft Visual C++ Redistributable for Visual Studio 2022 just in case. Visit Visual Studio download page for more info.
Setup CUDA
Download supported CUDA version
The latest CUDA version is 12.0. However (at the time of writing), PyTorch seems doesn't have support for it yet. So, you'll need an older version of CUDA (11.6 or 11.7). Go to Cuda Toolkit Archives to download version 11.7.1.
You may select Installer Type to local, and proceed with downloading.
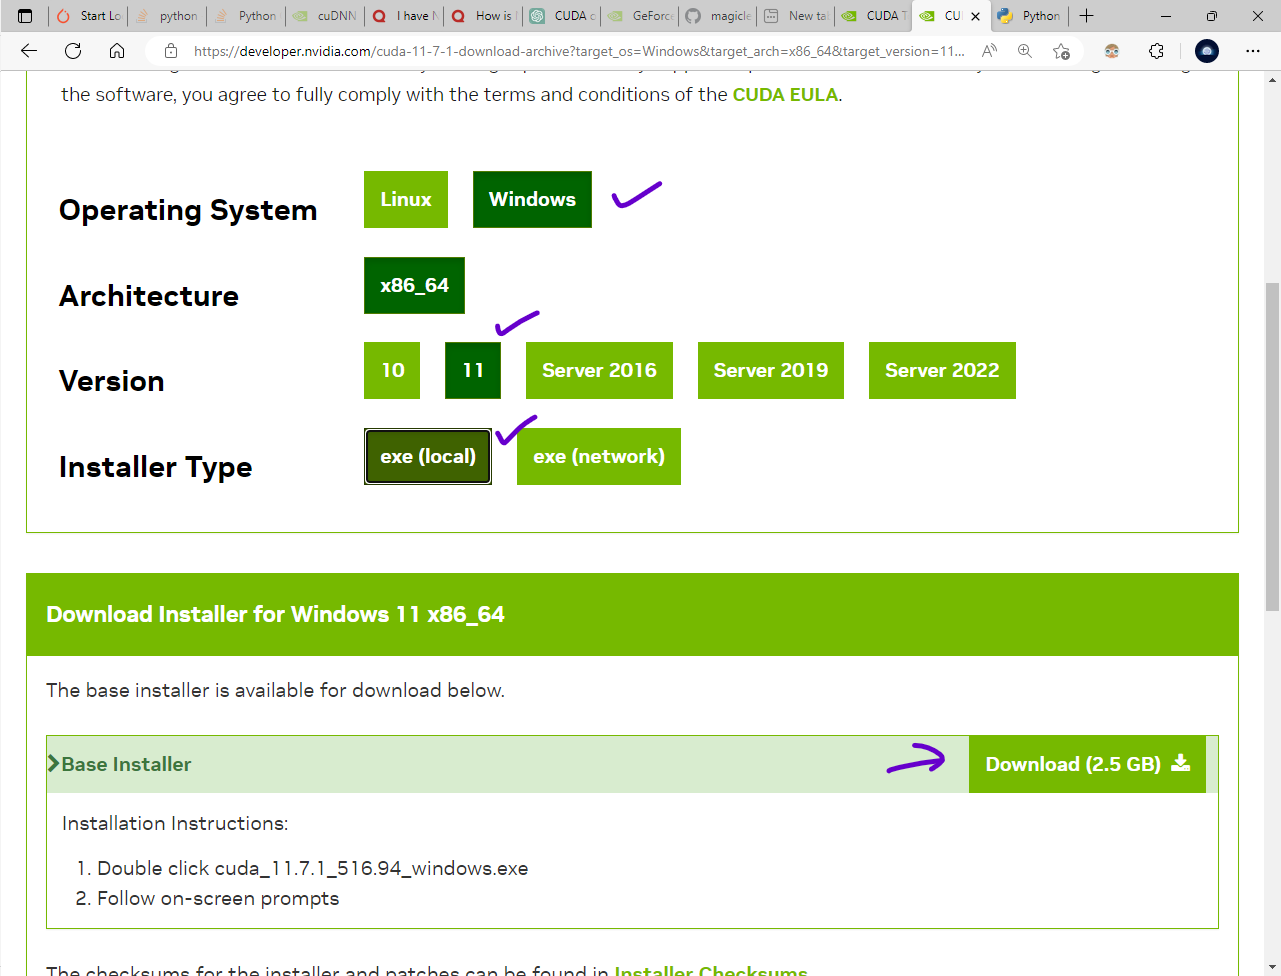
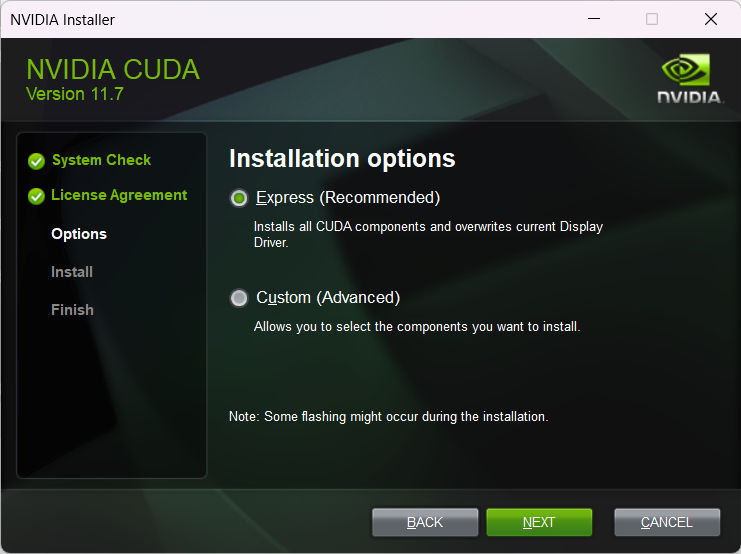
Install CUDA
Once the file is downloaded, double-click it to begin the installation.
Click the Express Installation. It will install the CUDA toolkit, some other things, and your display driver.
When the installation finishes. I got notified about trouble installing Nsight.
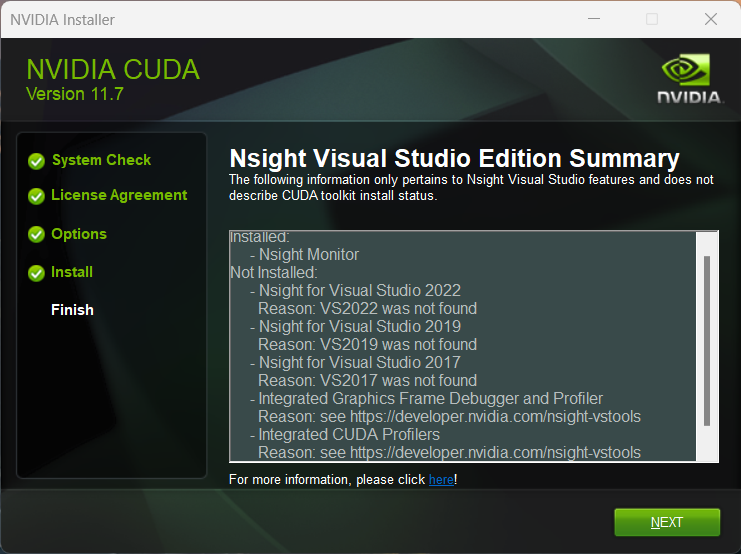
As the description said, it may not be related to CUDA so just hit Next and complete the installation.
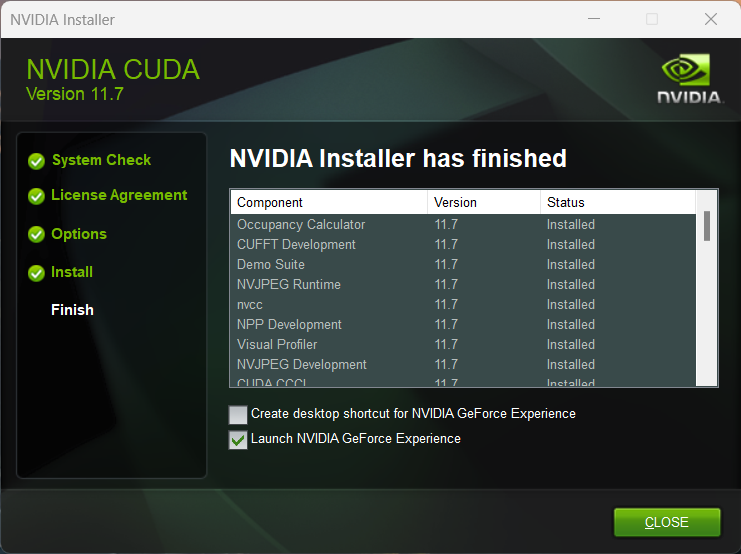
Verify the installation
Open Command Prompt or Powershell, and run the following command:
nvidia-smi
Then, you can try again verify CUDA availability again using Python.